TrustedHRM – Your Partner in Workforce Excellence
Welcome to TrustedHRM! Your all-in-one solution for effortless workforce management. TrustedHRM simplifies scheduling, shift planning, and timesheet tracking across teams and time zones. Manage multi-tier leave requests, assets, and employee credentials — all from a single platform. With performance insights and timeline tracking, TrustedHRM keeps your workforce organized, efficient, and always on schedule.
Server Requirements
Ensure your server meets the following requirements before proceeding with the installation.
Minimum Server Requirements
- PHP
>= 8.2 (8.3+ preferred) - MySQL
>= 8.0or MariaDB>= 10.10 - Apache
>= 2.4or Nginx>= 1.15 (Recommended: 1.20+ (LTS)) - Memory Limit
>= 1 GB (Recommended: 2 GB+) - Max Execution Time
>= 300seconds - Disk Space
>= 10 GB (Recommended: 20 GB+)
Required PHP Extensions
- OpenSSL PHP Extension
- PDO PHP Extension
- Mbstring PHP Extension
- Tokenizer PHP Extension
- cURL Extension
- JSON Extension
- XML PHP Extension
- BCMath PHP Extension
- Ctype PHP Extension
- Fileinfo PHP Extension
- DOM PHP Extension
- GD PHP Extension (or Imagick)
- ZIP PHP Extension
- Exif PHP Extension
- mysqli PHP Extension
- pdo_mysql (for MySQL/MariaDB)
Required PHP Settings
allow_url_fopen = On
file_uploads = On
max_file_uploads = 20
upload_max_filesize = 32M
post_max_size = 32M
max_input_vars = 3000
max_execution_time = 300
memory_limit = 200M
Database Requirements
- MySQL 8+ or MariaDB 10.10+
- InnoDB storage engine support
- UTF8MB4 character set support
- Database user with full privileges
Web Server Configuration
- URL Rewrite Module enabled
- HTTPS support (recommended)
- Gzip compression enabled (recommended)
- Security headers configured (recommended)
File Permissions
Please ensure the following file and folder permissions are set correctly for the application to function properly. Incorrect permissions may cause installation or runtime errors.
Required Writable Permissions
(777)
/lang— Language files
Required Writable Permissions
(775) [If you face permission errors try 777]
/storage— Application logs, cache, and temporary files/storage/app— Application file storage/storage/framework— Framework cache and session files/storage/logs— Application log files/bootstrap/cache— Bootstrap cache files/vendor— Vendor files
Required File Permissions
(664) [If you face permission errors try 666]
.env— Environment configuration filemodules_statuses.json— Modules configuration file
Common Issues and Solutions
If you see this error after copying and extracting the files on your server (common on VPS), you may need to manually set the permissions first. On a Linux VPS, run the following commands in the project directory terminal:
Command
sudo chmod -R 777 bootstrap/cache
sudo chmod -R 777 storage
sudo chmod -R 777 lang
sudo chmod -R 777 vendor
sudo chmod -R 666 modules_statuses.json
sudo chmod -R 666 .env
Create Database
Before installing TrustedHRM, you need to create a MySQL database and user. This section provides comprehensive instructions for different methods.
Creating DB in cPanel
Step 1: Create Database
- Login to your cPanel dashboard
- Navigate to Manage My Databases section
- Under Create New Database, enter
database name (e.g.,
yourdb_your_db_name) - Click Create Database
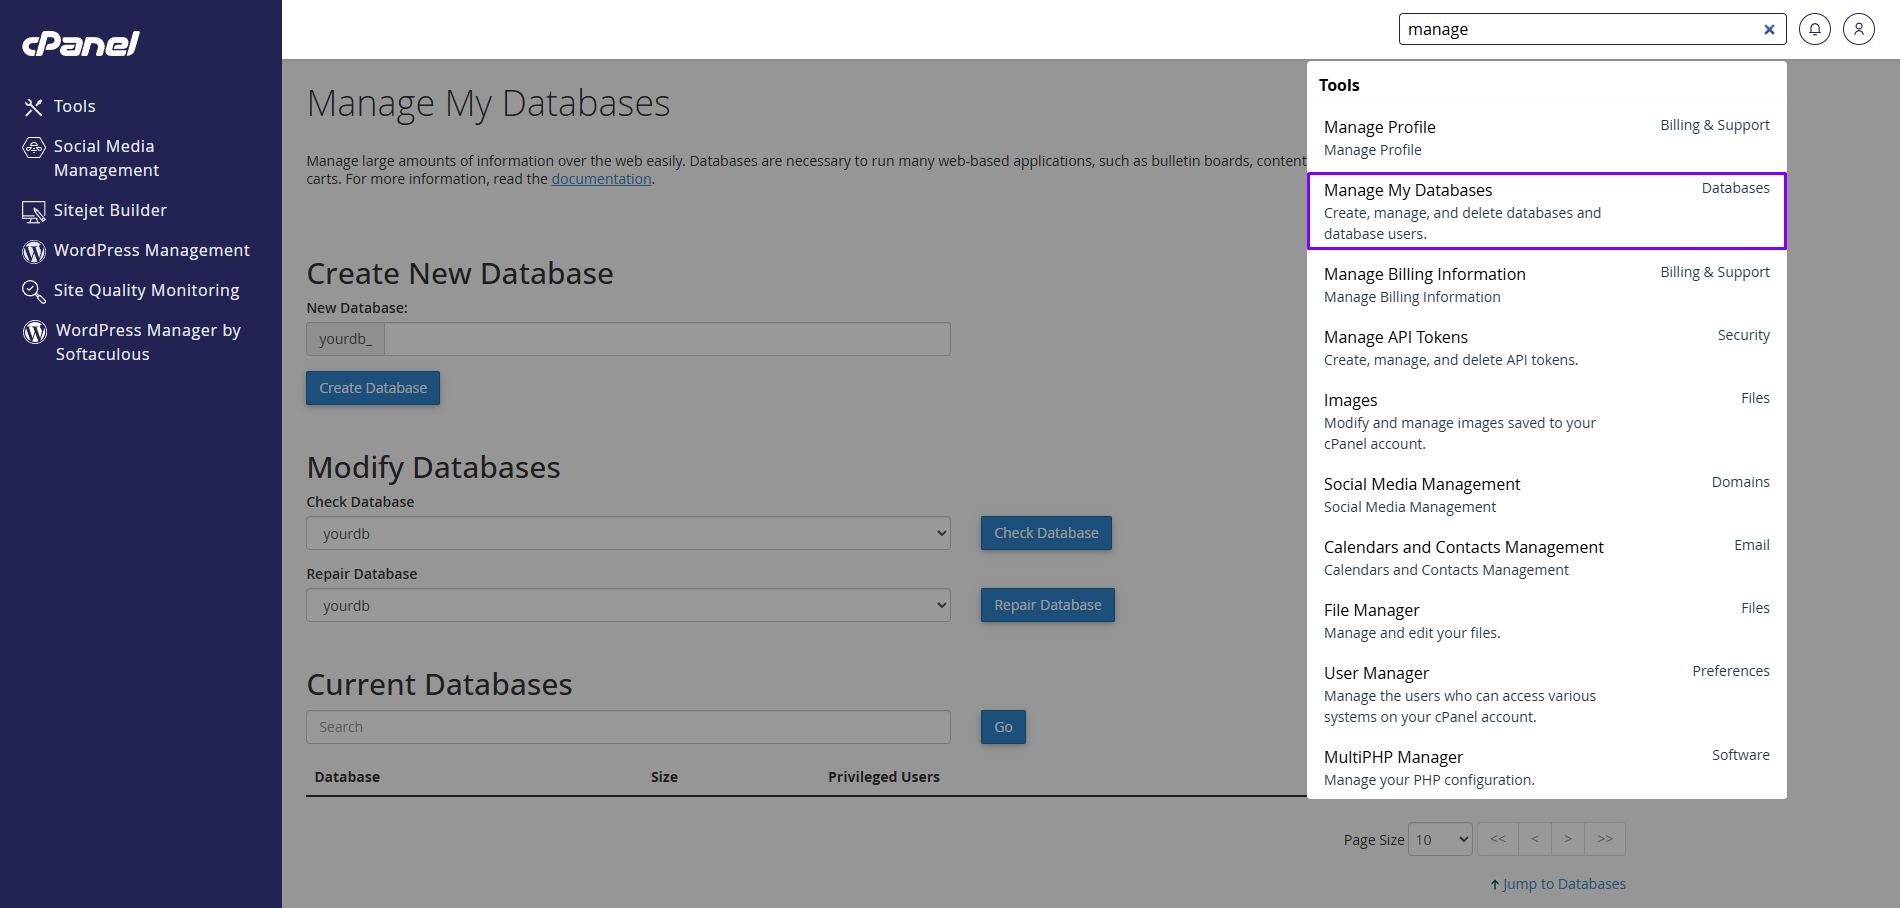
Goto the Manage My Databases from cPanel

Create New Database
Step 2: Create Database User
- Scroll down to MySQL Users section
- Enter username (e.g.,
yourdb_your_db_user_name) - Enter a strong password (avoid
#character) - Click Create User
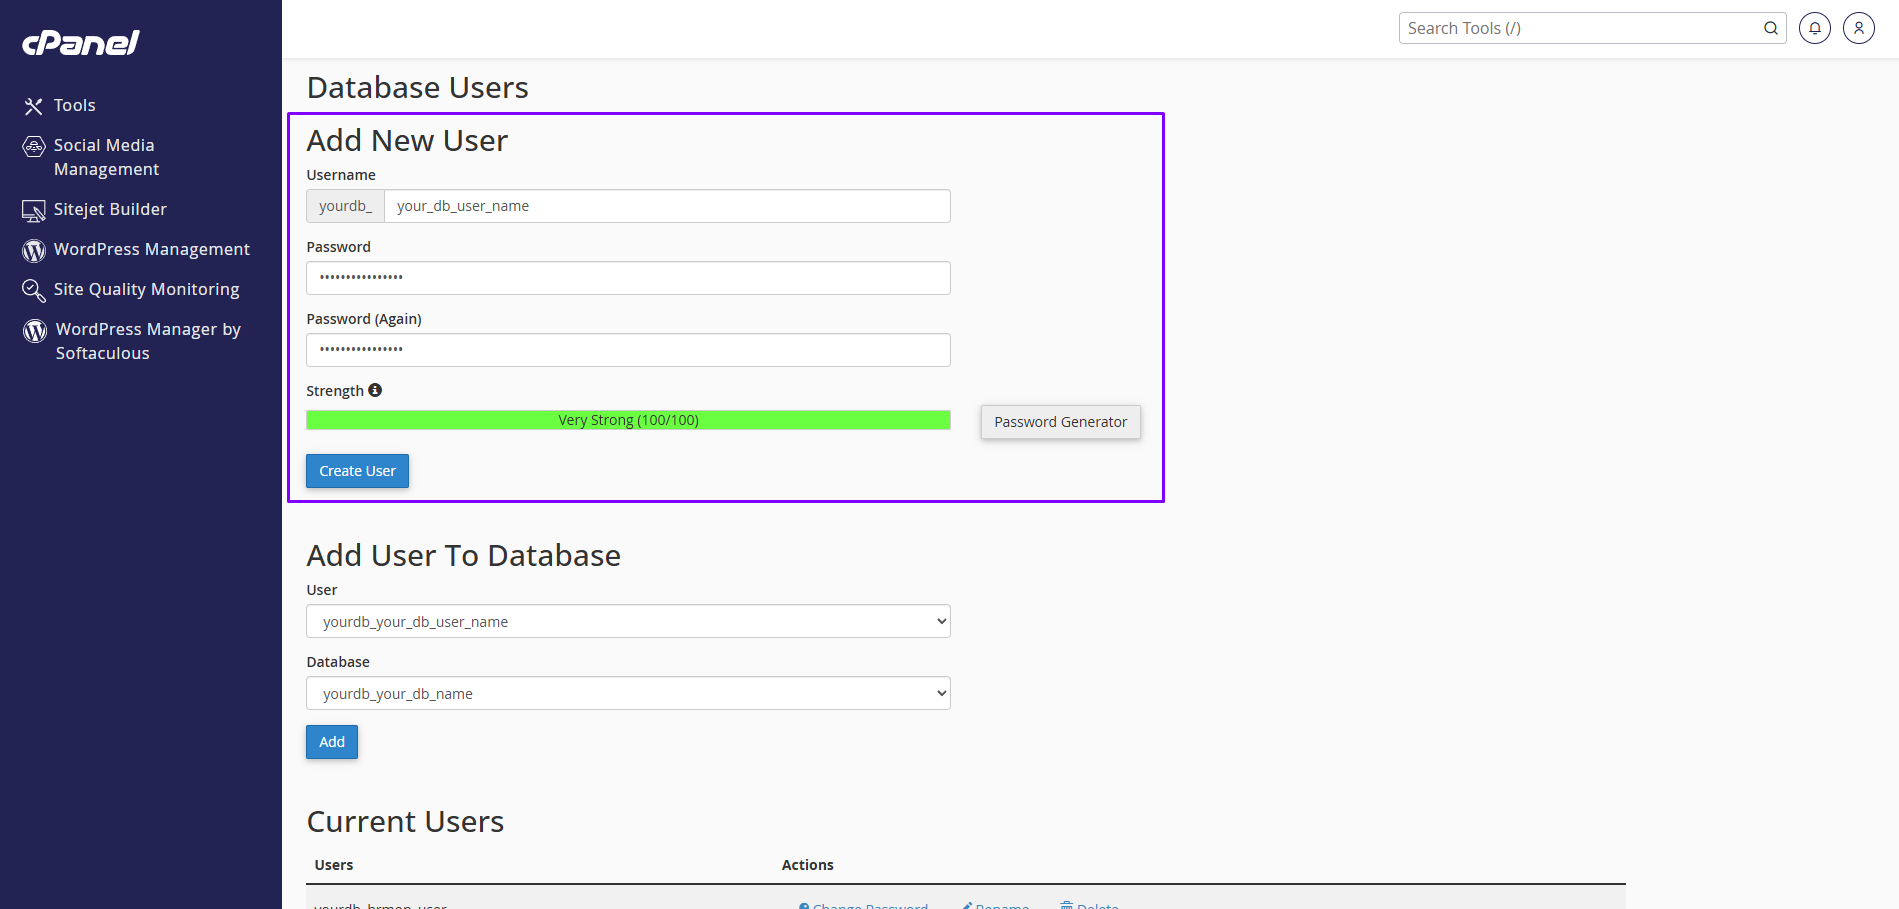
Add New User
Remember
Remember Database Name, User Name, and Password for future tasks
Important
Do not use a password that
contains
a # (hash) character as it will
be
treated as a comment in configuration
files.
Security Best Practices
- Use strong passwords with a mix of letters, numbers, and symbols
- Avoid common passwords or dictionary words
- Don't use the root MySQL user for application connections
- Regularly backup your database
- Keep your MySQL server updated
Step 3: Add User to Database
- In Add User to Database section
- Select the user you created
- Select the database you created
- Click Add
- Check ALL PRIVILEGES and click Make Changes

Add User To Database
Common Issues and Solutions
Universal / Other Servers
- Open phpMyAdmin from your hosting panel or localhost stack (XAMPP/WAMP/Laragon).
- Go to Databases → enter a name → click Create.
- Optionally create a dedicated user under Users and set a strong password.
- Grant ALL PRIVILEGES on the new database to that user.
- Save these values and update them in your
.envfile.
- Open the hosting control panel and go to MySQL Databases.
- Create a new database (note the exact name).
- Create a database user with a strong password.
- Assign the user to the database with ALL PRIVILEGES.
- Update your
.envwith DB name, user, and password.
Connect via SSH and run the following in the MySQL shell:
CREATE DATABASE `yourdb` DEFAULT CHARACTER SET utf8mb4 COLLATE utf8mb4_unicode_ci;
CREATE USER 'youruser'@'%' IDENTIFIED BY 'strong_password';
GRANT ALL PRIVILEGES ON `yourdb`.* TO 'youruser'@'%';
FLUSH PRIVILEGES;
Note: Use 'localhost' instead of
'%' if connecting locally only. Replace names/passwords
accordingly and update your .env.
- Create a managed MySQL instance (engine version per requirements).
- Allow application server IP in inbound rules/security group.
- Create a database within the instance and a dedicated user.
- Collect host, port, db name, user, and password; update
.env. - Test connectivity with a MySQL client before running migrations.
Installation
Prerequisites Notice
Please ensure that all prerequisites are completed before starting the installation. This includes verifying the Server Requirements, File Permissions, and Database Creation. Make sure your database credentials are ready in advance.
Note: The detailed installation guideline is provided in the installation file.
Run Background Jobs
TrustedHRM uses Laravel's queue worker and scheduler to process tasks like notifications, promotion, resignation, termination, etc. jobs. Make sure background jobs are running in your environment.
Queues: Start a Worker
Use one of the following options to run the queue worker continuously.
Option A — Terminal (Linux/macOS)
php artisan queue:workRecommended to run under a process manager (Supervisor/systemd) so it restarts automatically.
Supervisor (Linux)
# /etc/supervisor/conf.d/trustedhrm-queue.conf
[program:trustedhrm-queue]
process_name=%(program_name)s_%(process_num)02d
command=php /path/to/your/project/artisan queue:work
autostart=true
autorestart=true
user=www-data
numprocs=1
redirect_stderr=true
stdout_logfile=/var/log/supervisor/trustedhrm-queue.log
sudo supervisorctl reread
sudo supervisorctl update
sudo supervisorctl start trustedhrm-queue:*Option B — Windows (Task Scheduler)
- Open Task Scheduler → Create Task
- Action: Start a Program
- Program/script:
php - Add arguments:
artisan queue:work - Start in:
C:\\path\\to\\your\\project - Trigger: At startup or on logon; set to run whether user is logged on or not
Option C — Shared Hosting (cPanel)
Create a Cron Job with the following command (runs the worker in the background):
cd /home/USERNAME/public_html && php artisan queue:work > /dev/null 2>&1 &Note: Replace /home/USERNAME/public_html with your project path.
Scheduler: Run Cron
Laravel's scheduler should be triggered every minute to run due tasks (emails, cleanups, reminders, etc.).
Linux Cron
* * * * * php /path/to/your/project/artisan schedule:run > /dev/null 2>&1cPanel Cron
- cPanel → Cron Jobs → Add New Cron Job
- Common Settings: Once Per Minute
- Command:
php /home/USERNAME/public_html/artisan schedule:run > /dev/null 2>&1Troubleshooting
- Ensure
php artisan queue:workis running - Check
QUEUE_CONNECTIONin.env(e.g.,database,redis) - Review logs:
storage/logs/laravel.log - Verify Supervisor/Task Scheduler is active
- Confirm a system cron is running every minute
- Run manually to test:
php artisan schedule:run - Check server time/timezone aligns with app config
Recommendation
Use Supervisor (Linux) or a reliable service manager so queue workers auto-restart and survive deploys. Always enable the scheduler cron every minute.
Login to Dashboard
To help you get started with TrustedHRM immediately, we have pre-configured three demo users with specific roles. You can use these accounts to explore the system's features and functionalities right after installation. Goto your domain URL and login.
Default Login Credentials
| No | Name | Password | Role | |
|---|---|---|---|---|
| 1 | Super Admin |
12345678
|
Admin | |
| 2 | HR |
12345678
|
HR Manager | |
| 3 | Staff |
12345678
|
Staff |
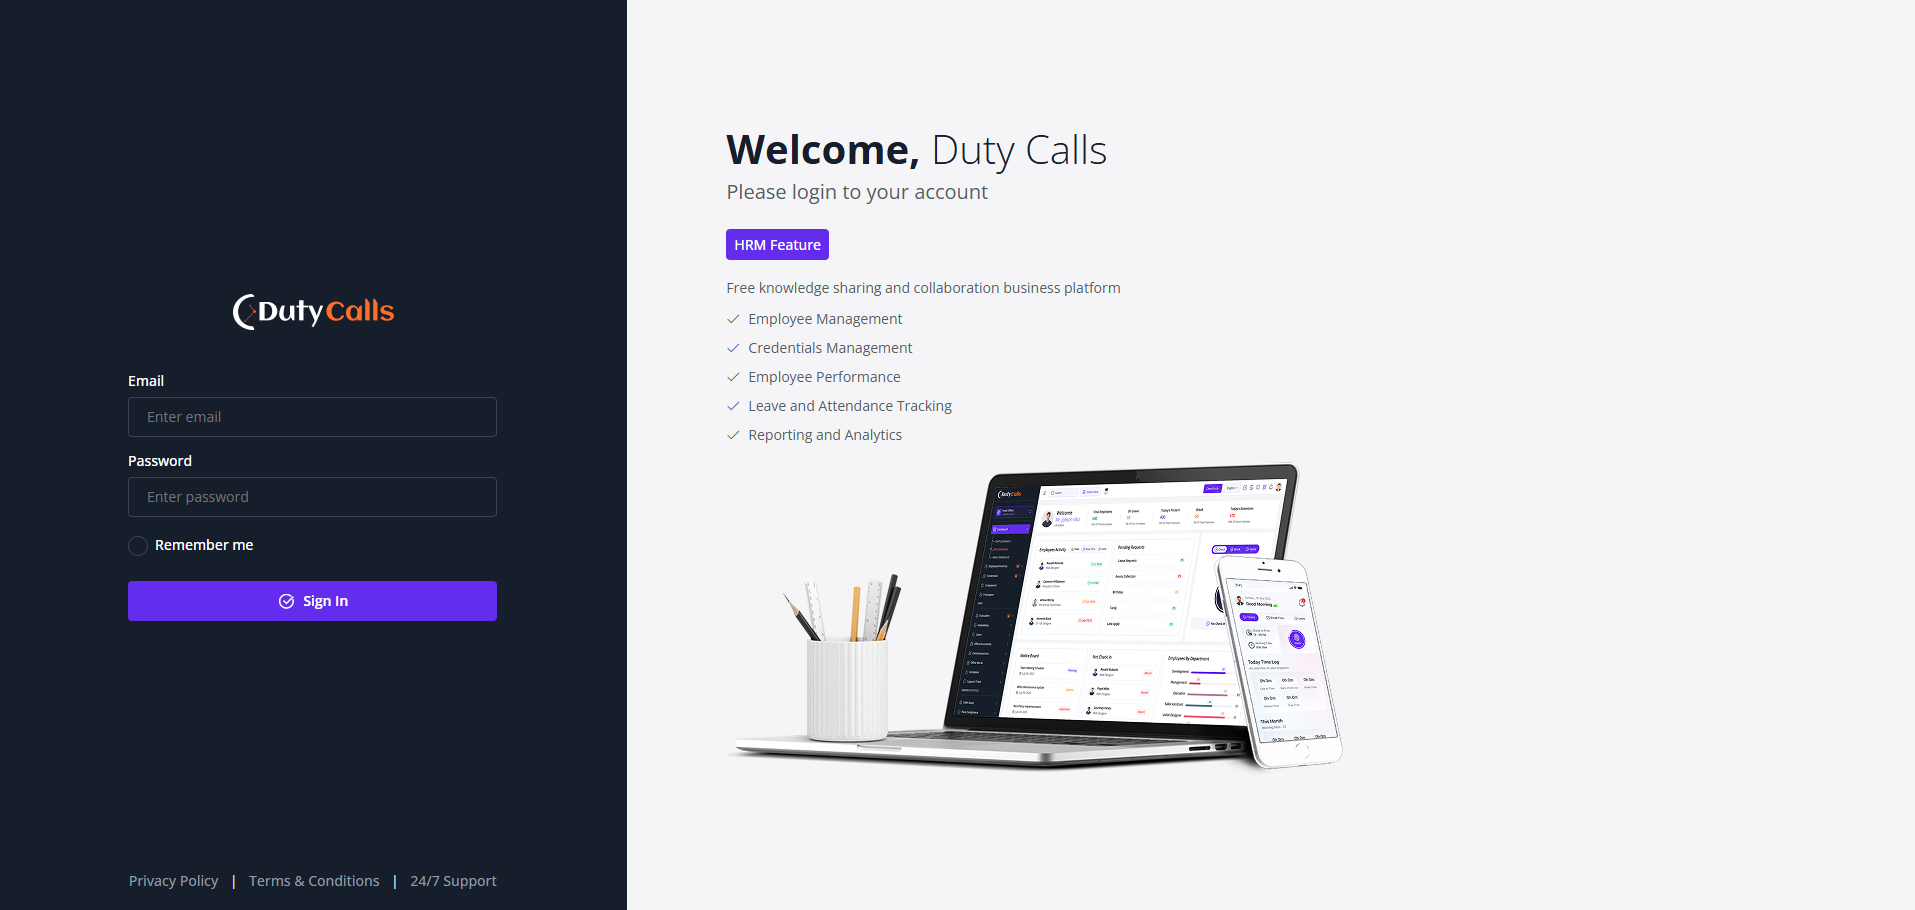
Goto your domain and login with the default credentials.

Who have staff dashboard permission can access this dashboard.
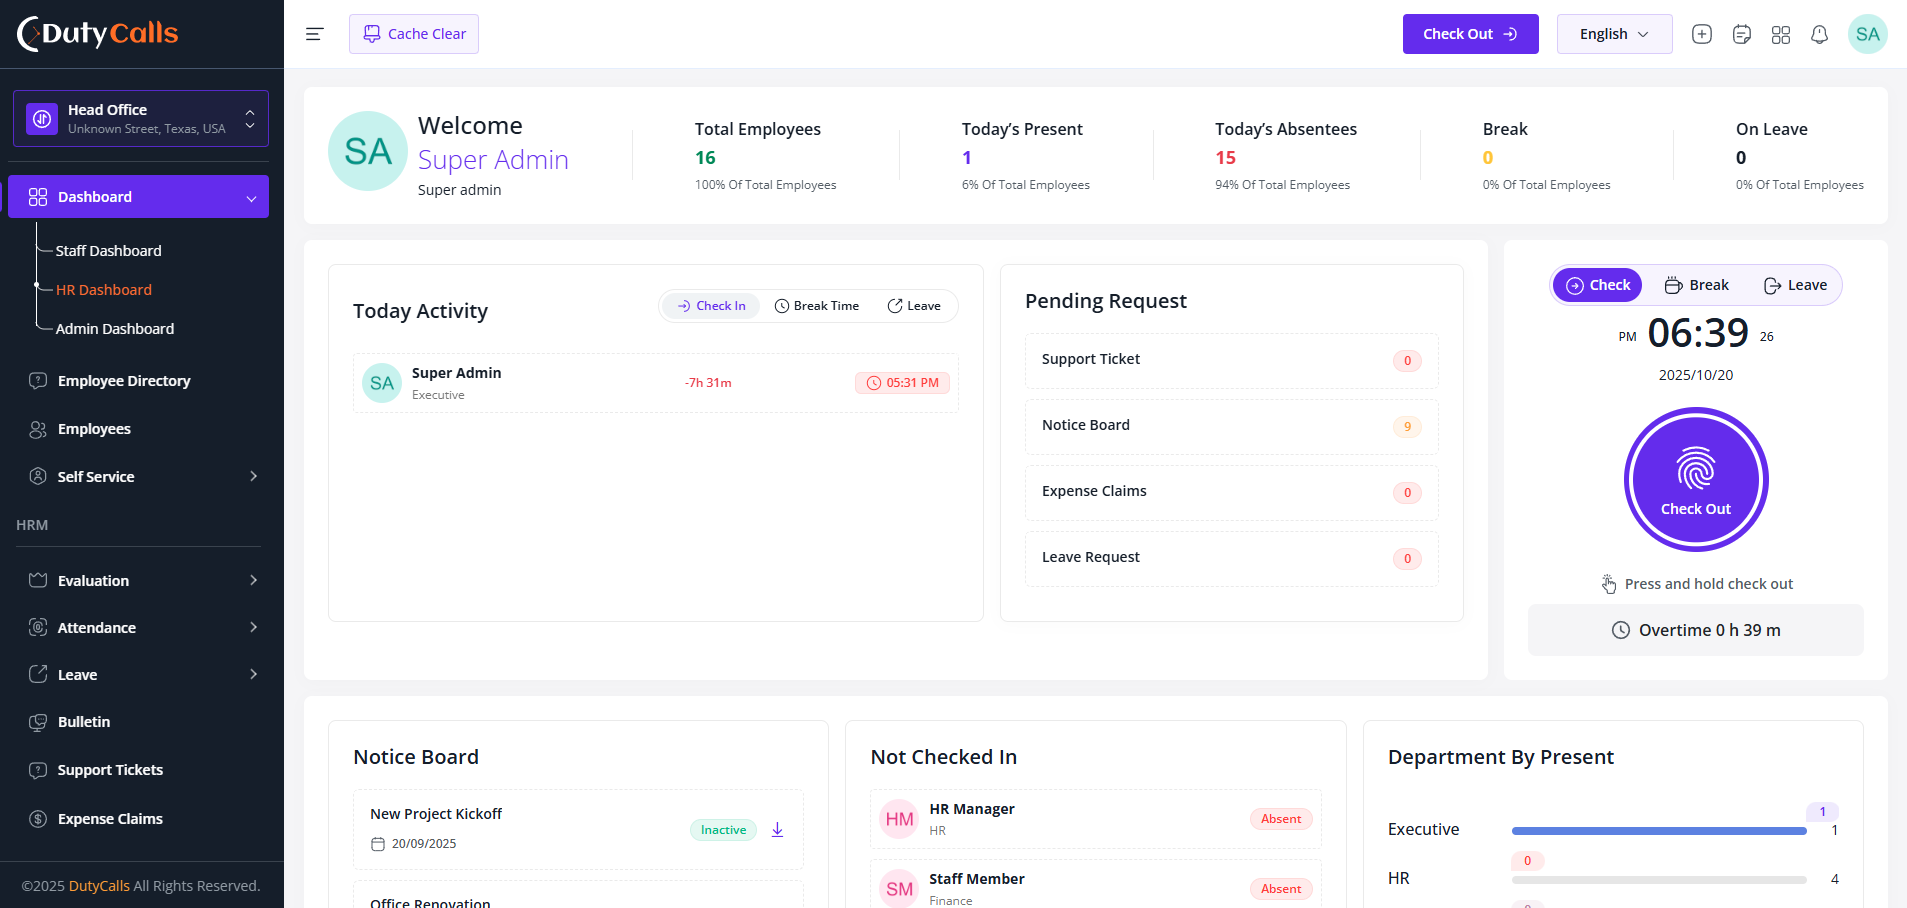
Who have hr dashboard permission can access this dashboard.
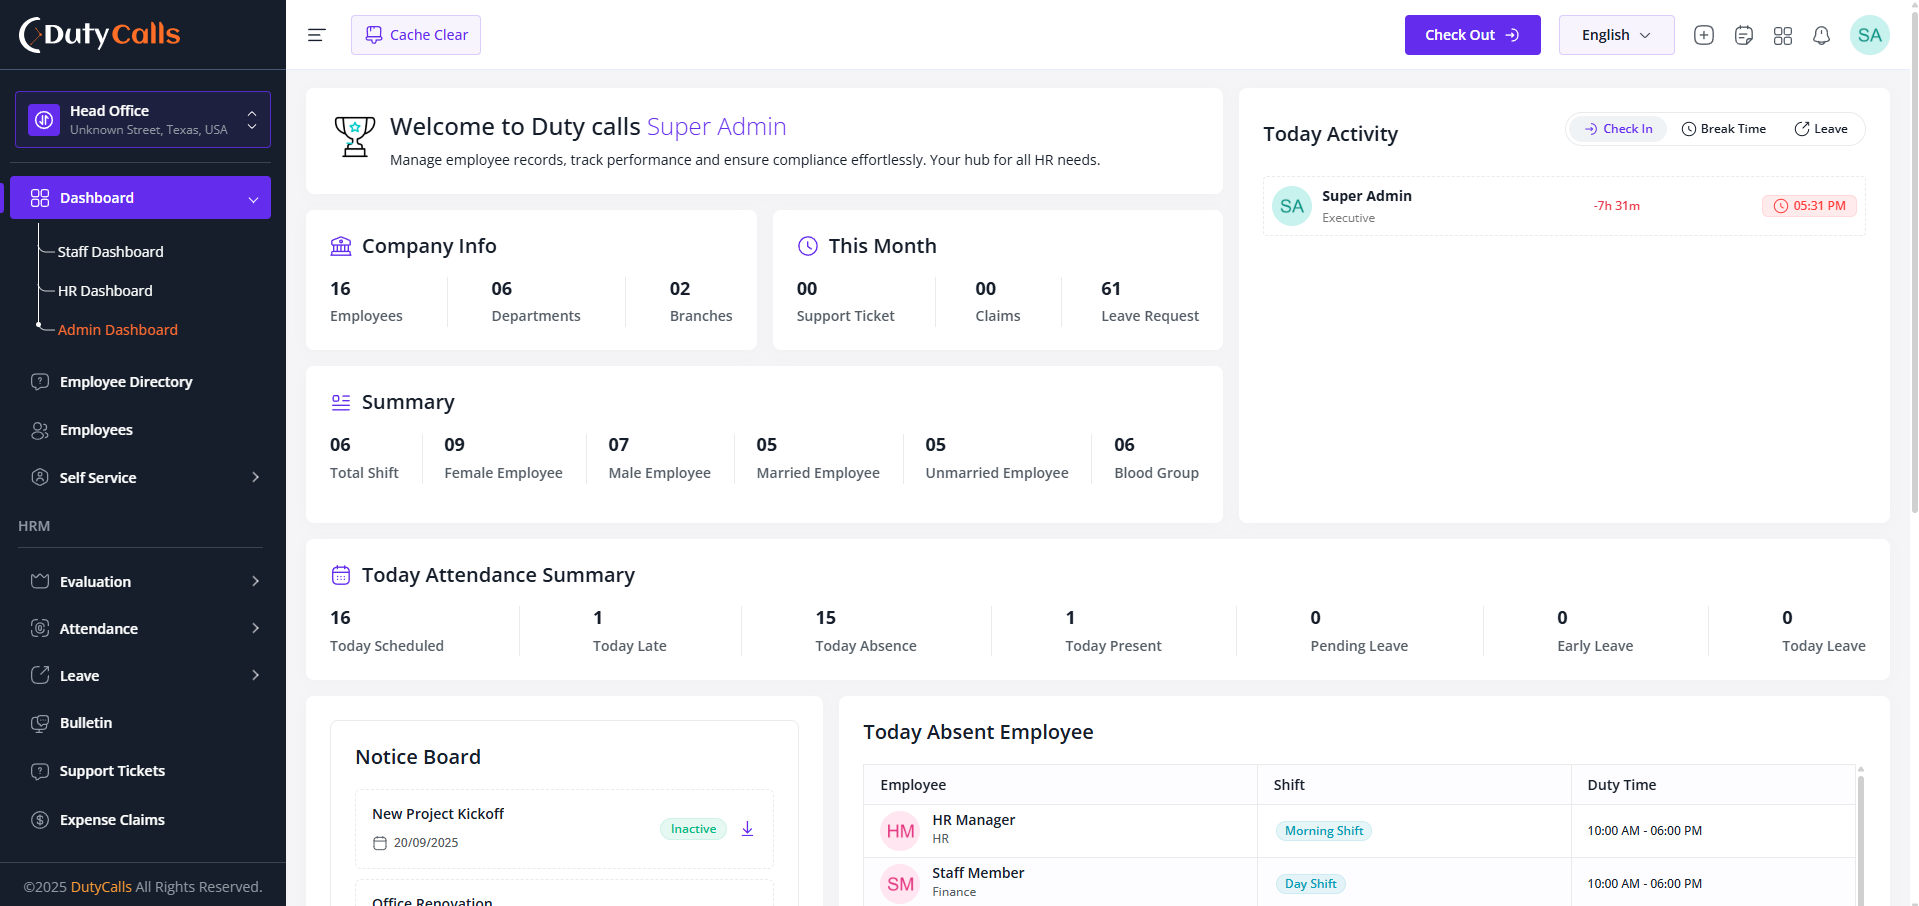
Who have admin dashboard permission can access this dashboard.
Note
The system includes a robust permission system. You can create new roles with specific permissions on your own. Additionally, according to your company policy, you can customize accessibility with our support.
Warning
For security purposes, we highly recommend changing the passwords for these default users immediately after your first login. You can do this from the user management section within the Admin panel.
General Setting
Configure the core behavior of the TrustedHRM platform including formats, fiscal year, and convenience toggles.
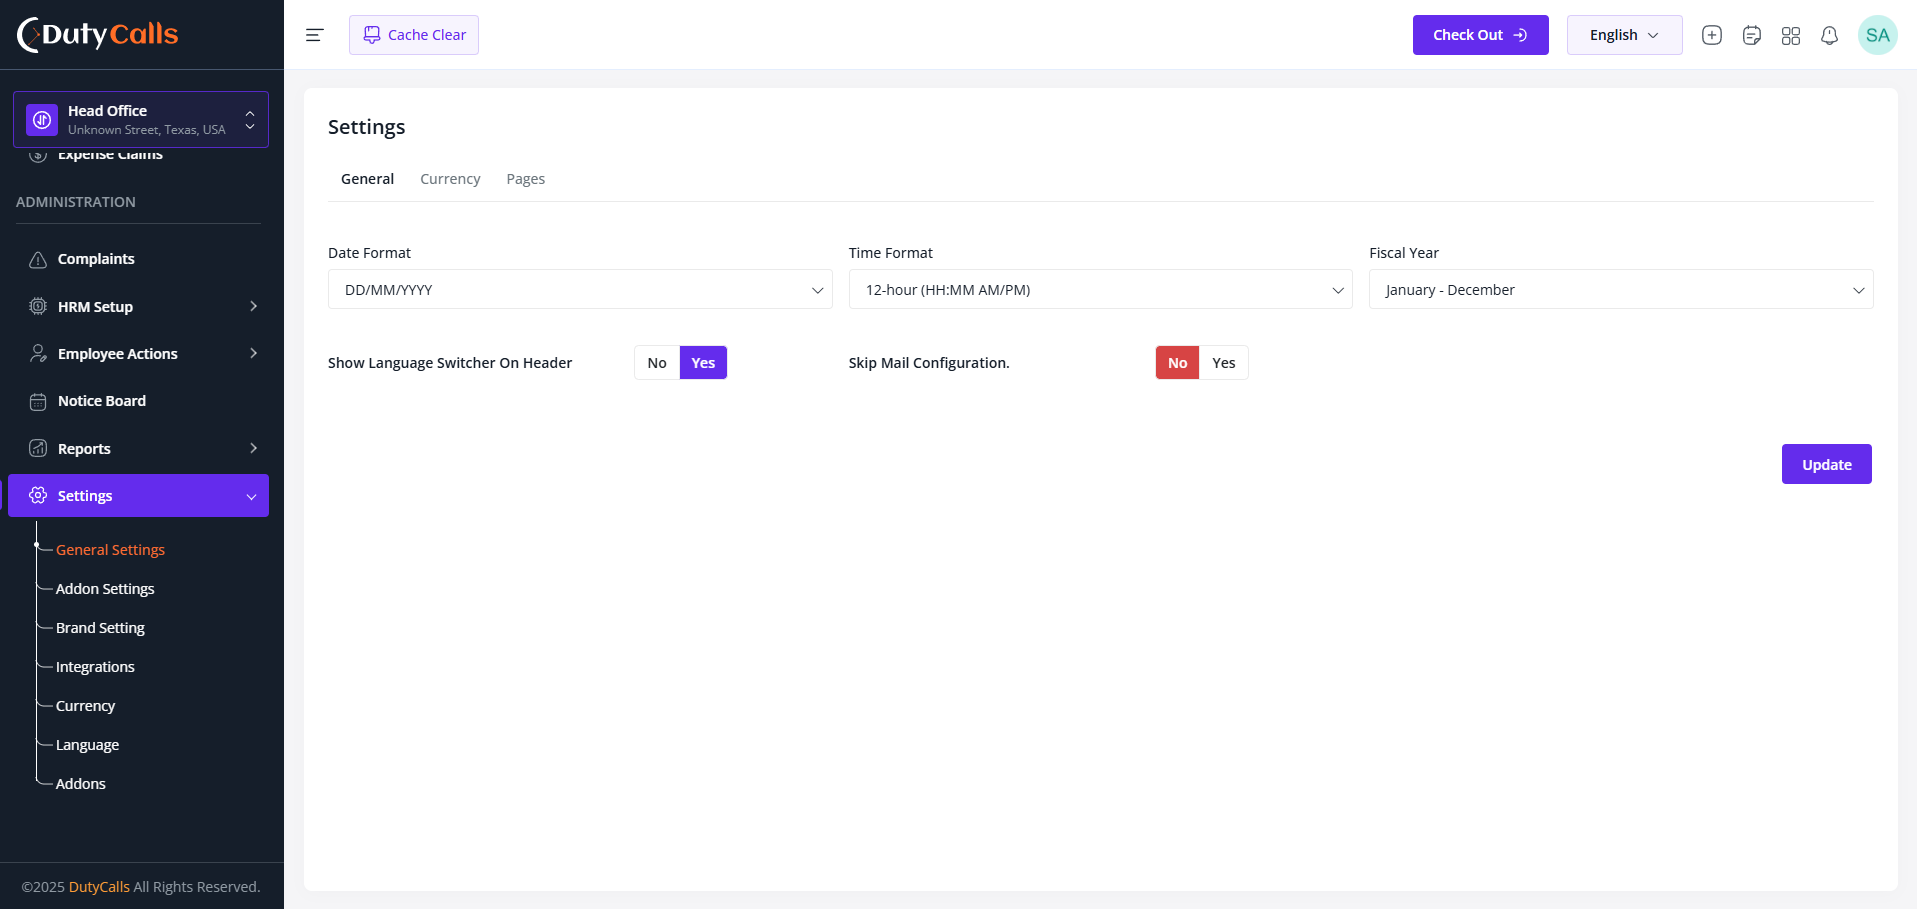
Update General Settings in the General section
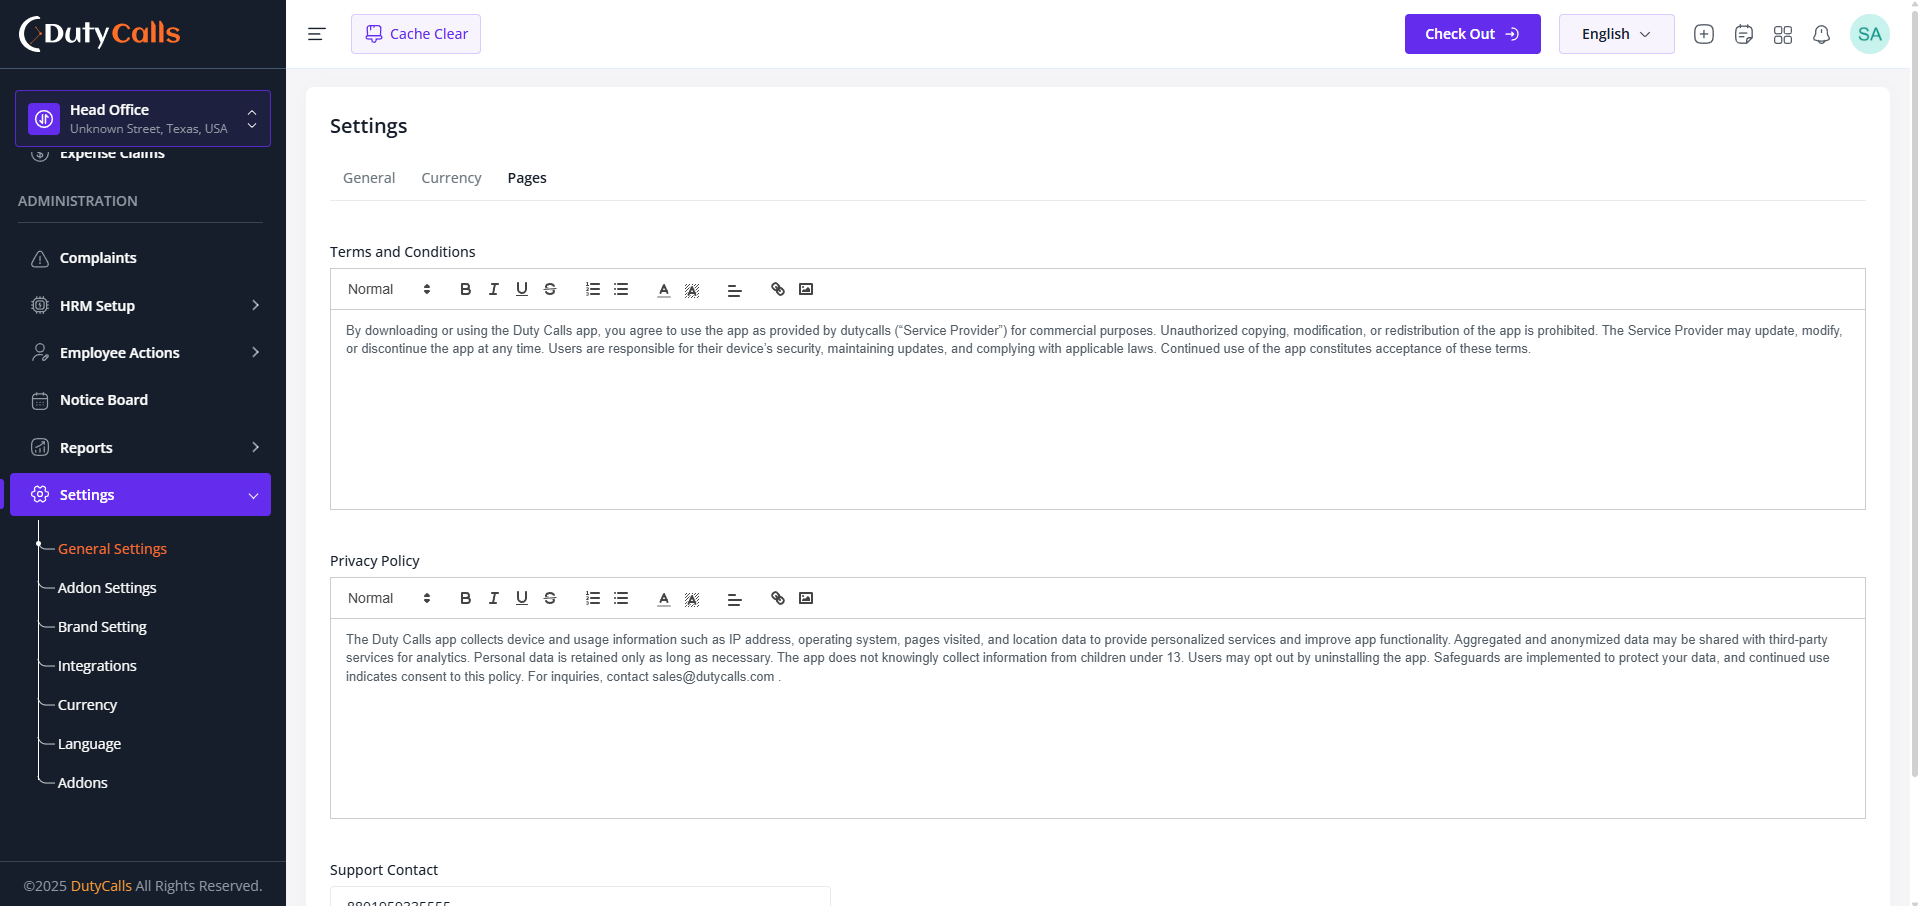
Update Terms and Conditions, Privacy Policy and Your Support Contact in the Pages section
What you can configure
- Date Format: (e.g.,
DD/MM/YYYY) - Time Format: (e.g.,
12-hour
                                        AM/PM
) - Fiscal Year: Your employee's leave
will be reset based on this fiscal year.
(e.g., If you choose
January -
                                        December
. Then on January all employees leave will be reset) - Language Switcher: If you want to close language switcher from the nav then you can turn it off from here.
- Skip Mail Configuration: While employee creation we can send a mail to the employee. If you want to skip this mail then you can turn it off from here. After the mail integration, enable it from here.
All changes define the default operational environment for the HR system. Click Update to save any changes you make.
Brand Setting
Customize your organization's visual identity to maintain brand consistency across TrustedHRM.
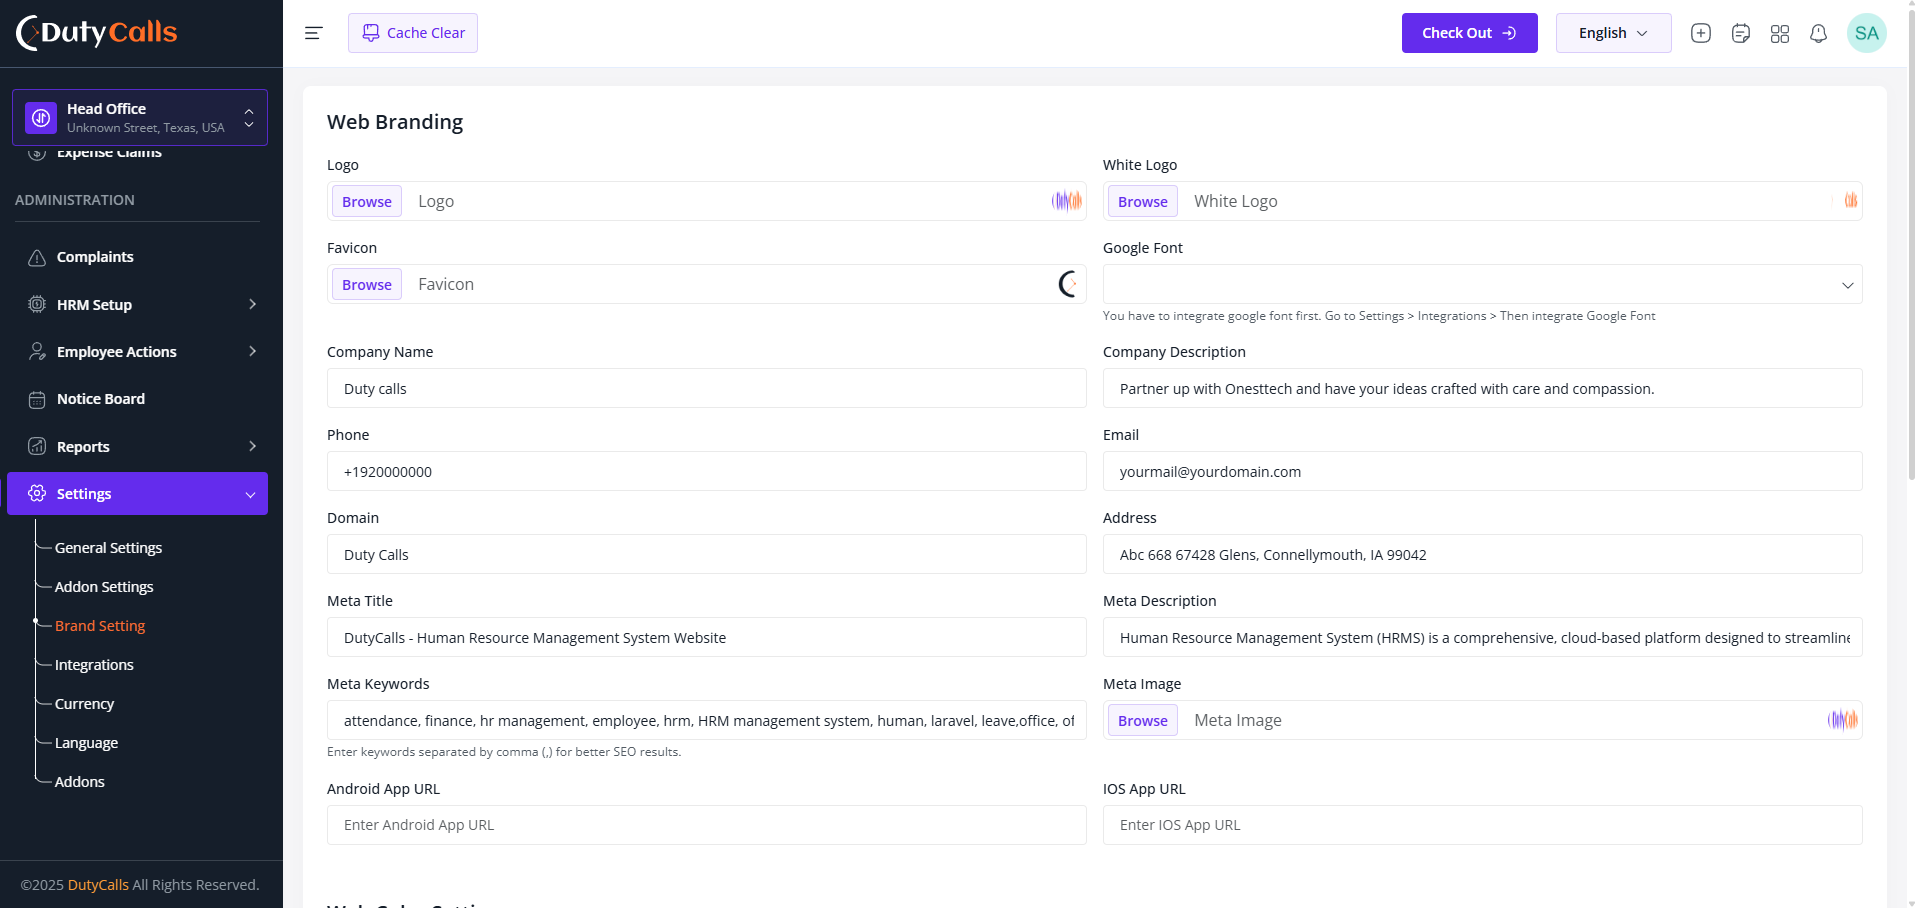
All Brand related settings in the Branding section
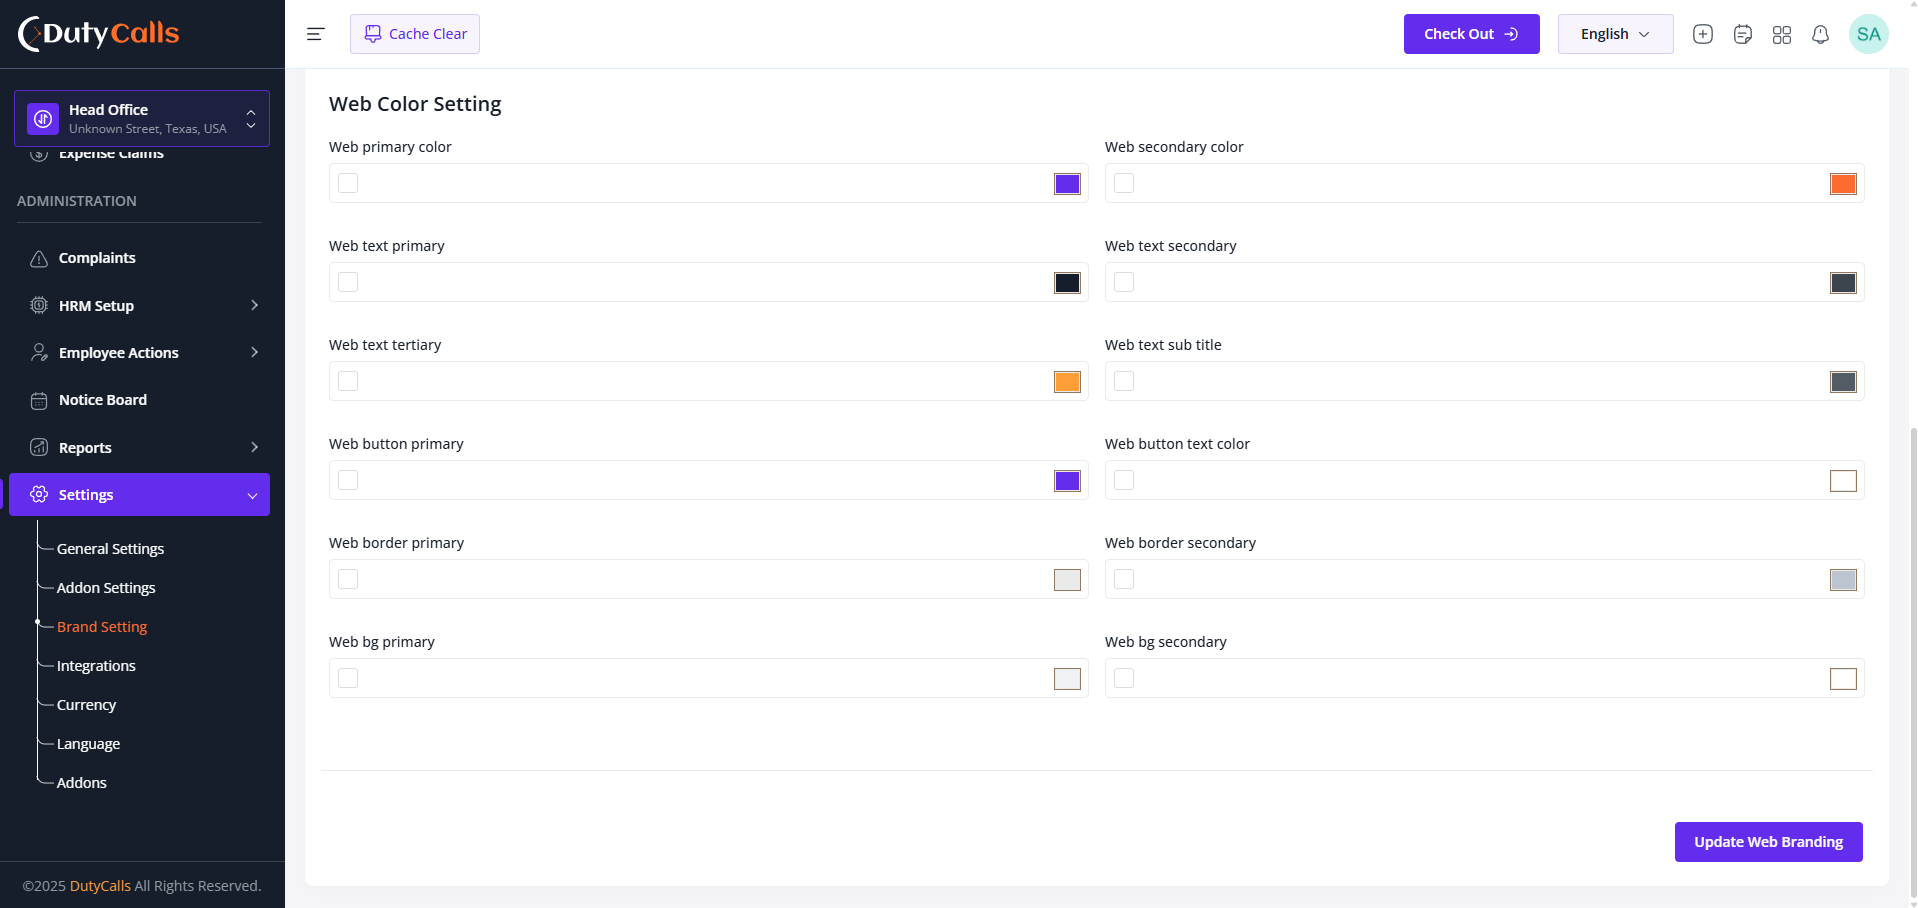
You can change also the Color based on your brand from here.
Customization Options
- Company Logo for headers, login, and documents
- Color Scheme for primary/secondary colors
- Company Information (name, tagline, contacts)
- Favicon for browser tabs and bookmarks
- Email Templates with branded headers/footers
- Document Branding for reports and official documents
Integrations
Connect TrustedHRM with third-party services to enhance workflows and automate data exchange.

Click on the Gear icon to view the Integrations section
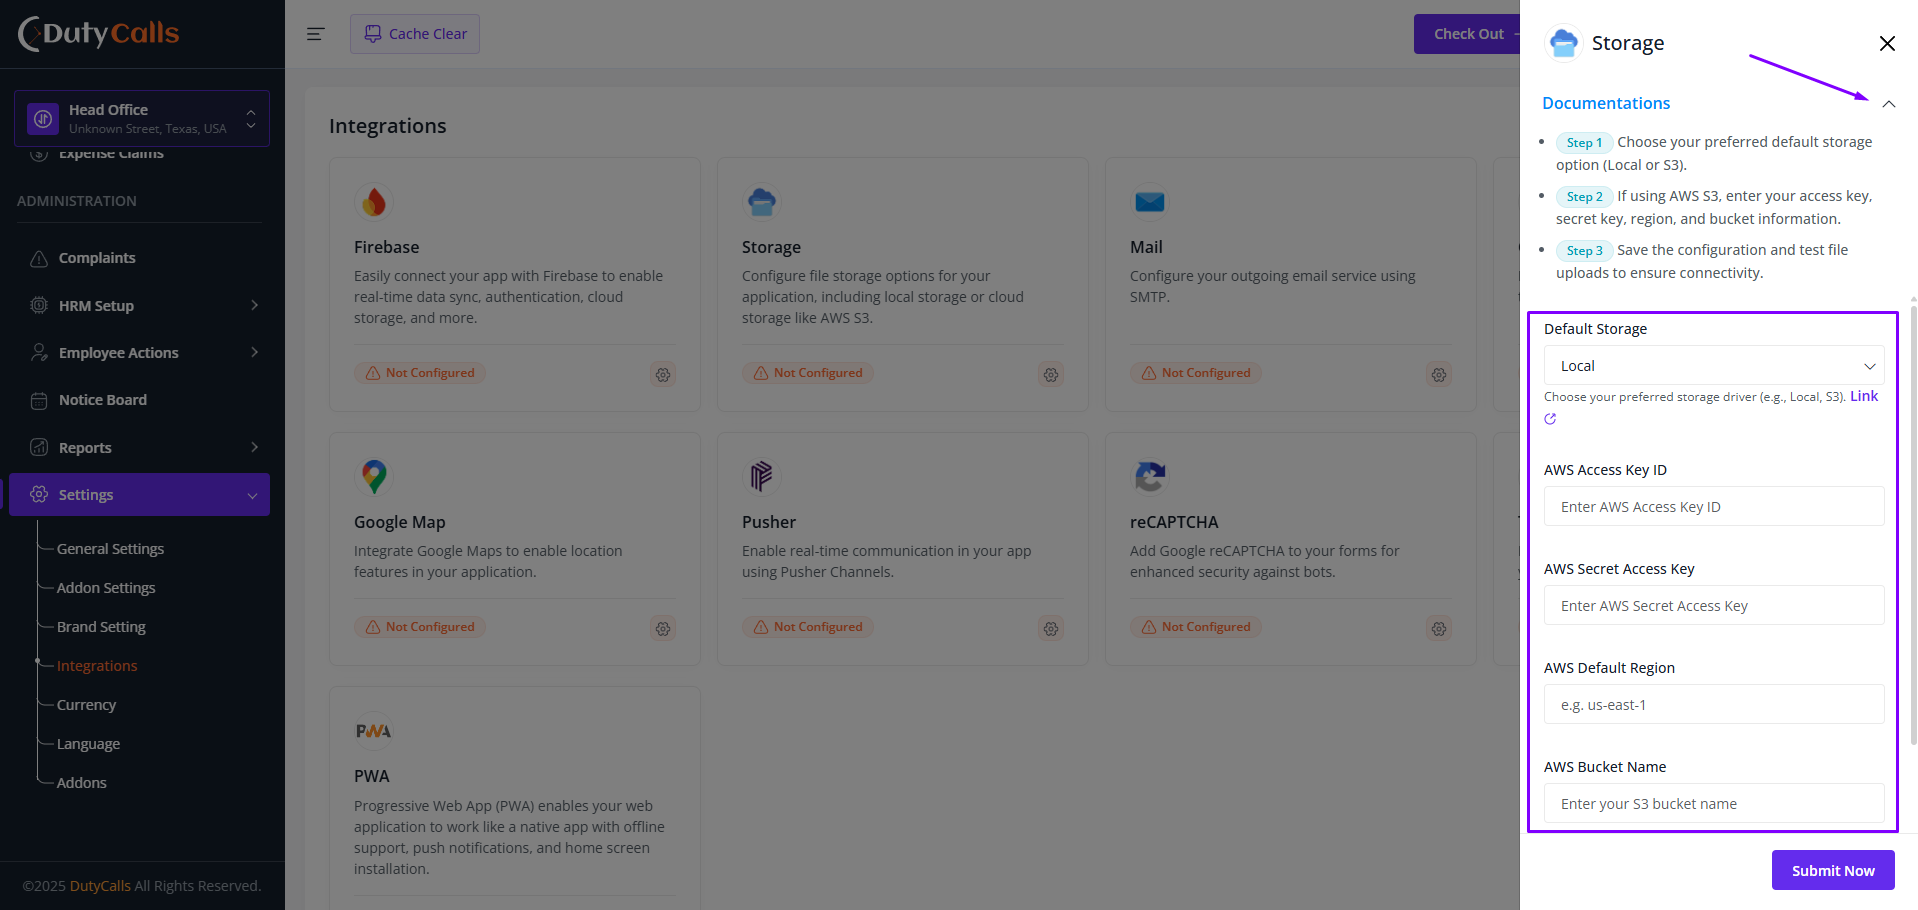
Click on the Documentation tab to see the Integrations documentation
Available Integrations
- Firebase: Real-time sync, auth, and cloud storage
- Storage: Local or cloud (e.g., AWS S3) file storage
- Mail: SMTP settings for outgoing email.
- Google Font: Customize app typography
- Google Map: Enable location features
- Pusher: Real-time communication (channels)
- reCAPTCHA: Protect forms from bots
- Tawk: Live chat support widget
- PWA: Progressive Web App capabilities
Warning
Update Mail Configuration to enable email sending. Without proper settings, the system cannot send notifications, password resets, or other emails.
Language
Configure and manage multiple languages for a consistent and localized experience across TrustedHRM.
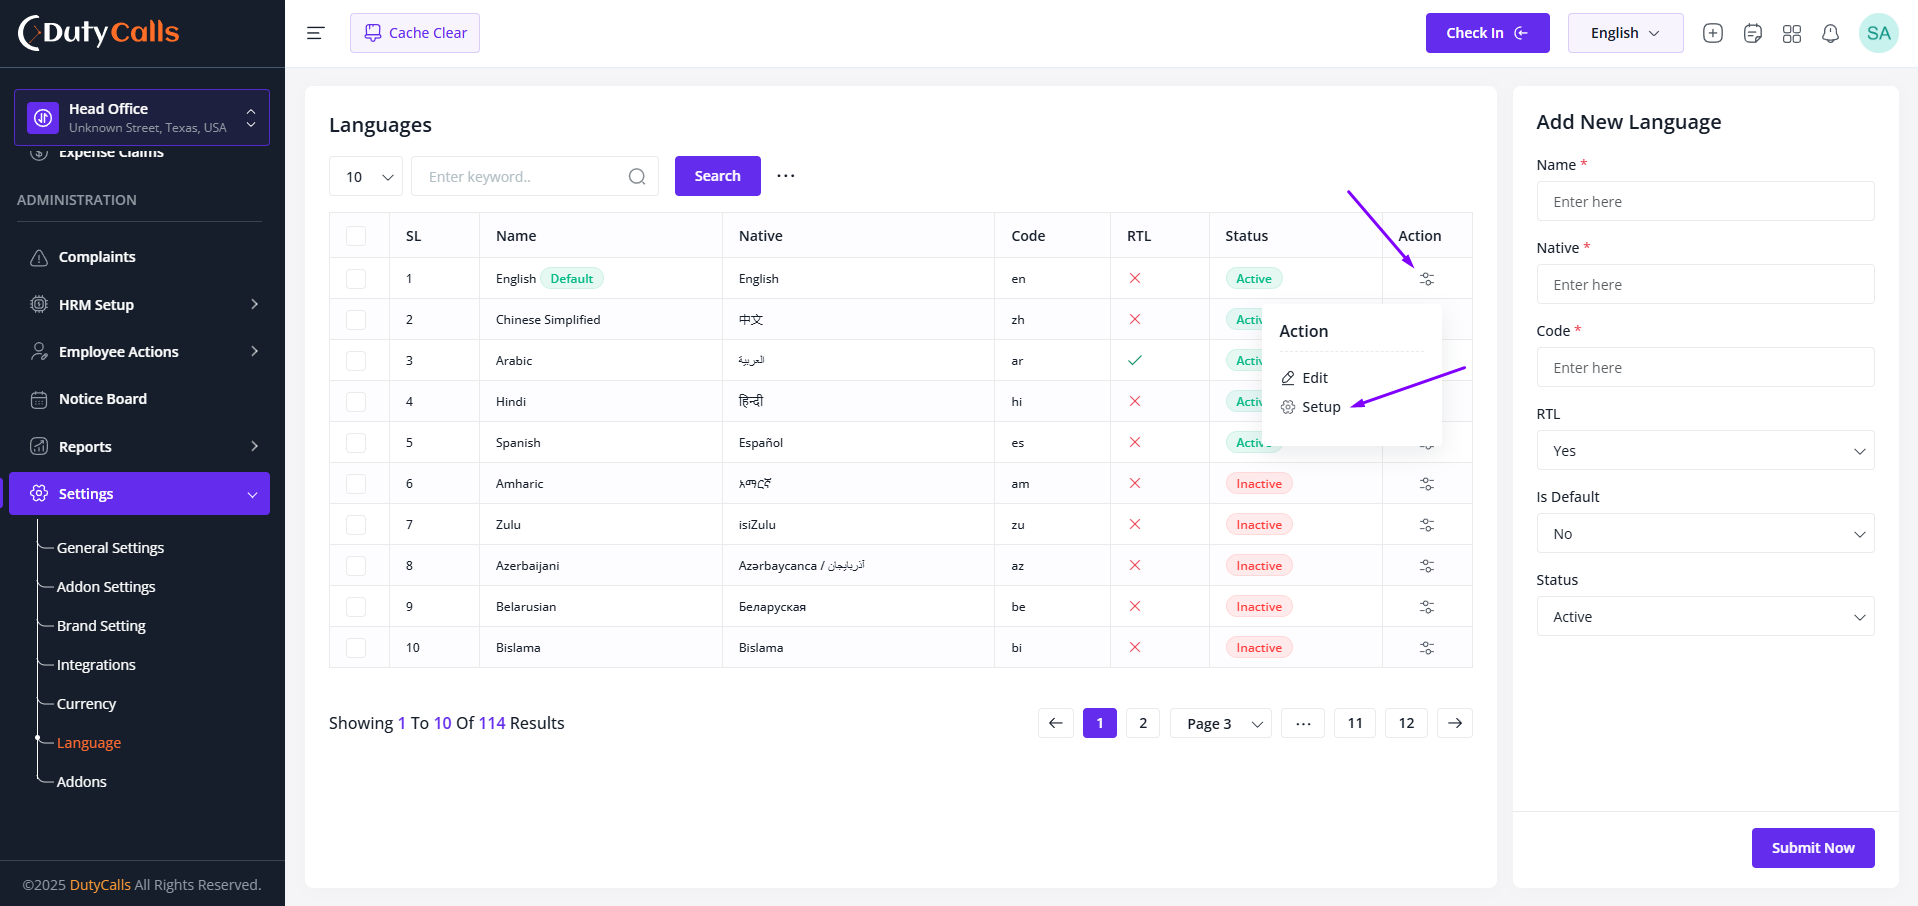
Click on the Gear icon to view the Setup option
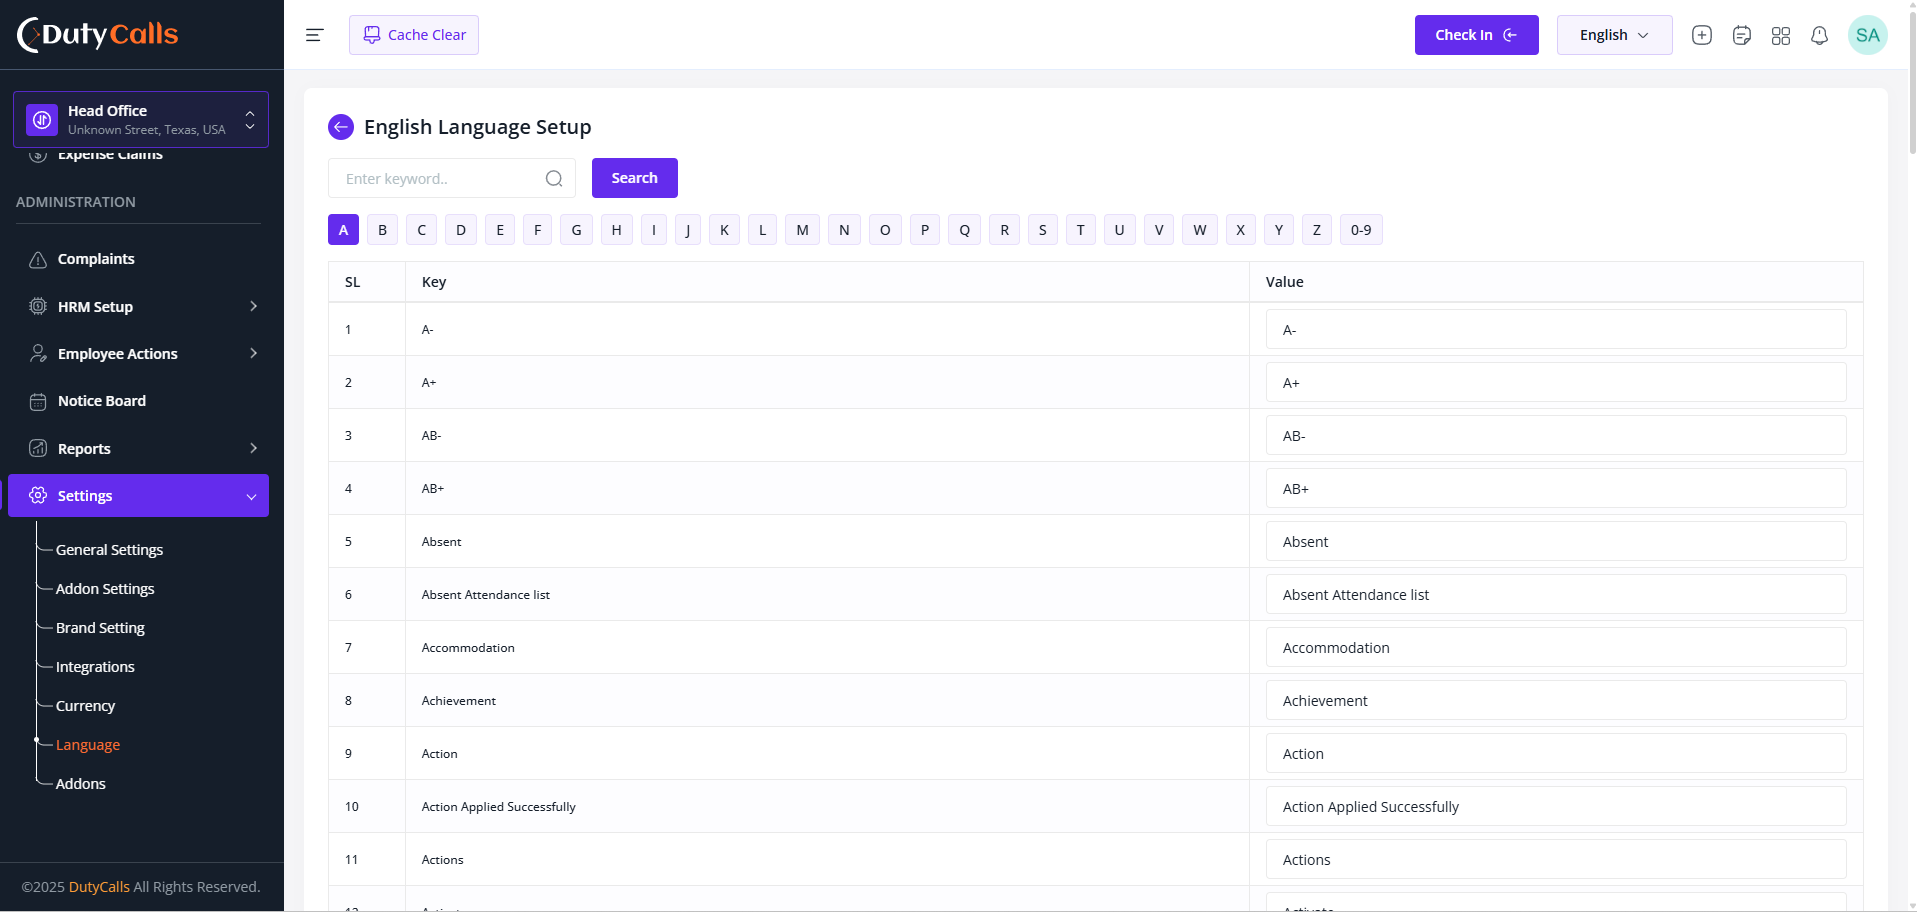
Update the language value, that will auto save the changes
The Language Settings section allows administrators to:
- Set the default system language
- Add new language packs
- Configure language-specific formatting for dates, numbers, and currency
- Support both LTR and RTL text directions
- Let users switch languages from their profile
- Manage translations for custom content and system messages
Centralized language management ensures consistent UX across all modules while honoring cultural and linguistic preferences.
Departments
Create, manage, and organize different departments within your organization for efficient employee categorization and management.
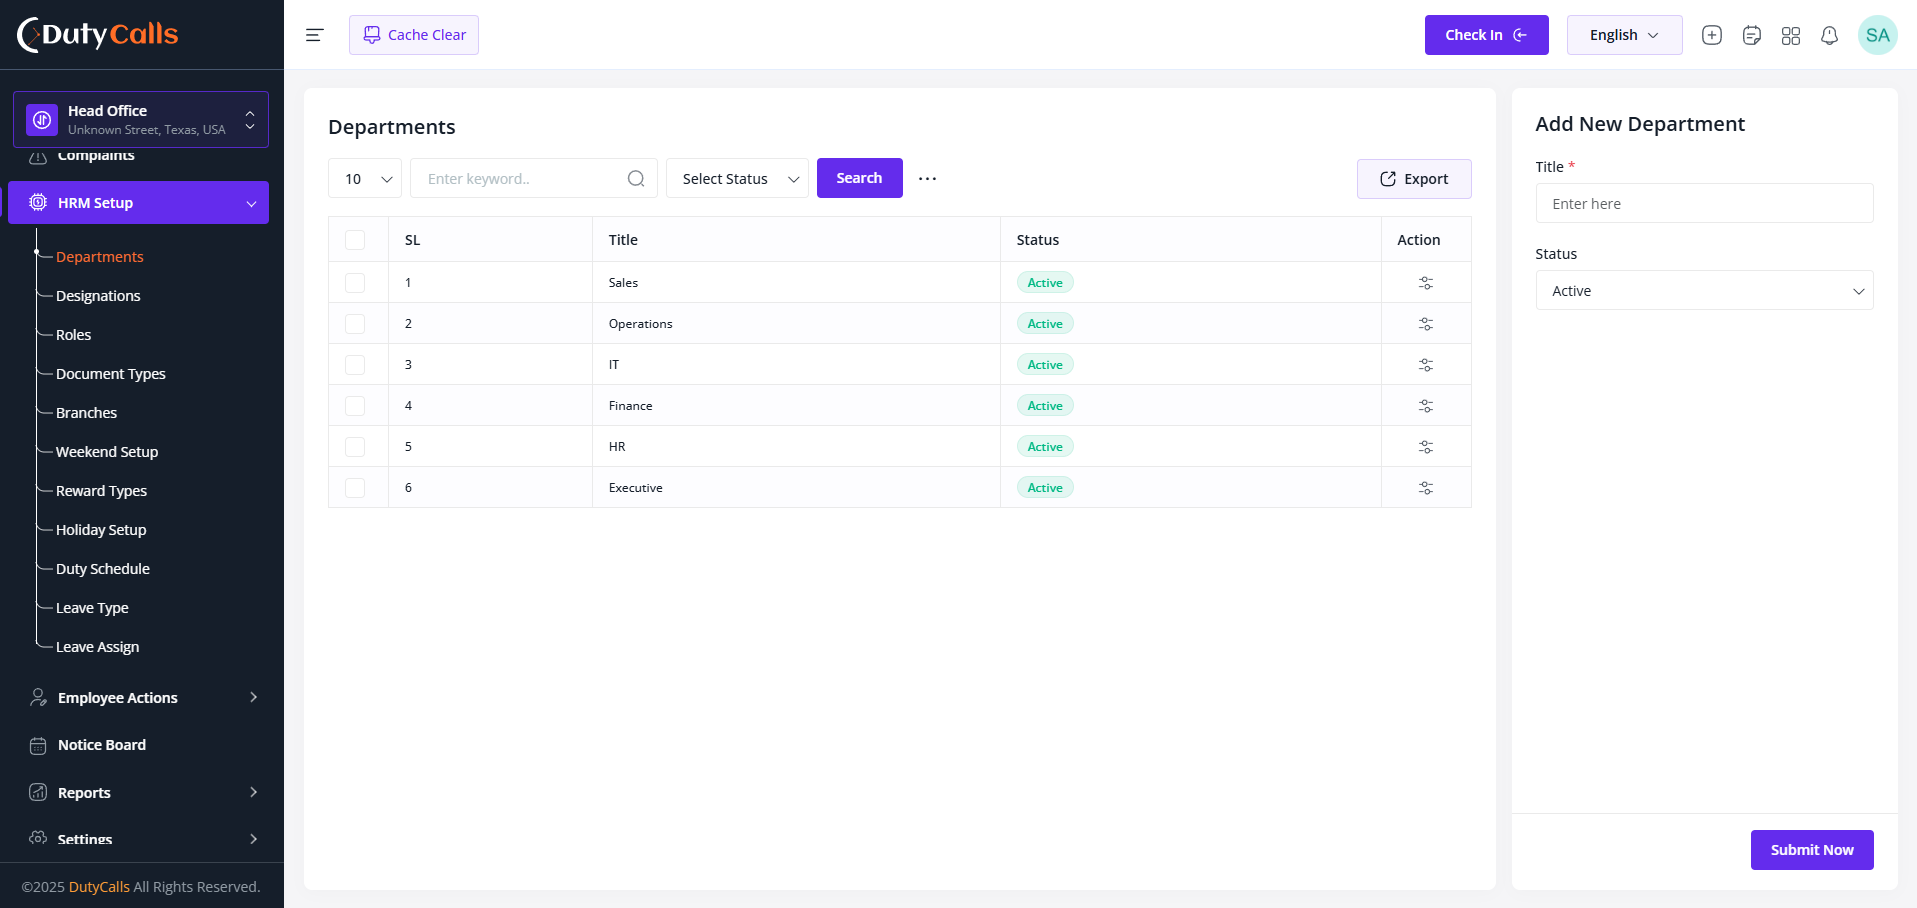
Create and Manage Departments here
The Departments module provides centralized system that helps maintain a clear organizational structure and enables efficient employee categorization and management across various business units.
Designations
Create, manage, and organize job positions and roles within your organization for clear hierarchy and role management.
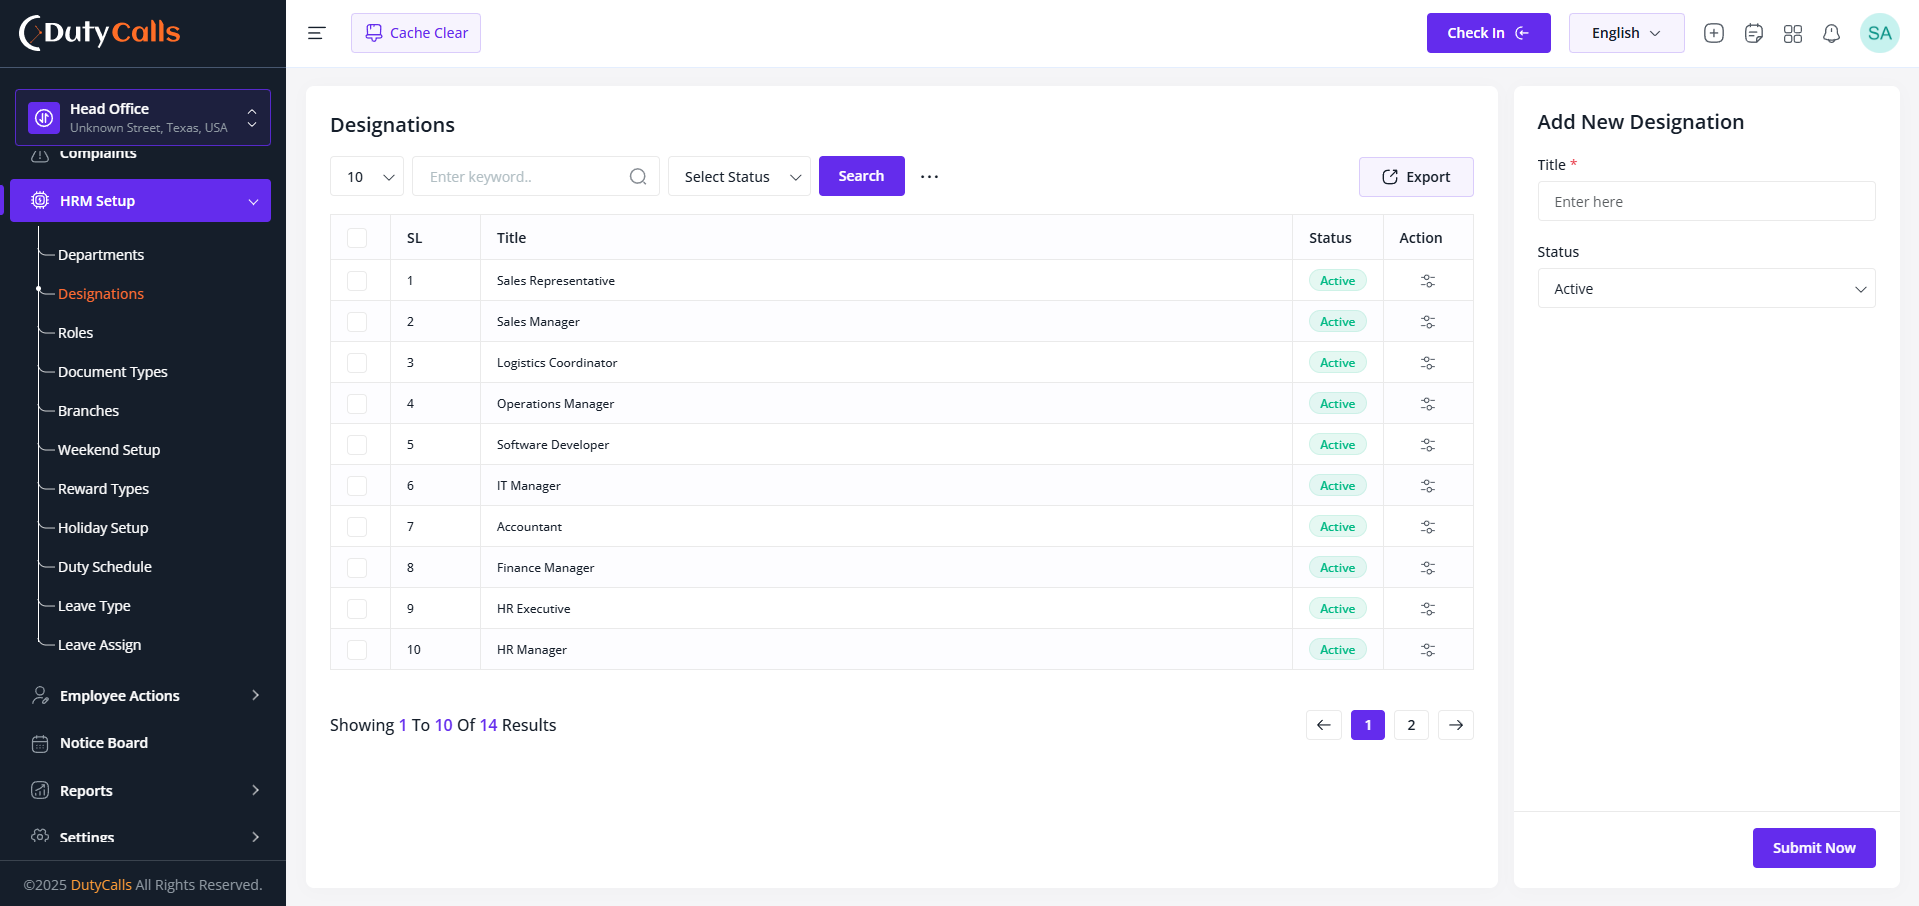
Create and Manage Designations here
Organizational Structure
Well-defined designations help create a clear organizational structure, improve communication channels, and establish proper authority levels throughout your company.
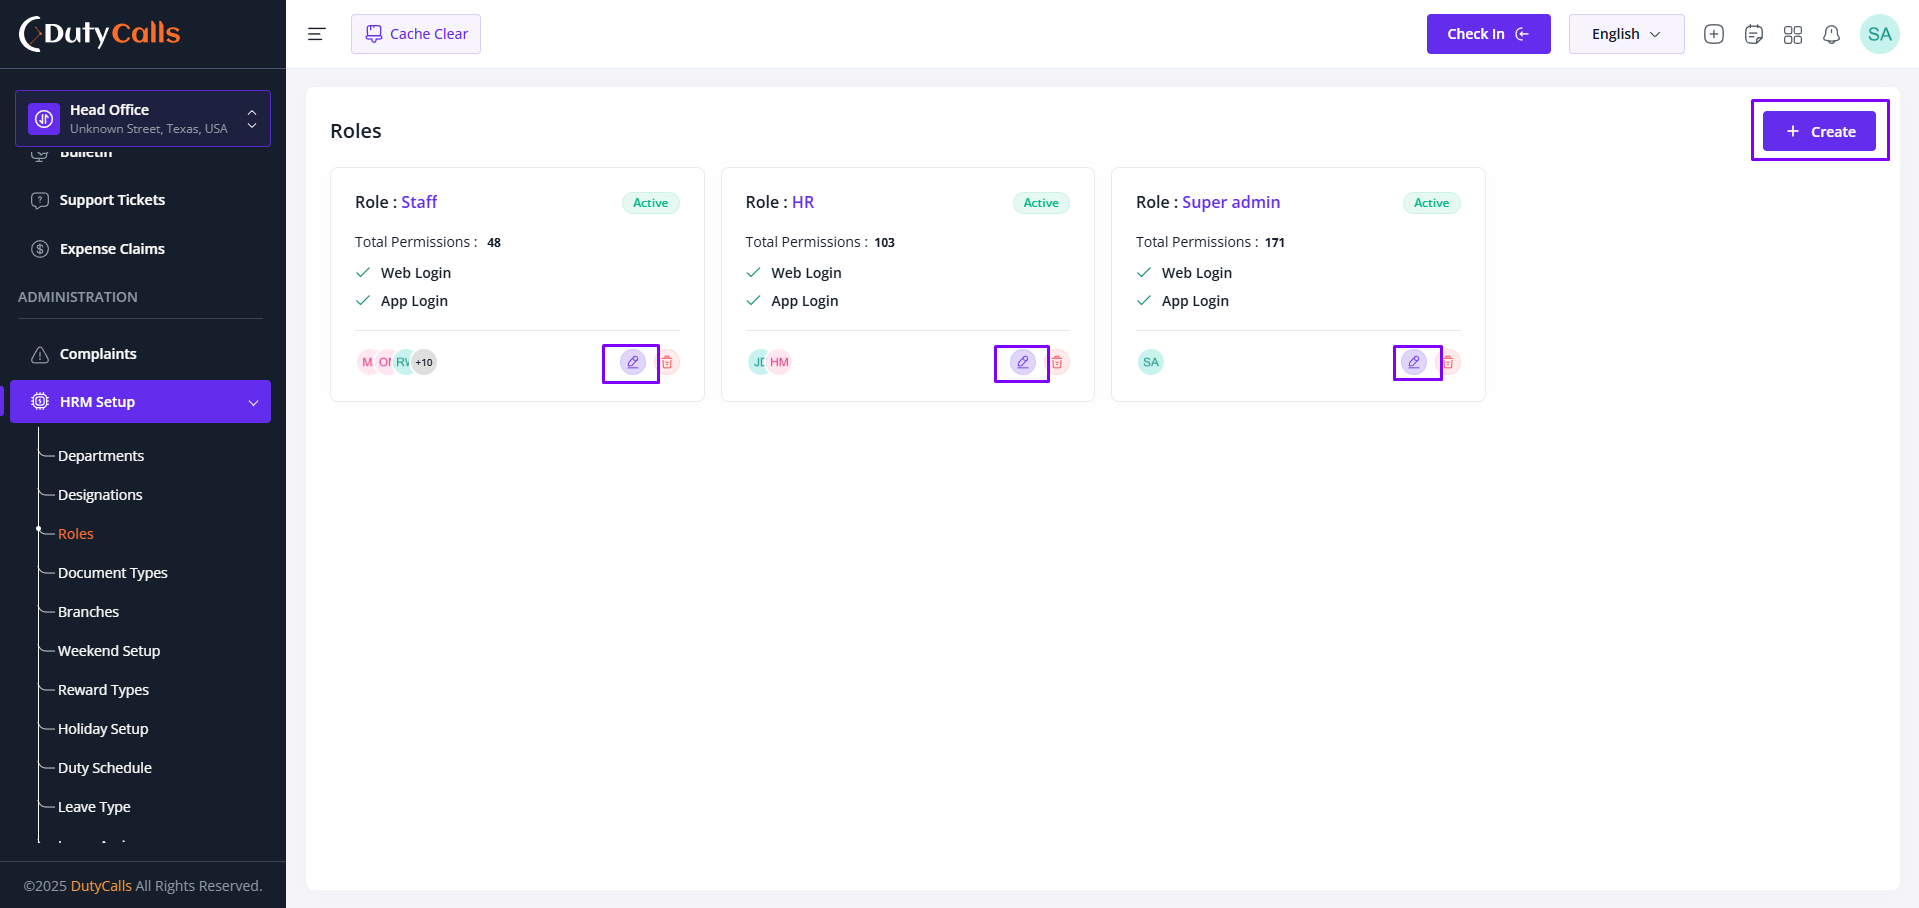
Roles
Define and manage user roles with specific permissions and access levels throughout the HRM system.The Roles management system ensures proper security and access control by assigning appropriate permissions to different user types within your organization.
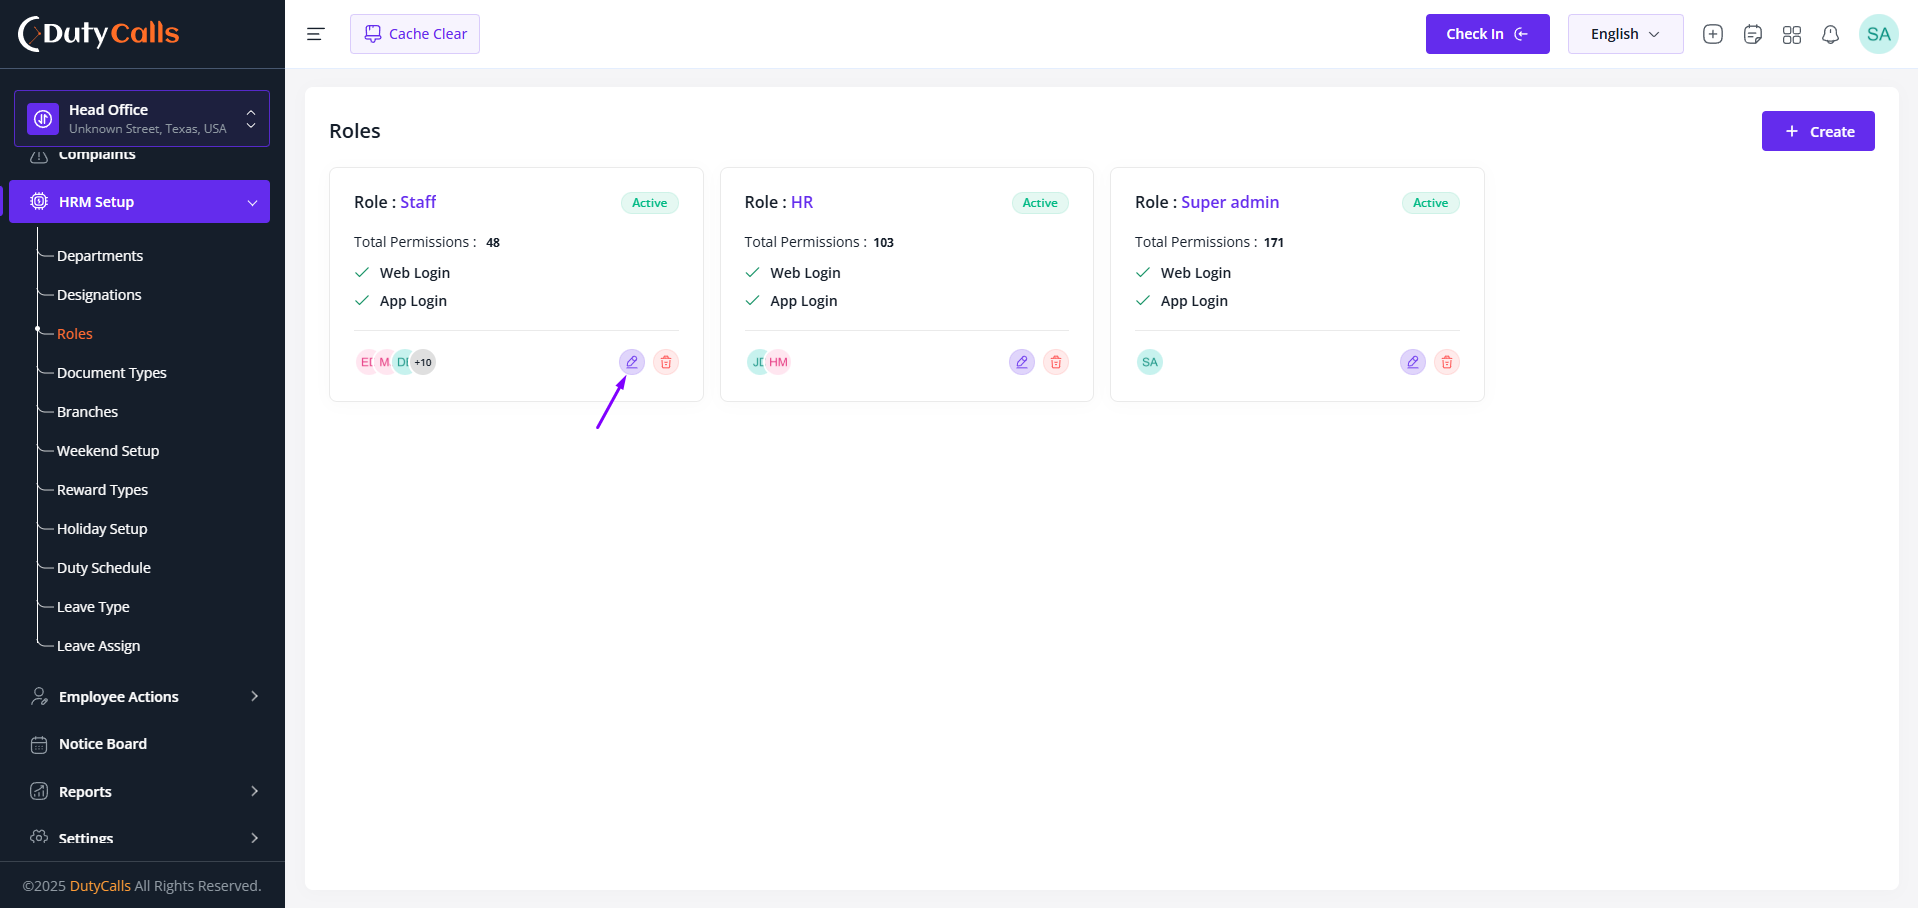
Click on the Edit icon to view the Setup Permissions page
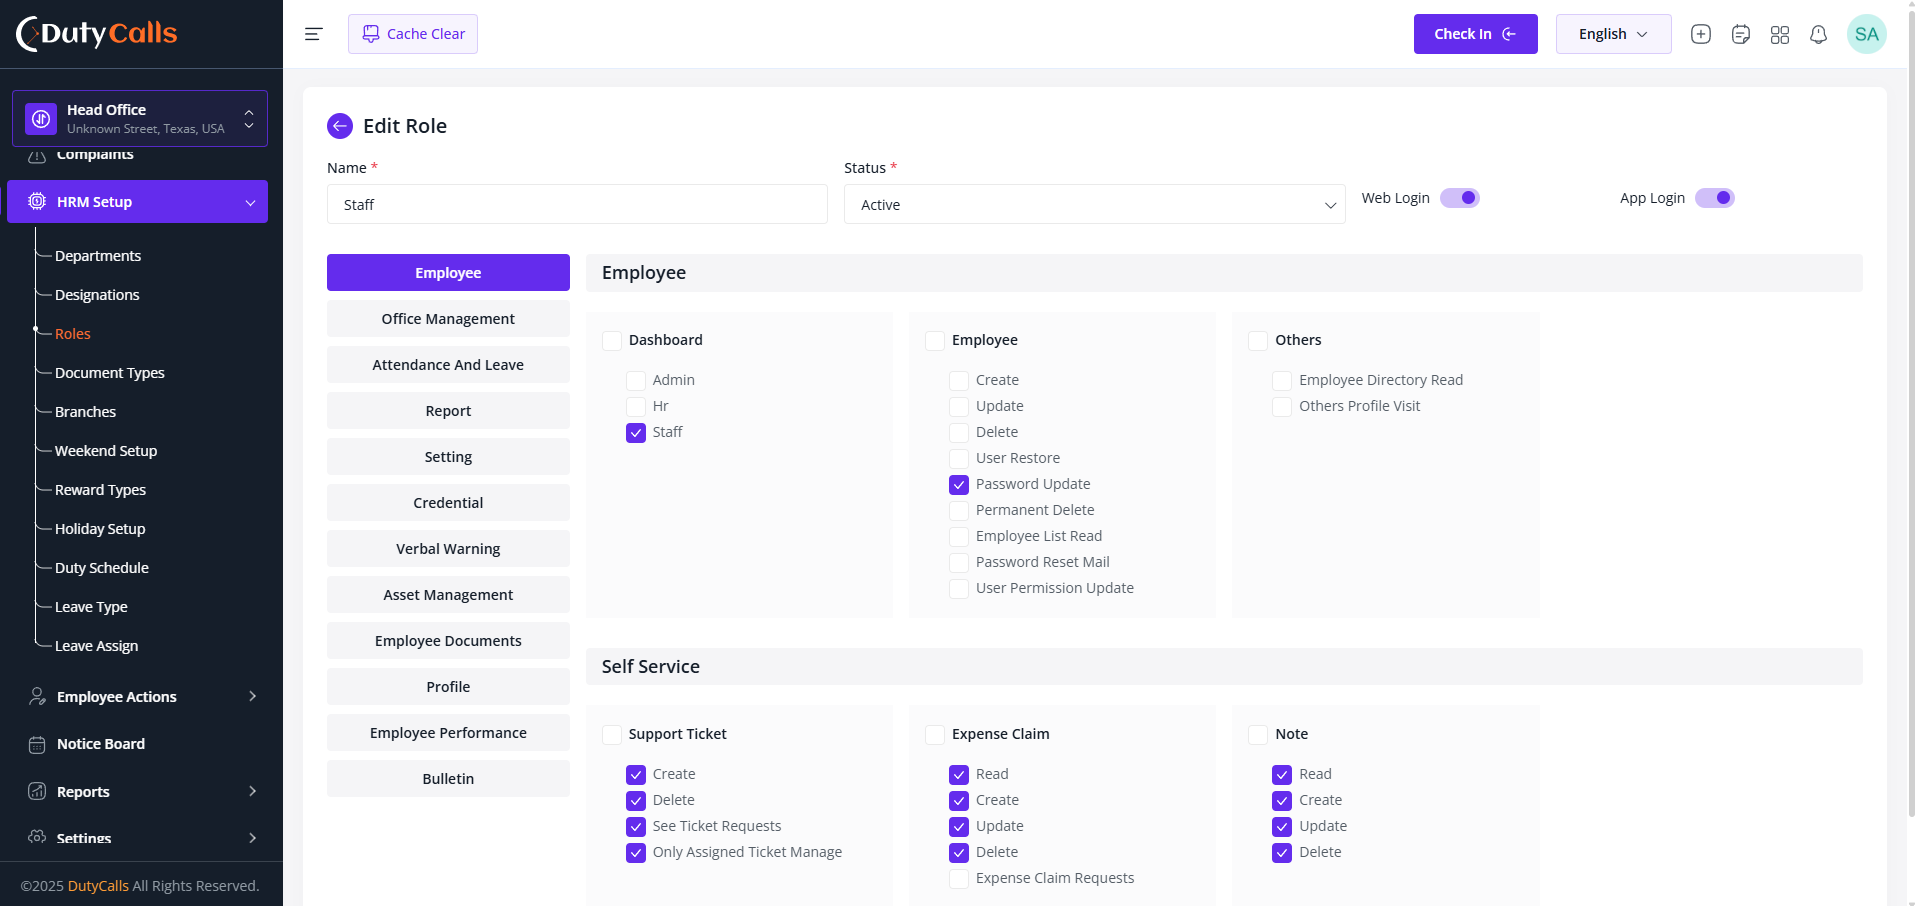
Click on the checkbox to enable permission for this role
Note
While Saving (Submit Now) there are a button Apply Permissions To Users. Make it clicked if you want to apply that this permission to all users of this role
Security Note
Be cautious when assigning administrative permissions. Always ensure that sensitive operations like system settings, user management, and financial data access are restricted to authorized personnel only.
Document Types
Create, manage, and organize different document types for efficient document handling and compliance across departments. This system helps maintain a clear and organized document management system, enabling efficient document handling and compliance across various departments and projects.
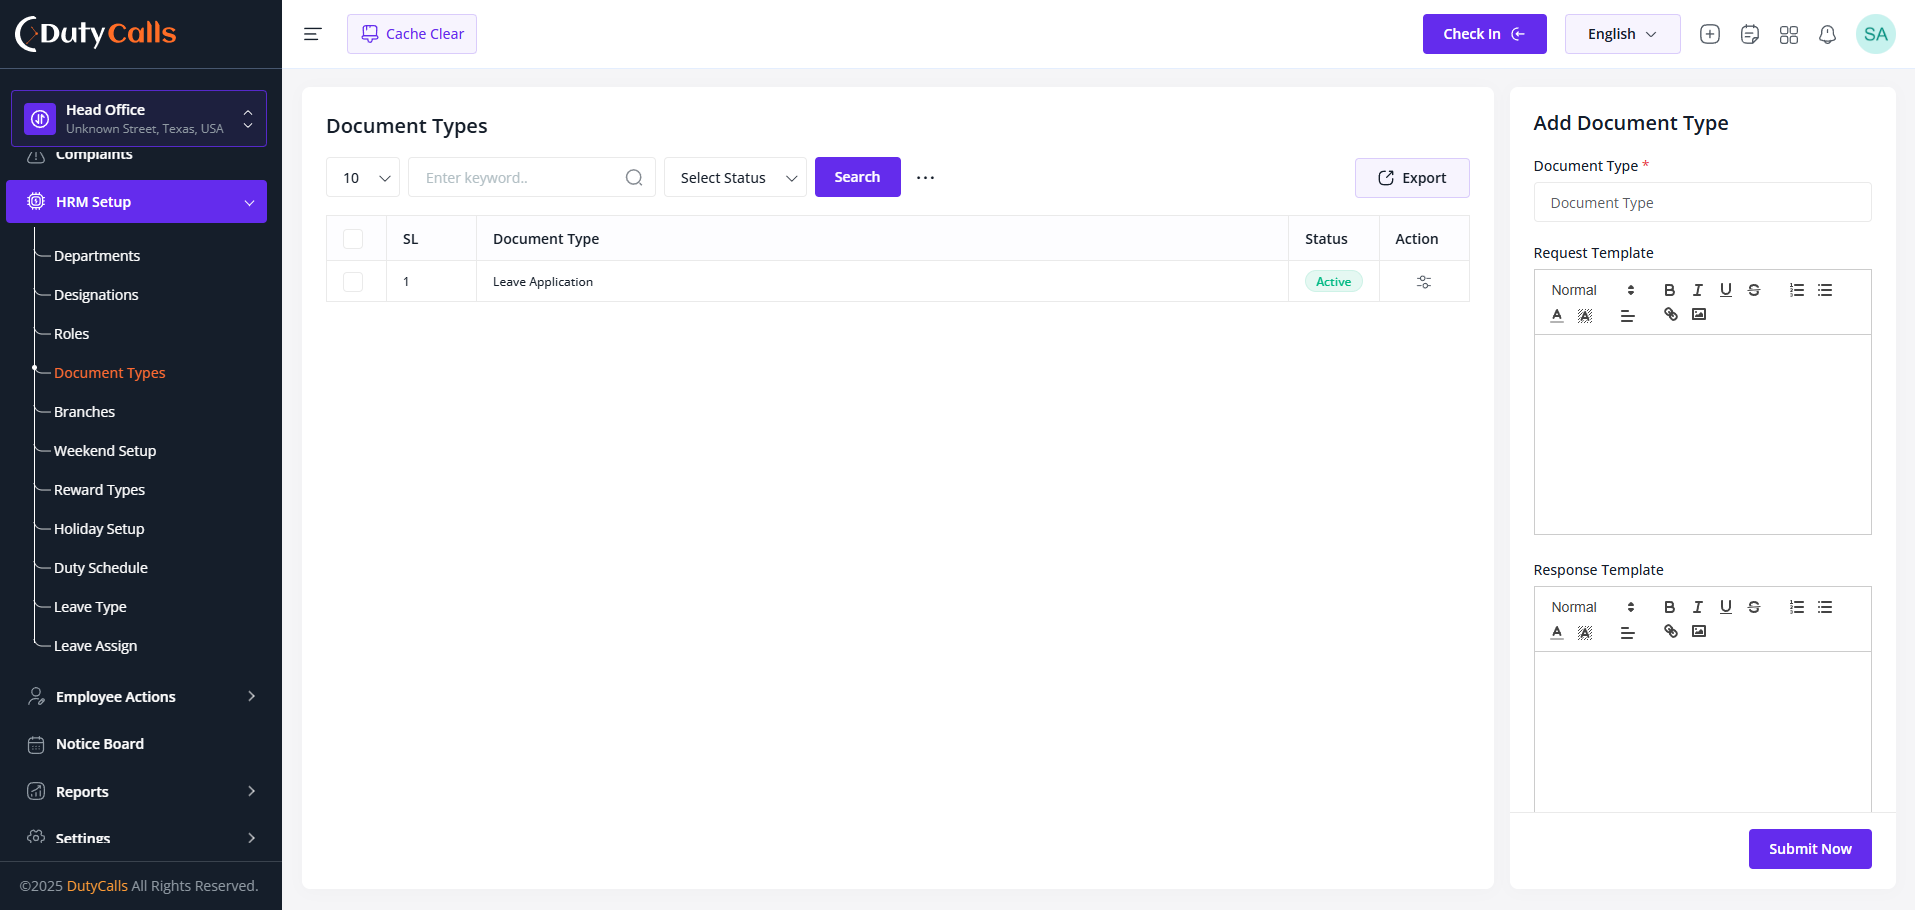
Create Application format template so that employee can access this
Branches
Create and manage multiple office locations, regional offices, or operational branches for distributed operations.
The Branches module provides comprehensive branch management capabilities for organizations with distributed operations across different geographical locations.
Add your multiple branches here
Weekend Setup
Configure and manage weekend schedules for your organization with different patterns for various departments.
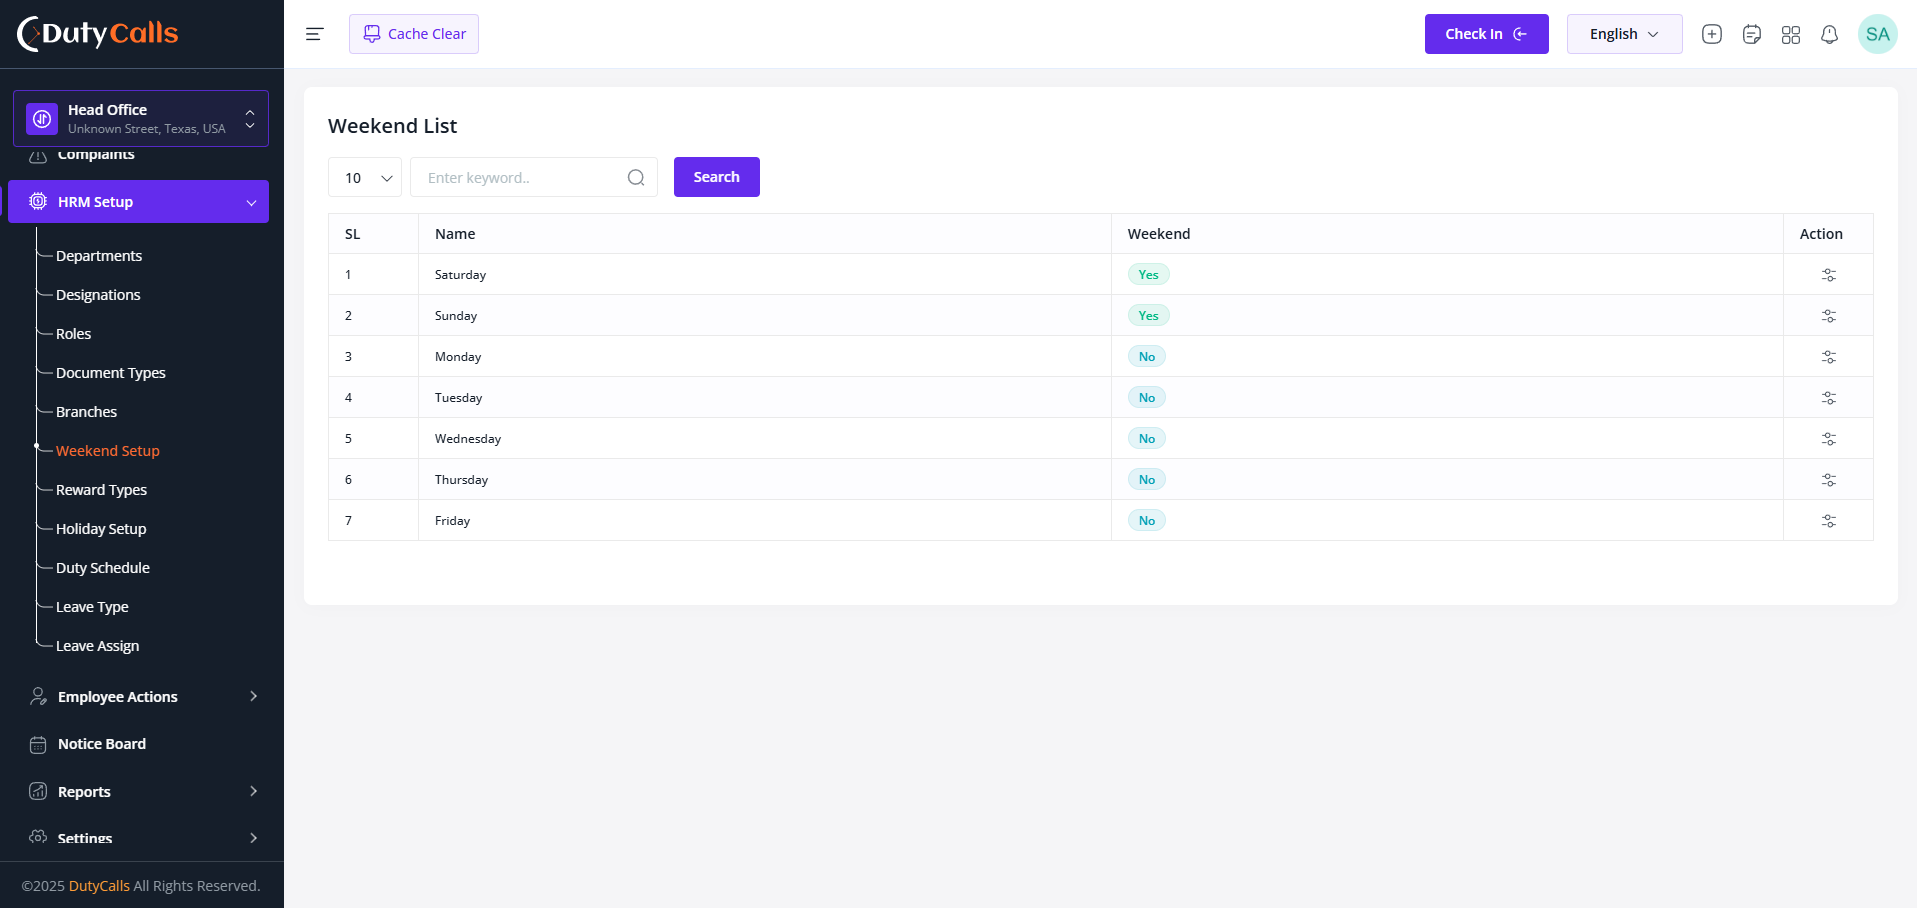
Manage your default weekend from here
Weekend Configuration Best Practices
- Consider your organization's operational requirements when setting weekends
- Ensure weekend patterns align with local cultural and religious practices
- Coordinate weekend schedules with client and vendor availability
- Plan for adequate coverage during weekend periods
- Regularly review and adjust weekend patterns based on business needs
- Communicate weekend schedule changes well in advance to employees
Scheduling Impact
Weekend configurations directly affect attendance tracking and leave calculations.
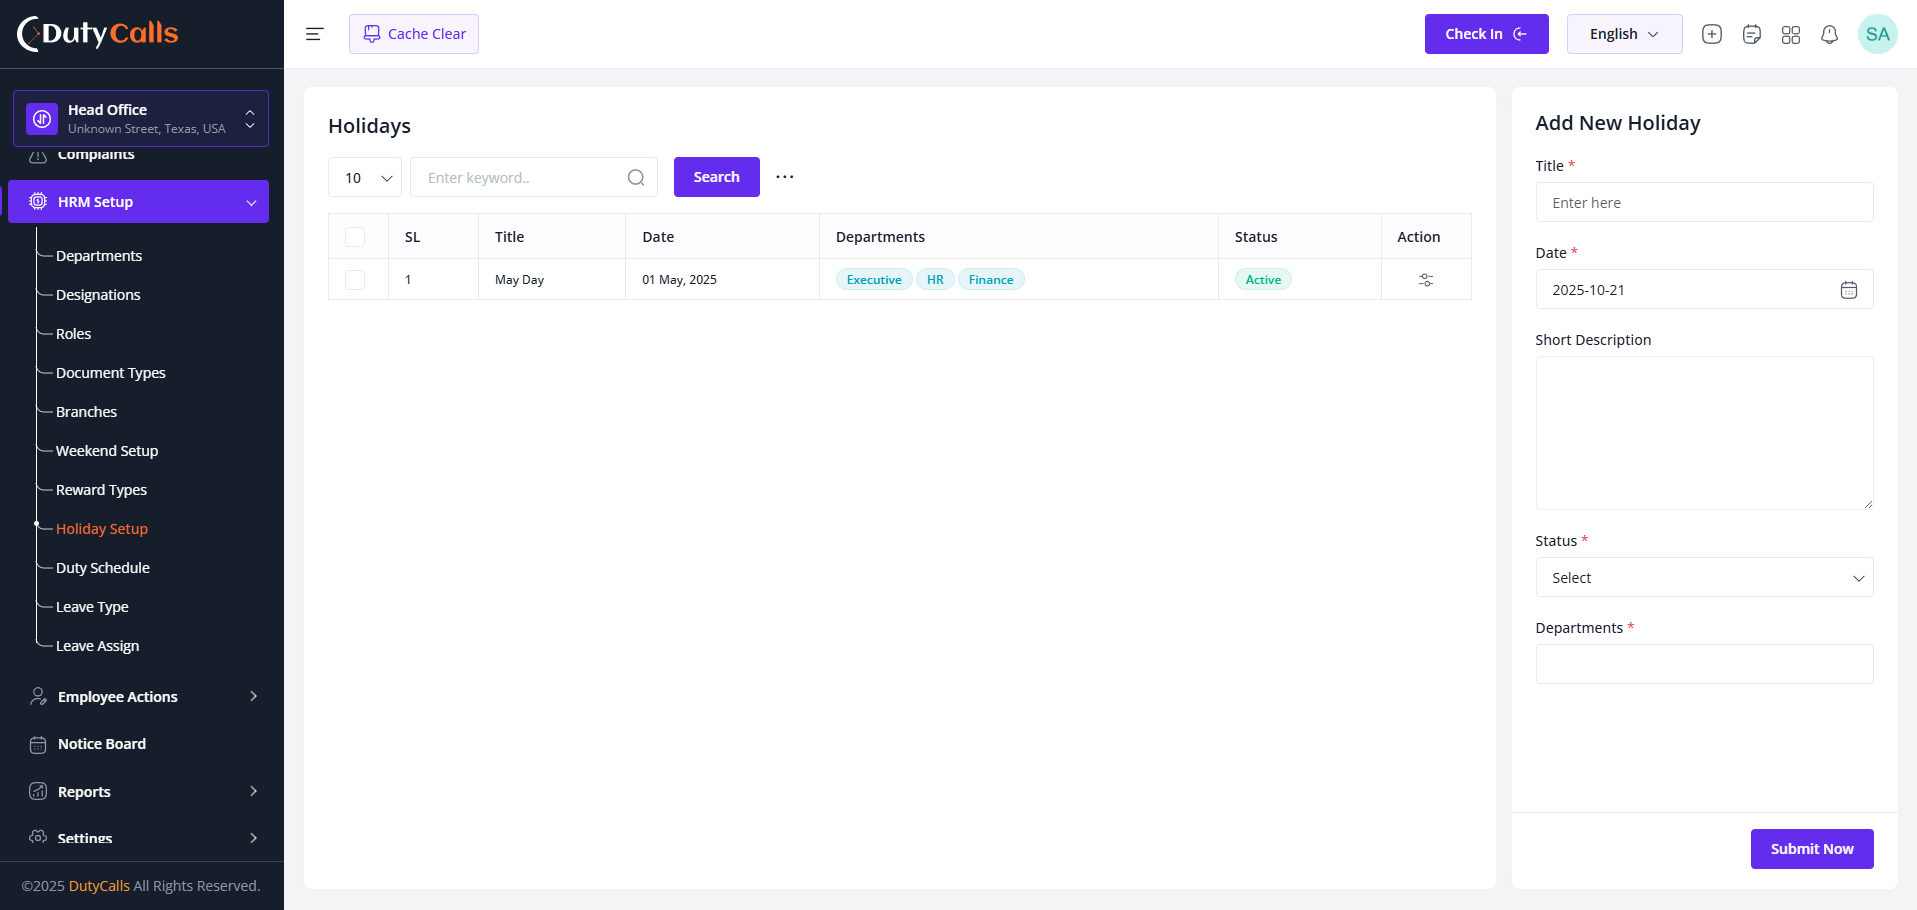
Holiday Setup
Create, manage, and configure public holidays, company holidays, and special observances for accurate attendance and payroll processing.
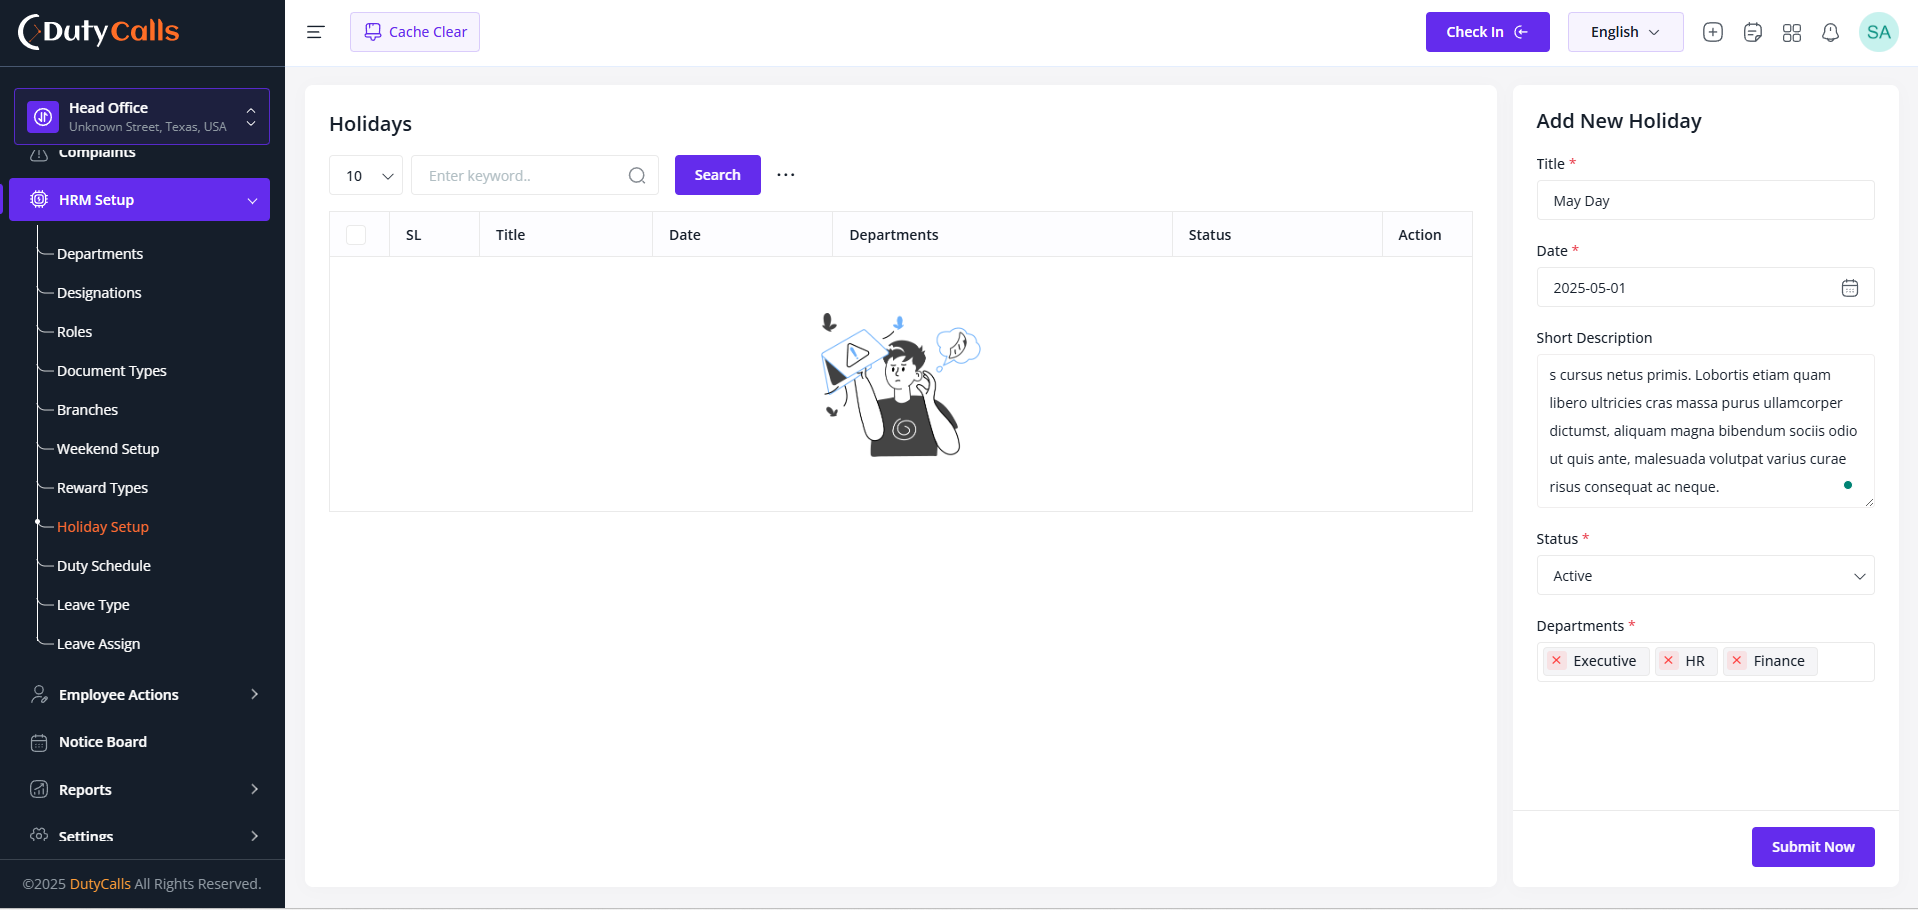
Click on the Gear icon to view the Setup option
Update the language value, that will auto save the changes
Common Holiday Types
- National Holidays: Independence Day, National Day, Constitution Day
- Religious Holidays: Christmas, Eid, Diwali, Chinese New Year
- Cultural Holidays: Labor Day, Mother's Day, Father's Day
- Company Holidays: Founder's Day, Company Anniversary, Team Building Days
- Regional Holidays: State-specific or province-specific observances
- Seasonal Holidays: Summer break, Winter holidays, Spring festival
- Emergency Holidays: Declared holidays for special circumstances
- Optional Holidays: Floating holidays that employees can choose to observe
Holiday Management Best Practices
- Plan and announce holidays well in advance for better workforce planning
- Consider local customs and religious diversity when setting up holidays
- Establish clear policies for holiday compensation and overtime rates
- Regularly review and update holiday calendars for accuracy
- Coordinate with payroll and attendance systems for seamless integration
- Maintain compliance with local labor laws and holiday regulations
Security & Compliance
Ensure that sensitive document types have appropriate access controls and encryption. Consider legal requirements for document retention and disposal, especially for personal and financial information.
Duty Schedule
Create, manage, and assign work schedules for employees across different departments and roles with comprehensive scheduling capabilities.This system manages working hours, shifts, breaks, and overtime policies, ensuring optimal workforce management and compliance with labor regulations.
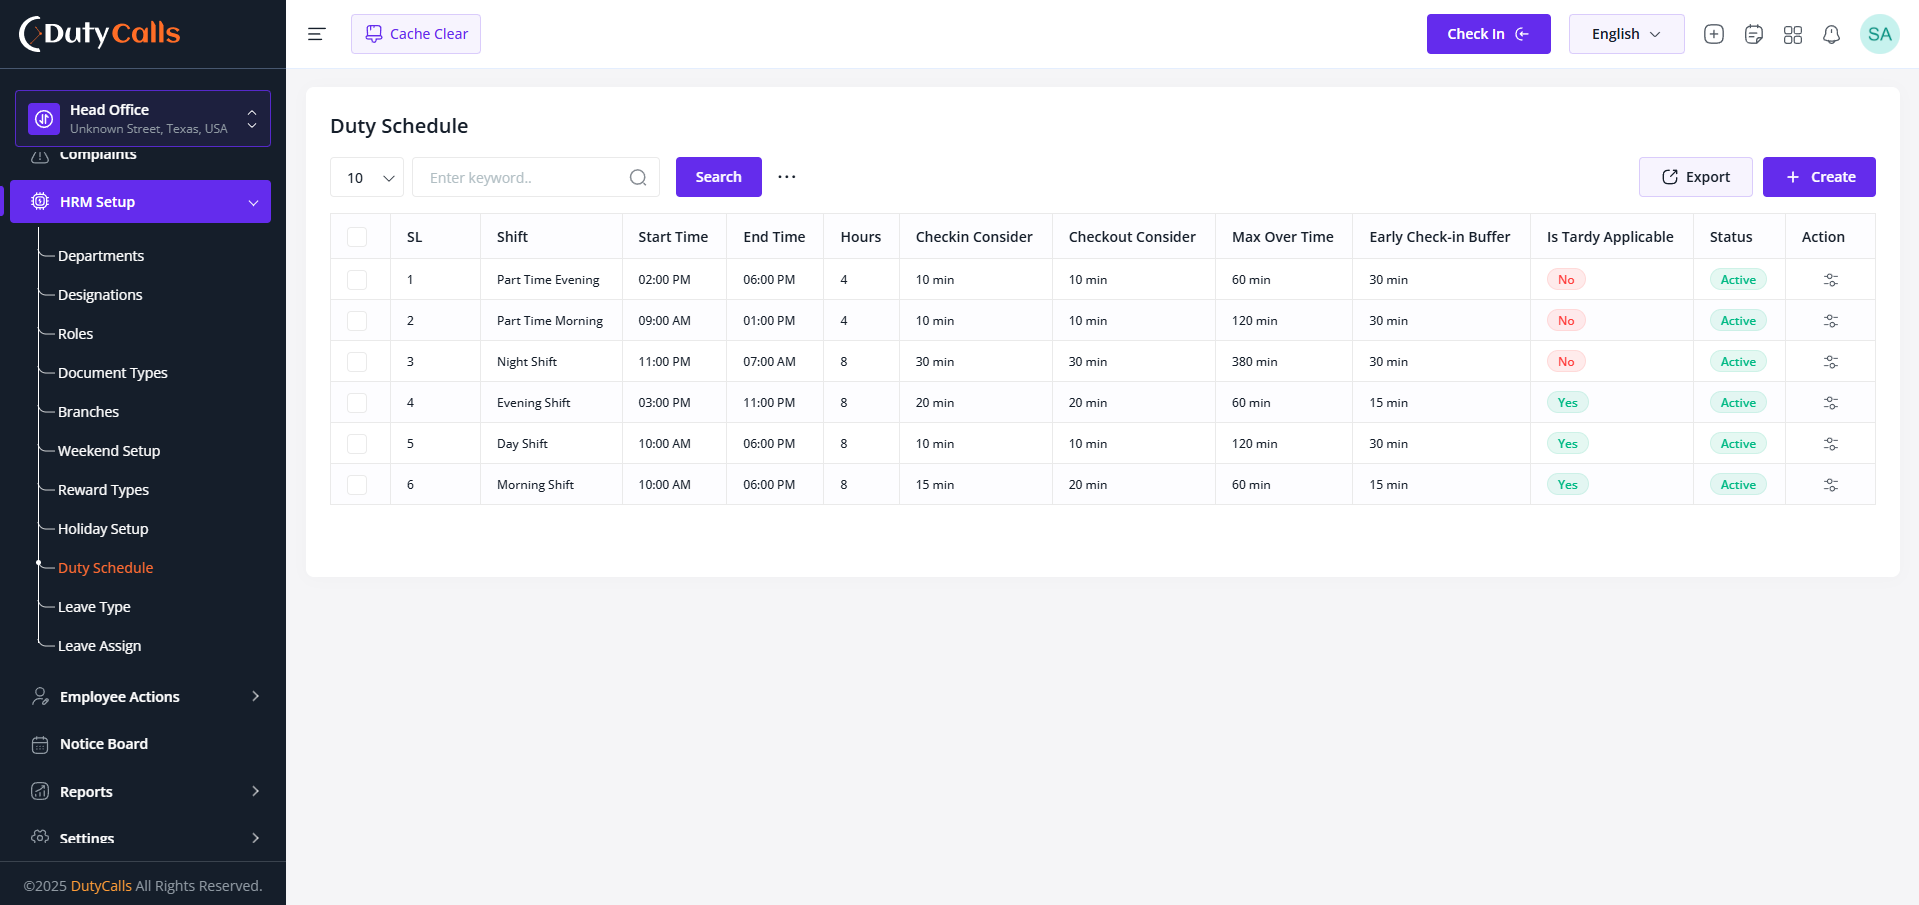
See all the duty schedules here, you can create a new one and edit the existing ones
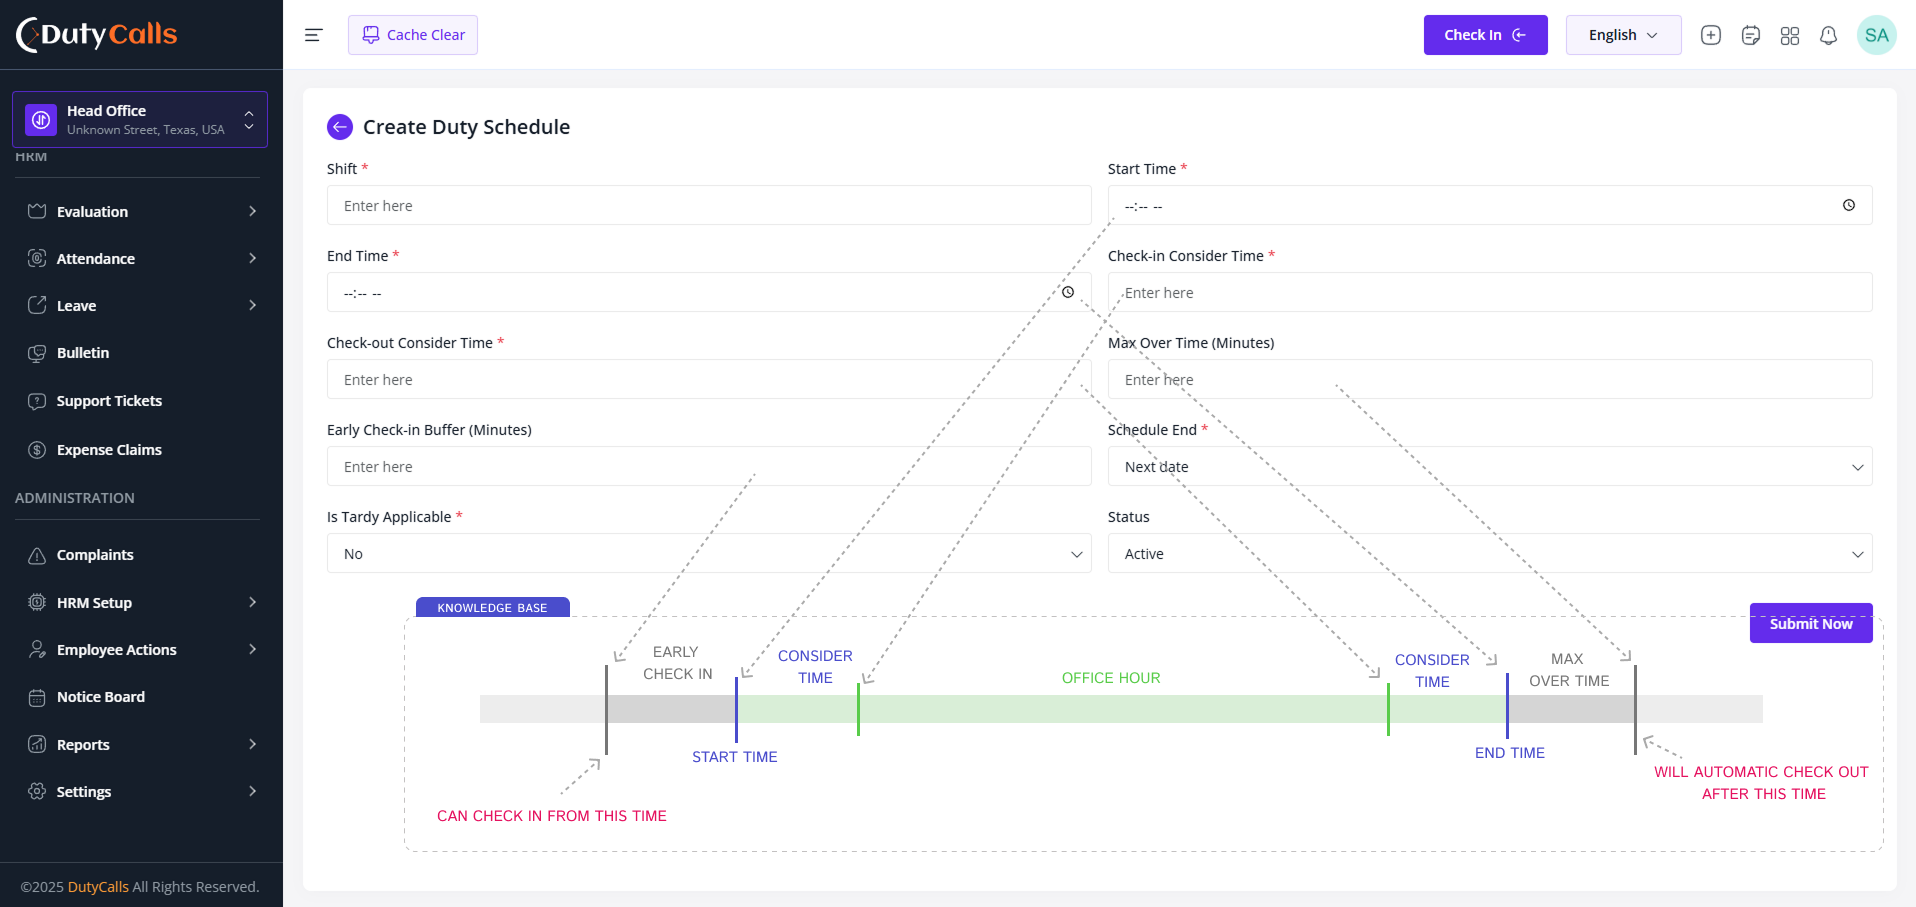
Create new duty schedule according to your needs. Follow the screenshot for better understanding
Compliance & Legal Considerations
Ensure that all duty schedules comply with local labor laws regarding maximum working hours, mandatory break times, and overtime regulations. Consider employee rights and work-life balance when designing schedules, and maintain proper records for legal compliance.
Leave Type
Create, configure, and manage different types of leave available to employees with specific rules, entitlements, and approval workflows.
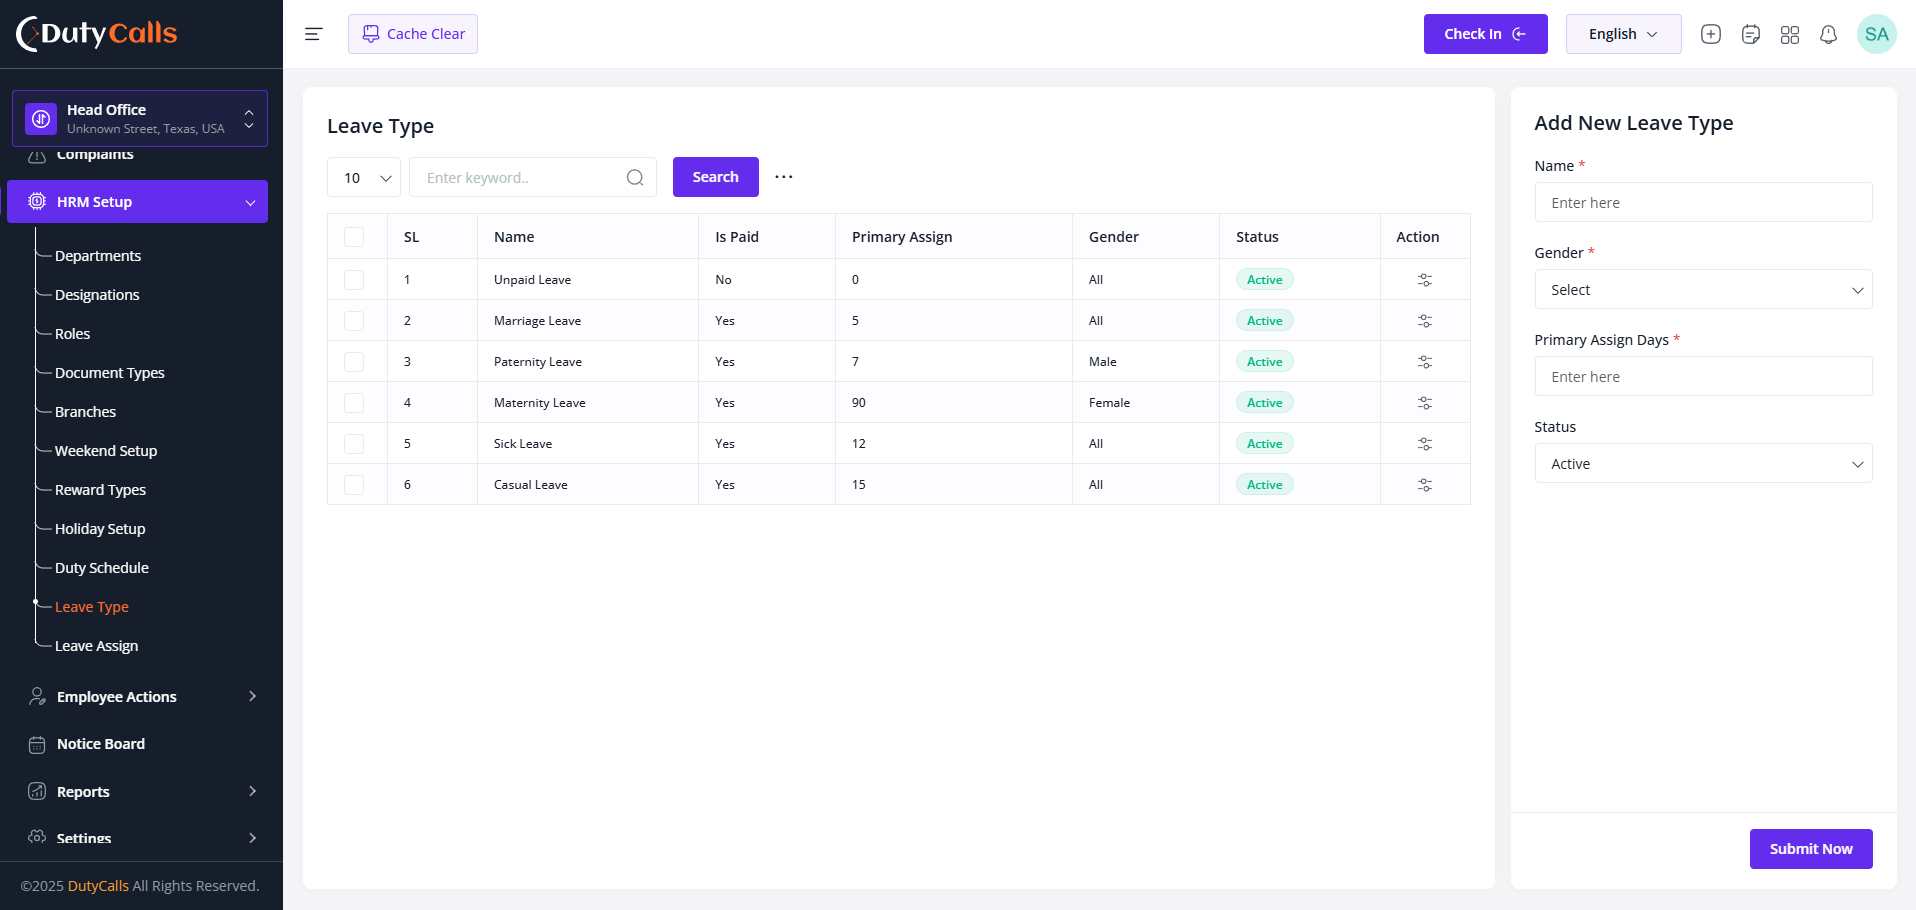
Click on the Gear icon to view the Setup option
Key Features
- Leave Type Creation: Create custom leave types with specific names and descriptions
- Entitlement Configuration: Set default leave balances and annual allocations
- Gender-Specific Leave: Create leave types specific to gender requirements
- Status Management: Enable or disable leave types as needed
Common Leave Types
- Annual Leave: Yearly vacation entitlements for rest and recreation
- Sick Leave: Medical leave for health-related absences
- Casual Leave: Short-term personal leave for urgent matters
- Maternity Leave: Extended leave for new mothers
- Paternity Leave: Leave entitlement for new fathers
- Emergency Leave: Urgent leave for unexpected family situations
- Study Leave: Educational leave for professional development
- Compensatory Leave: Time off compensation for overtime work
- Bereavement Leave: Leave for mourning and funeral arrangements
- Religious Leave: Leave for religious observances and festivals
Leave Management Best Practices
- Create clear and descriptive leave type names and policies
- Set realistic entitlement balances based on company policy
- Configure appropriate approval workflows for different leave types
- Regularly review and update leave policies for compliance
Legal Compliance
Ensure that your leave types comply with local labor laws and regulations. Consider mandatory leave requirements such as maternity leave, sick leave minimums, and public holiday entitlements as per your jurisdiction's employment laws.
Leave Assign
Our leave assign manages with department. So you have to assign leave to employee by department. Allocate leave balances to employees based on employment terms, company policies, and leave entitlements for proper work-life balance.
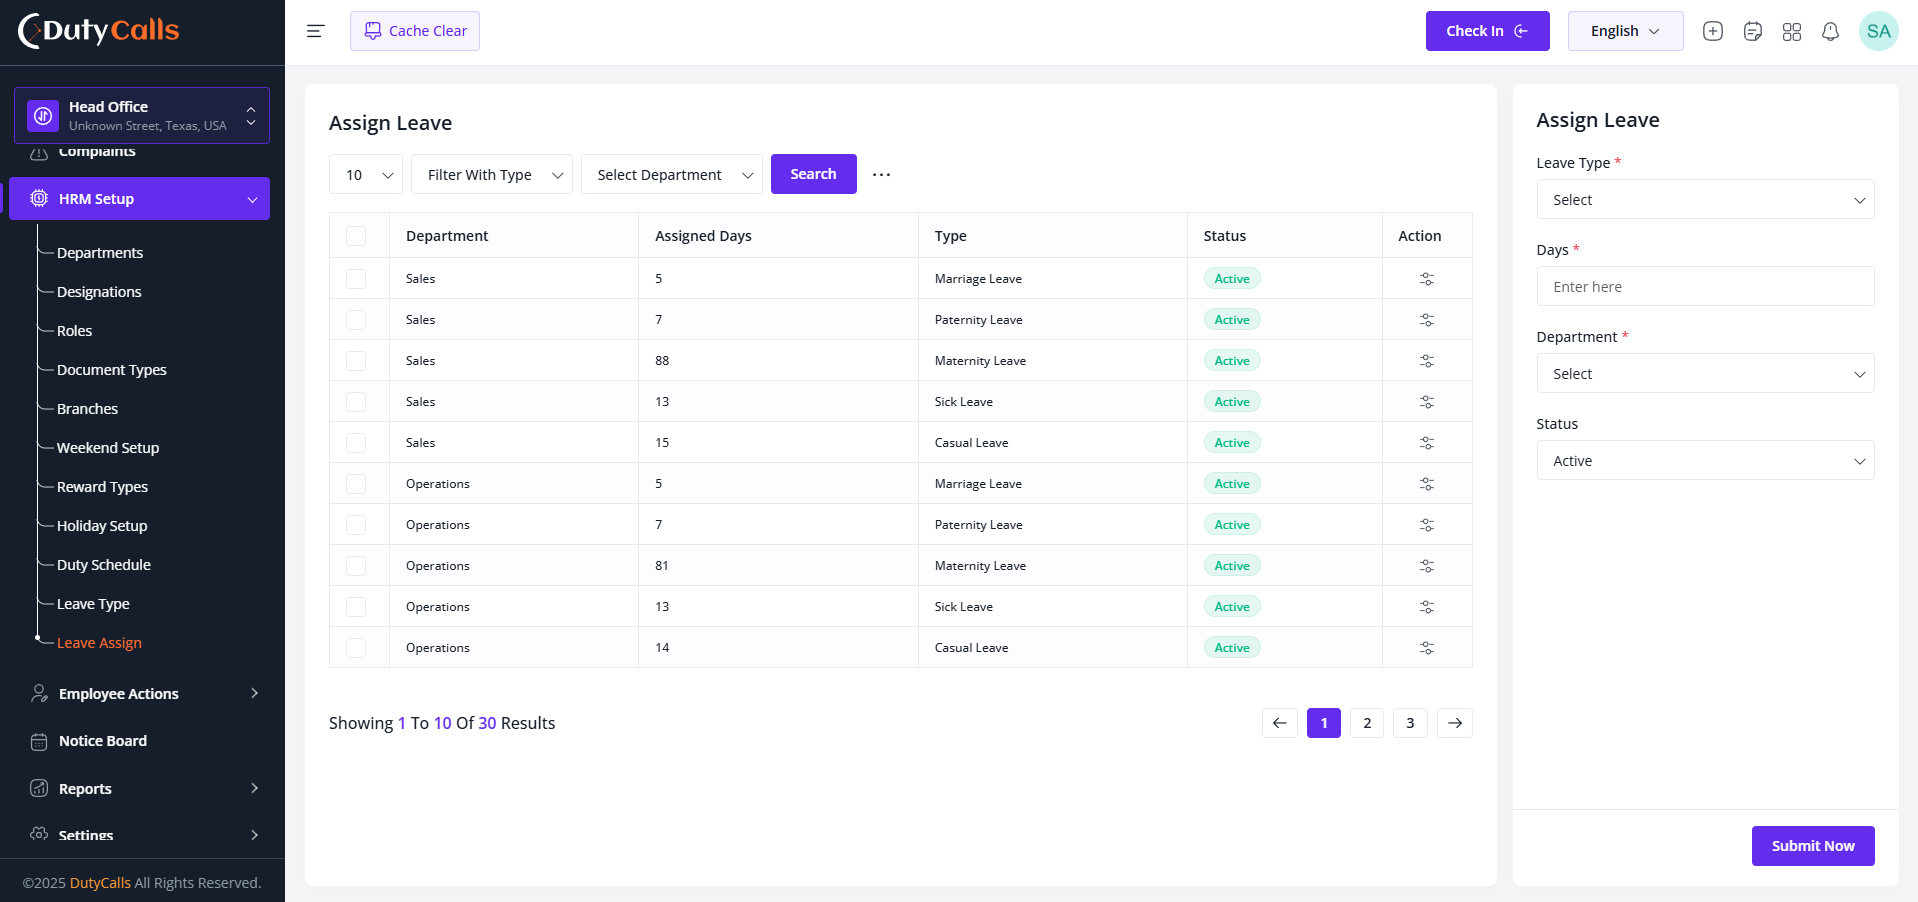
Click on the Gear icon to view the Setup option
Leave Assignment Best Practices
- Establish clear leave policies and entitlement criteria
- Consider probation periods when assigning leave to new employees
- Regularly review and update leave balances based on policy changes
- Maintain accurate records for audit and compliance purposes
- Communicate leave policies clearly to all employees
Compliance & Fairness
Ensure that leave assignments comply with local labor laws and company policies. Maintain fairness and consistency in leave allocation across all employees, considering their employment terms, tenure, and departmental requirements.
Role & Permissions
Master the role-based access control system in TrustedHRM. Learn how to create, manage, and assign roles with specific permissions to ensure secure and organized access to your HR system.
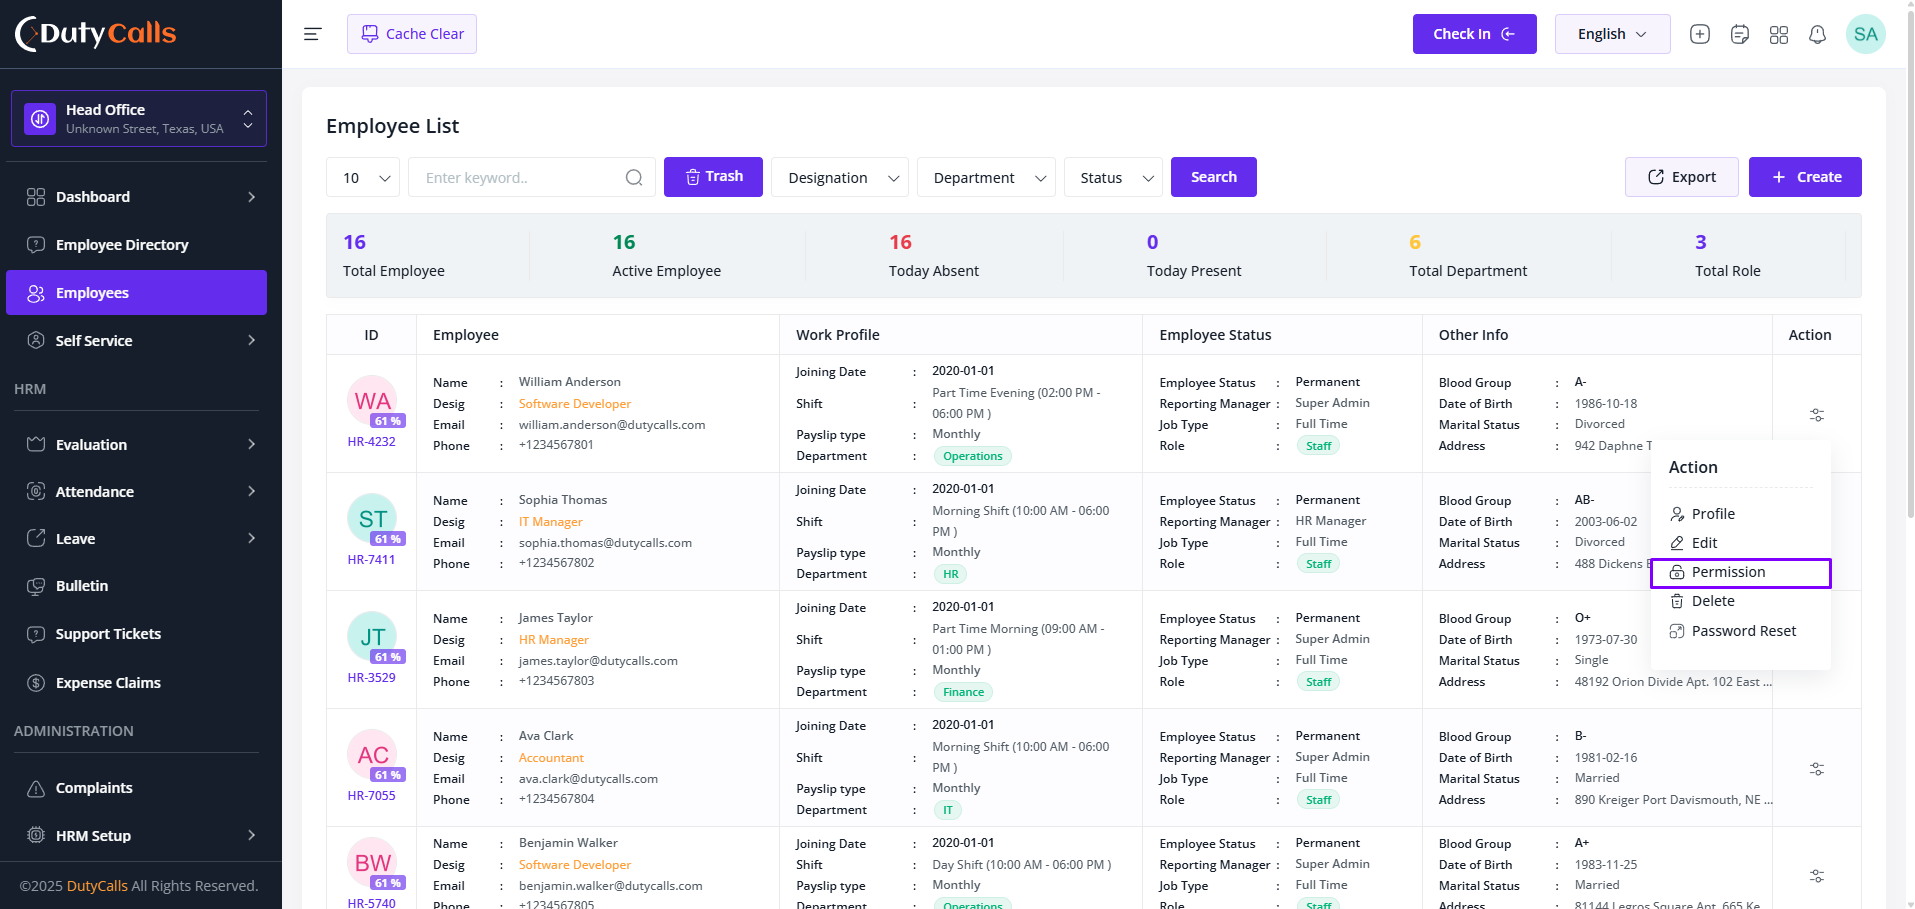
For updating a single User's permission then just update from users page
For updating a single role or it's all users permission then just update from roles page
Understanding Role-Based Access Control
TrustedHRM implements a comprehensive role-based access control (RBAC) system that allows you to:
- Define User Roles: Create custom roles tailored to your organizational hierarchy
- Set Granular Permissions: Control access to specific modules, features, and data
- Manage User Access: Assign and modify user permissions based on job responsibilities
- Maintain Security: Ensure data protection through structured access controls
- Audit Access: Track user activities and permission changes for compliance
Default System Roles
| Permission | Description | Recommendation | ||
|---|---|---|---|---|
| Staff | HR | Admin | ||
| Dashboard | ||||
| Employee > Dashboard > Admin | View Staff Dashboard | |||
| Employee > Dashboard > HR | View HR Dashboard | |||
| Employee > Dashboard > Staff | View Staff Dashboard | |||
| Employee Management | ||||
| Employee > Create | Create new employee records | |||
| Employee > Update | Modify employee information | |||
| Employee > Delete | Soft delete employee records | |||
| Employee > User Restore | Restore deleted employee accounts | |||
| Employee > Password Update | Update employee passwords | |||
| Employee > Permanent Delete | Permanently remove employee records | |||
| Employee > Employee List Read | View employee listings | |||
| Employee > Password Reset Mail | Send password reset emails | |||
| Employee > User Permission Update | Modify user permissions | |||
| Others > Employee Directory Read | Access employee directory | |||
| Others > Others Profile Visit | View other employee profiles | |||
| Support Tickets | ||||
| Self Service > Support Ticket > Create | Create support tickets | |||
| Self Service > Support Ticket > Delete | Delete own support tickets | |||
| Self Service > Support Ticket > See Ticket Requests | View all support tickets | |||
| Self Service > Support Ticket > Only Assigned Ticket Manage | Manage assigned tickets only | |||
| Expense Management | ||||
| Self Service > Expense Claim > Read | View expense claims | |||
| Self Service > Expense Claim > Create | Submit new expense claims | |||
| Self Service > Expense Claim > Update | Modify expense claims | |||
| Self Service > Expense Claim > Delete | Delete expense claims | |||
| Self Service > Expense Claim > Expense Claim Requests | Review and approve expense claims | |||
| Notes Management | ||||
| Self Service > Note > Read | View notes and memos | |||
| Self Service > Note > Create | Create new notes | |||
| Self Service > Note > Update | Edit existing notes | |||
| Self Service > Note > Delete | Delete notes | |||
| Attendance | ||||
| Attendance > Create | Create attendance entry | |||
| Attendance > Read | View attendance records | |||
| Attendance > Absent Attendance Read | View absence-specific attendance reports | |||
| Attendance > Manual Create | Manually create attendance entries | |||
| Attendance > See Others Attendance | View other employees' attendance | |||
| Leave Management | ||||
| Leave Management > Leave Type > Read | View leave type definitions | |||
| Leave Management > Leave Type > Create | Add new leave types | |||
| Leave Management > Leave Type > Update | Modify existing leave types | |||
| Leave Management > Leave Type > Delete | Remove leave types | |||
| Leave Management > Leave Assign > Read | View leave assignments/entitlements | |||
| Leave Management > Leave Assign > Create | Assign leave quotas to employees | |||
| Leave Management > Leave Assign > Update | Modify leave assignments | |||
| Leave Management > Leave Assign > Delete | Remove leave assignments | |||
| Leave Management > Leave Request > Read | View leave requests | |||
| Leave Management > Leave Request > Create | Submit a new leave request | |||
| Leave Management > Leave Request > Referrer | Manage request referrers | |||
| Leave Management > Leave Request > Delete | Delete leave requests | |||
| Leave Management > Leave Request > Approve | Approve leave requests | |||
| Leave Management > Leave Request > Reject | Reject leave requests | |||
| Leave Management > Leave Request > Refer | Refer leave requests to another approver | |||
| Weekend & Holiday Management | ||||
| Weekend & Holiday Management > Weekend > Read | View weekend configuration | |||
| Weekend & Holiday Management > Weekend > Update | Update weekend configuration | |||
| Weekend & Holiday Management > Holiday > Read | View holiday listings | |||
| Weekend & Holiday Management > Holiday > Create | Add new holidays | |||
| Weekend & Holiday Management > Holiday > Update | Modify holiday details | |||
| Weekend & Holiday Management > Holiday > Delete | Delete holiday entries | |||
| Weekend & Holiday Management > Schedule > Read | View work schedules | |||
| Weekend & Holiday Management > Schedule > Create | Create work schedules | |||
| Weekend & Holiday Management > Schedule > Update | Update work schedules | |||
| Weekend & Holiday Management > Schedule > Delete | Delete work schedules | |||
| Report | ||||
| Report > Leave Report | Generate leave summaries and details | |||
| Report > Tally Attendance Report | View attendance tally report | |||
| Report > Monthly Worksheet Report | Generate monthly worksheet summaries | |||
| Report > Monthly Timesheet Report | Generate monthly timesheet reports | |||
| Settings | ||||
| General Settings > Read | View overall system settings | |||
| General Settings > Update | Modify overall system settings | |||
| Addon Settings > Read | View addon configuration | |||
| Addon Settings > Update | Update addon configuration | |||
| Addon Management > Access | Enable/disable addons and manage licenses | |||
| Branding Settings > Read | View branding configuration (logo, colors) | |||
| Branding Settings > Update | Modify branding (logo, colors) | |||
| Integration Settings > Read | View third-party integration settings | |||
| Integration Settings > Update | Update third-party integration settings | |||
| Currency > Read | View currency list and default currency | |||
| Currency > Create | Add new currency | |||
| Currency > Update | Modify currency settings | |||
| Currency > Delete | Remove a currency | |||
| Language > Read | View available languages | |||
| Language > Create | Add a new language | |||
| Language > Update | Modify language strings/translations | |||
| Language > Delete | Remove a language | |||
| Language > Setup | Configure language settings | |||
| Language > Make Default | Set default language | |||
| Communication > Communication Settings > Read | View email/SMS configuration | |||
| Communication > Communication Settings > Update | Update email/SMS configuration | |||
| Activation > Read | View activation/license status | |||
| Activation > Update | Activate/deactivate license | |||
| Credential | ||||
| Credential > Read | View stored credentials or keys | |||
| Credential > Create | Add new credential entries | |||
| Credential > Update | Modify existing credentials | |||
| Credential > Delete | Remove credential entries | |||
| Complain | ||||
| Complain > Read | View complaints | |||
| Complain > Create | Submit a complaint | |||
| Complain > Update | Edit complaint details | |||
| Complain > Delete | Delete complaint entries | |||
| Complain > Handel Complain | Handle/resolve complaints | |||
| Verbal Warning | ||||
| Verbal Warning > Read | View verbal warnings | |||
| Verbal Warning > Create | Issue a verbal warning | |||
| Verbal Warning > Update | Modify verbal warning details | |||
| Verbal Warning > Delete | Remove verbal warnings | |||
| Asset | ||||
| Asset > Asset Category > Read | View asset categories | |||
| Asset > Asset Category > Create | Add new asset category | |||
| Asset > Asset Category > Update | Modify asset category | |||
| Asset > Asset Category > Delete | Delete asset category | |||
| Asset > Asset Manage > Read | View assets | |||
| Asset > Asset Manage > Create | Add new assets | |||
| Asset > Asset Manage > Update | Modify assets | |||
| Asset > Asset Manage > Delete | Delete assets | |||
| Asset > Asset Manage > Assign | Assign assets to employees | |||
| Asset > Asset History > Read | View asset assignment and change history | |||
| Employee Documents | ||||
| Employee Documents > Official Document Type > Read | View official document types | |||
| Employee Documents > Official Document Type > Create | Add new official document type | |||
| Employee Documents > Official Document Type > Update | Modify official document type | |||
| Employee Documents > Official Document Type > Delete | Delete official document type | |||
| Employee Documents > Official Document Request > Read | View own official document requests | |||
| Employee Documents > Official Document Request > Read All | View all official document requests | |||
| Employee Documents > Official Document Request > Create | Submit an official document request | |||
| Employee Documents > Official Document Request > Update | Modify an official document request | |||
| Employee Documents > Official Document Request > Delete | Delete an official document request | |||
| Employee Documents > Employee Documents > Read | View employee documents | |||
| Employee Documents > Employee Documents > Create | Upload/add employee documents | |||
| Employee Documents > Employee Documents > Update | Modify employee document details | |||
| Employee Documents > Employee Documents > Delete | Delete employee documents | |||
| Profile Menus | ||||
| Profile Menus > Attendance Profile > Read | View attendance section in profile | |||
| Profile Menus > Contract Profile > Read | View contract section in profile | |||
| Profile Menus > Notice Profile > Read | View notice section in profile | |||
| Profile Menus > Html Component > Read | View HTML components in profile | |||
| Profile Menus > Duty Calendar > Read | View duty calendar in profile | |||
| Employee Performance | ||||
| Employee Performance > Performance > Read | View performance records | |||
| Employee Performance > Performance > Create | Create performance records | |||
| Employee Performance > Performance > Update | Update performance records | |||
| Employee Performance > Performance > Delete | Delete performance records | |||
| Employee Performance > Award Type > Read | View award types | |||
| Employee Performance > Award Type > Create | Create award types | |||
| Employee Performance > Award Type > Update | Update award types | |||
| Employee Performance > Award Type > Delete | Delete award types | |||
| Employee Performance > Award > Read | View awards | |||
| Employee Performance > Award > Create | Create awards | |||
| Employee Performance > Award > Update | Update awards | |||
| Employee Performance > Award > Delete | Delete awards | |||
| Bulletin | ||||
| Bulletin > Bulletin > Read | View bulletin list | |||
| Bulletin > Bulletin > Create | Create bulletins | |||
| Bulletin > Bulletin > Update | Update bulletins | |||
| Bulletin > Bulletin > Delete | Delete bulletins | |||
Security Best Practices
- Follow the principle of least privilege - grant only necessary permissions
- Regularly review and audit user roles and permissions
- Use department-based access controls for data segregation
Important Considerations
- Always test permission changes in a non-production environment first
- Maintain backup admin access to prevent system lockouts
- Consider compliance requirements when designing role structures
Add Employees
Learn how to efficiently add and manage employee records in TrustedHRM. This comprehensive guide covers all aspects of employee onboarding and profile management.

Goto the Employee page and click on Create
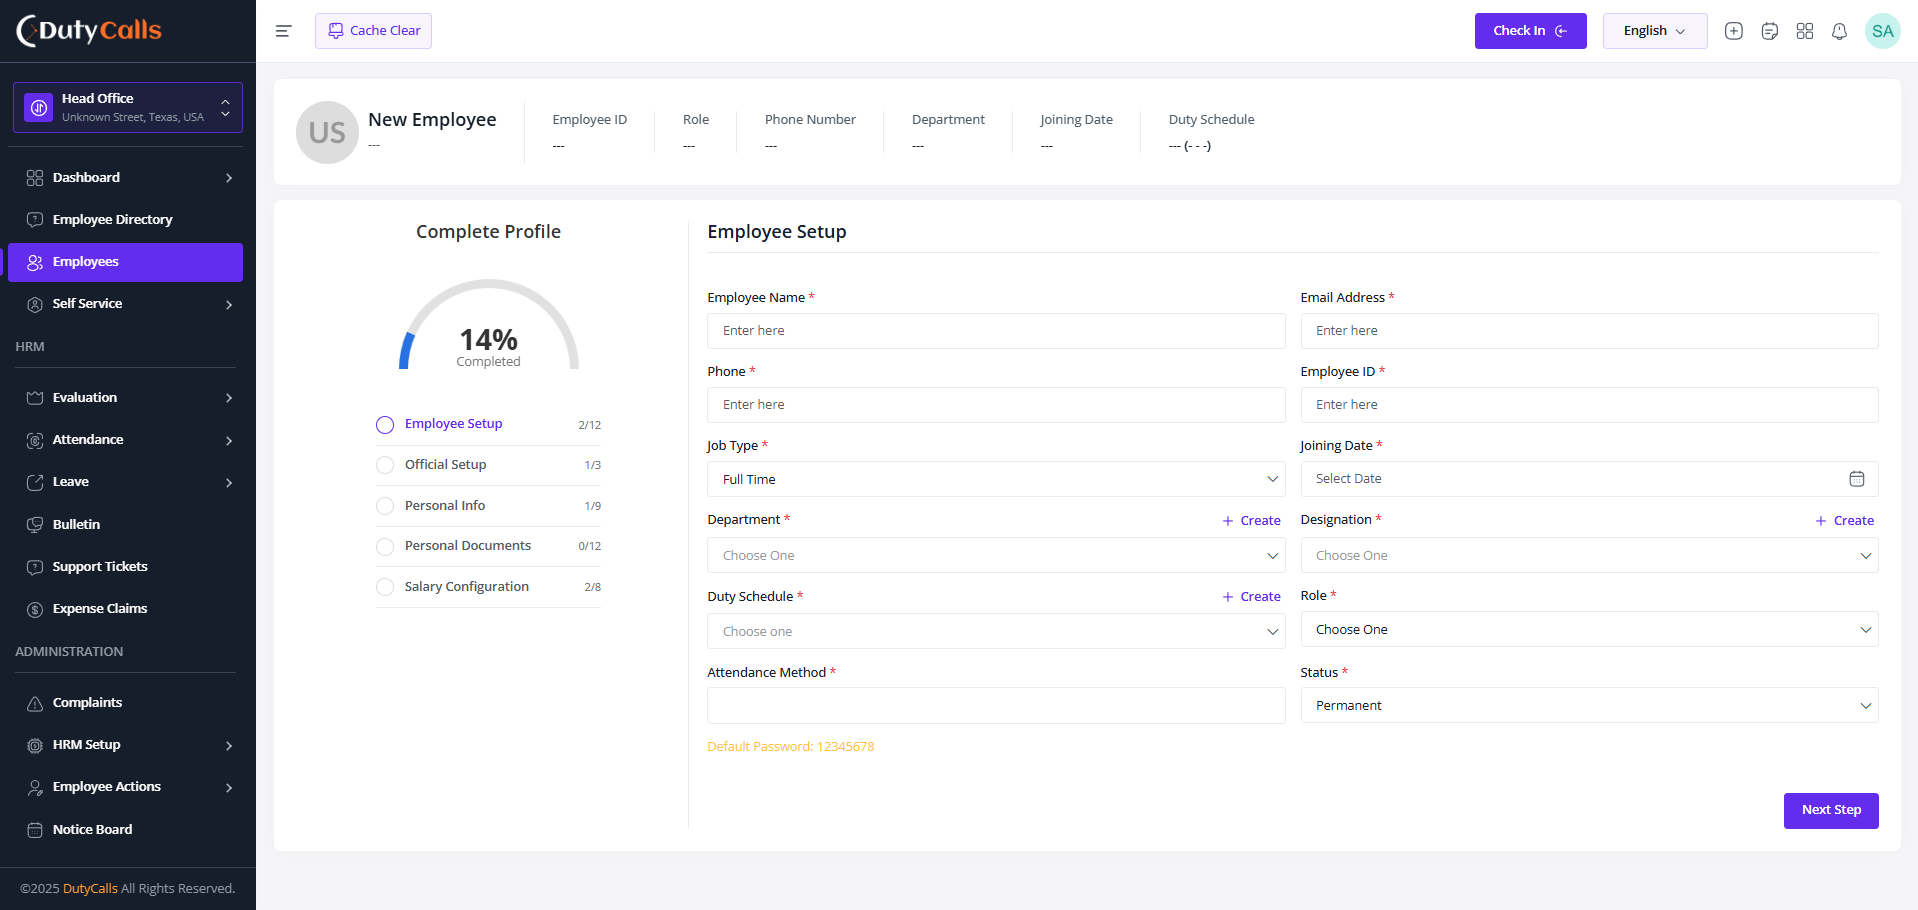
Add Employee information
Setup Steps
- Employee Setup
- Official Setup
- Personal Info
- Personal Documents
- Salary Configuration
Attention
Must complete Official Setup for smooth Employee Timezone, Attendance and Leave Management
Best Practices
- Verify all employee information before finalizing registration
- Ensure all required documents are collected and uploaded
- Set up proper reporting hierarchies from the start
- Configure appropriate user permissions based on roles
- Send welcome emails with login credentials securely
Data Privacy
Ensure compliance with data protection regulations when collecting and storing employee information. Implement proper access controls and maintain data security standards throughout the employee lifecycle.
Apply For Leave
Streamline your leave application process with TrustedHRM' intuitive leave management system. Learn how employees can request time off and managers can approve or reject applications efficiently.
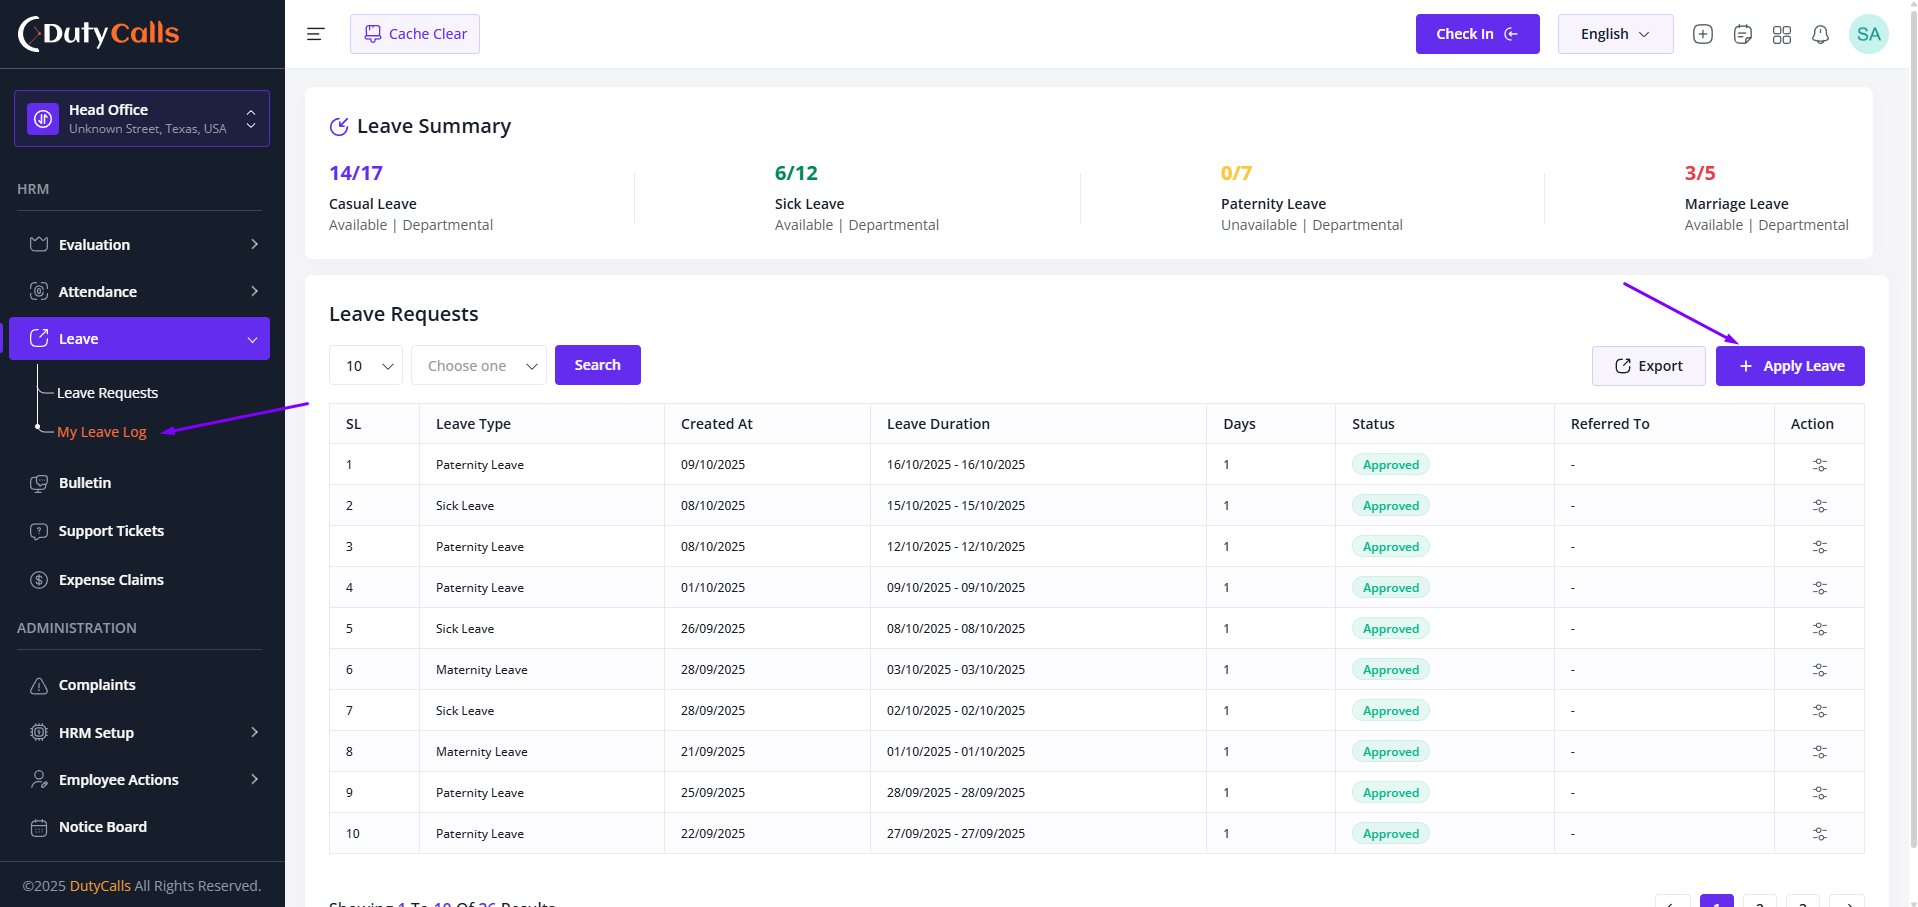
All can see their applied leaves on My Leave Log. From here they can apply for leave
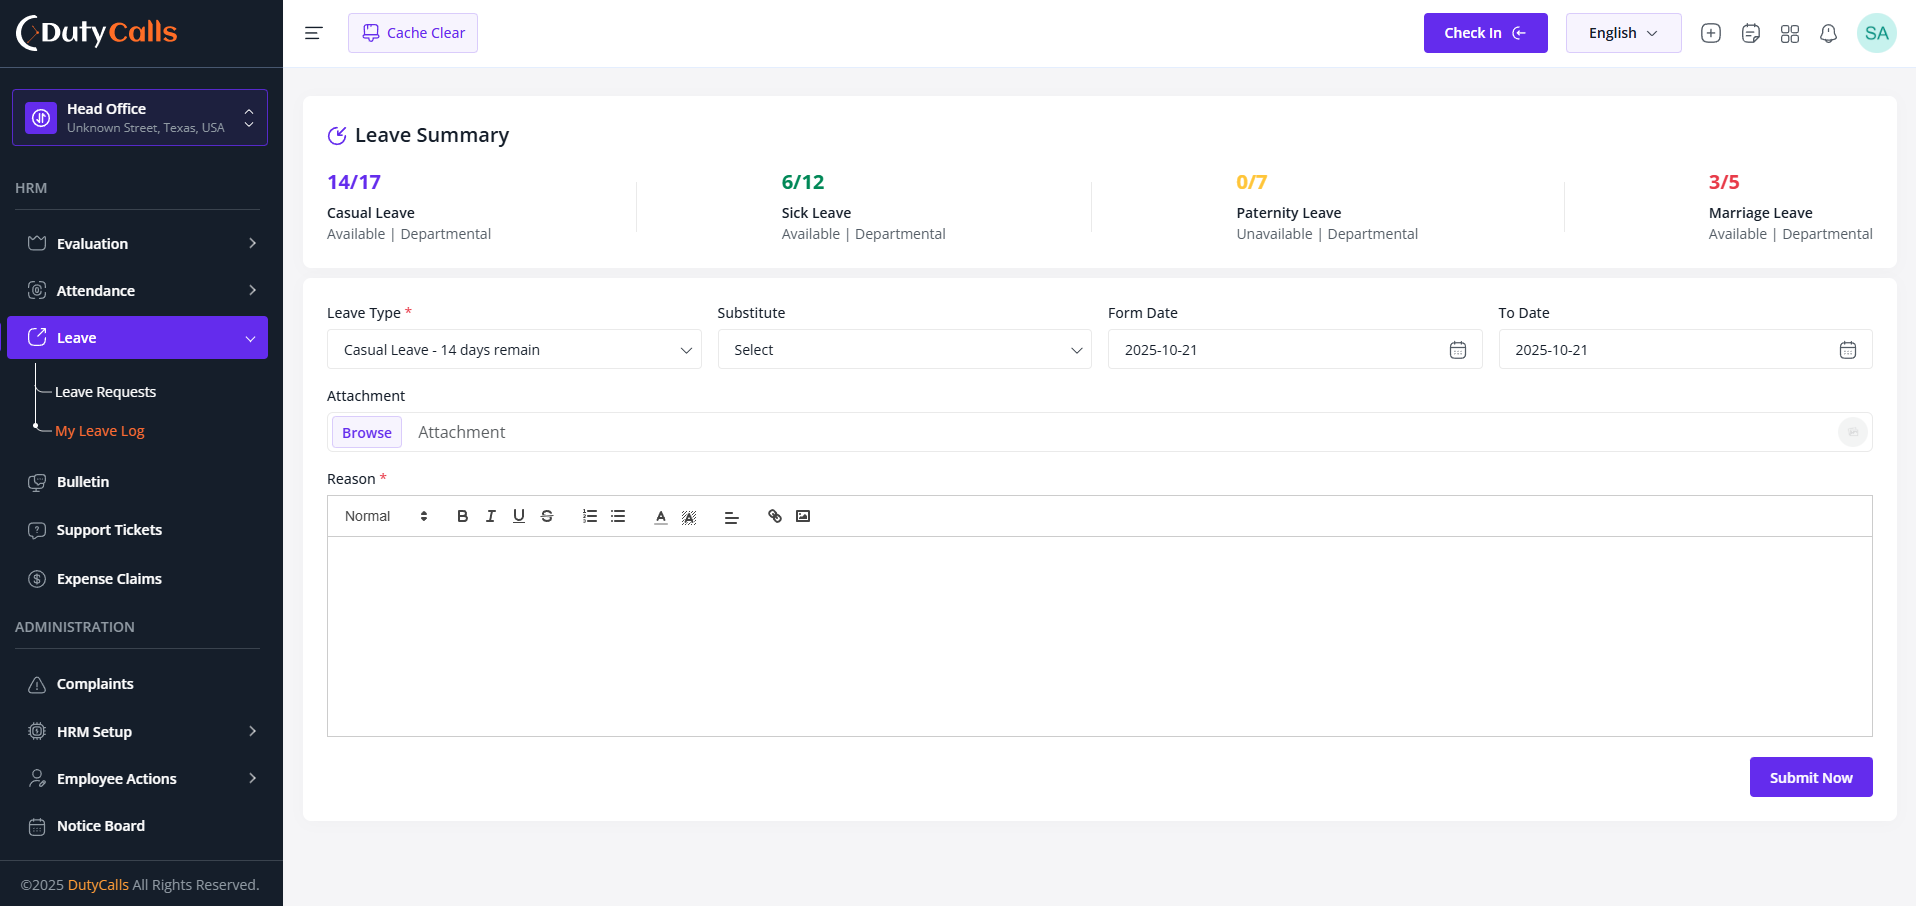
Apply Leave with required details. Select your substitute.
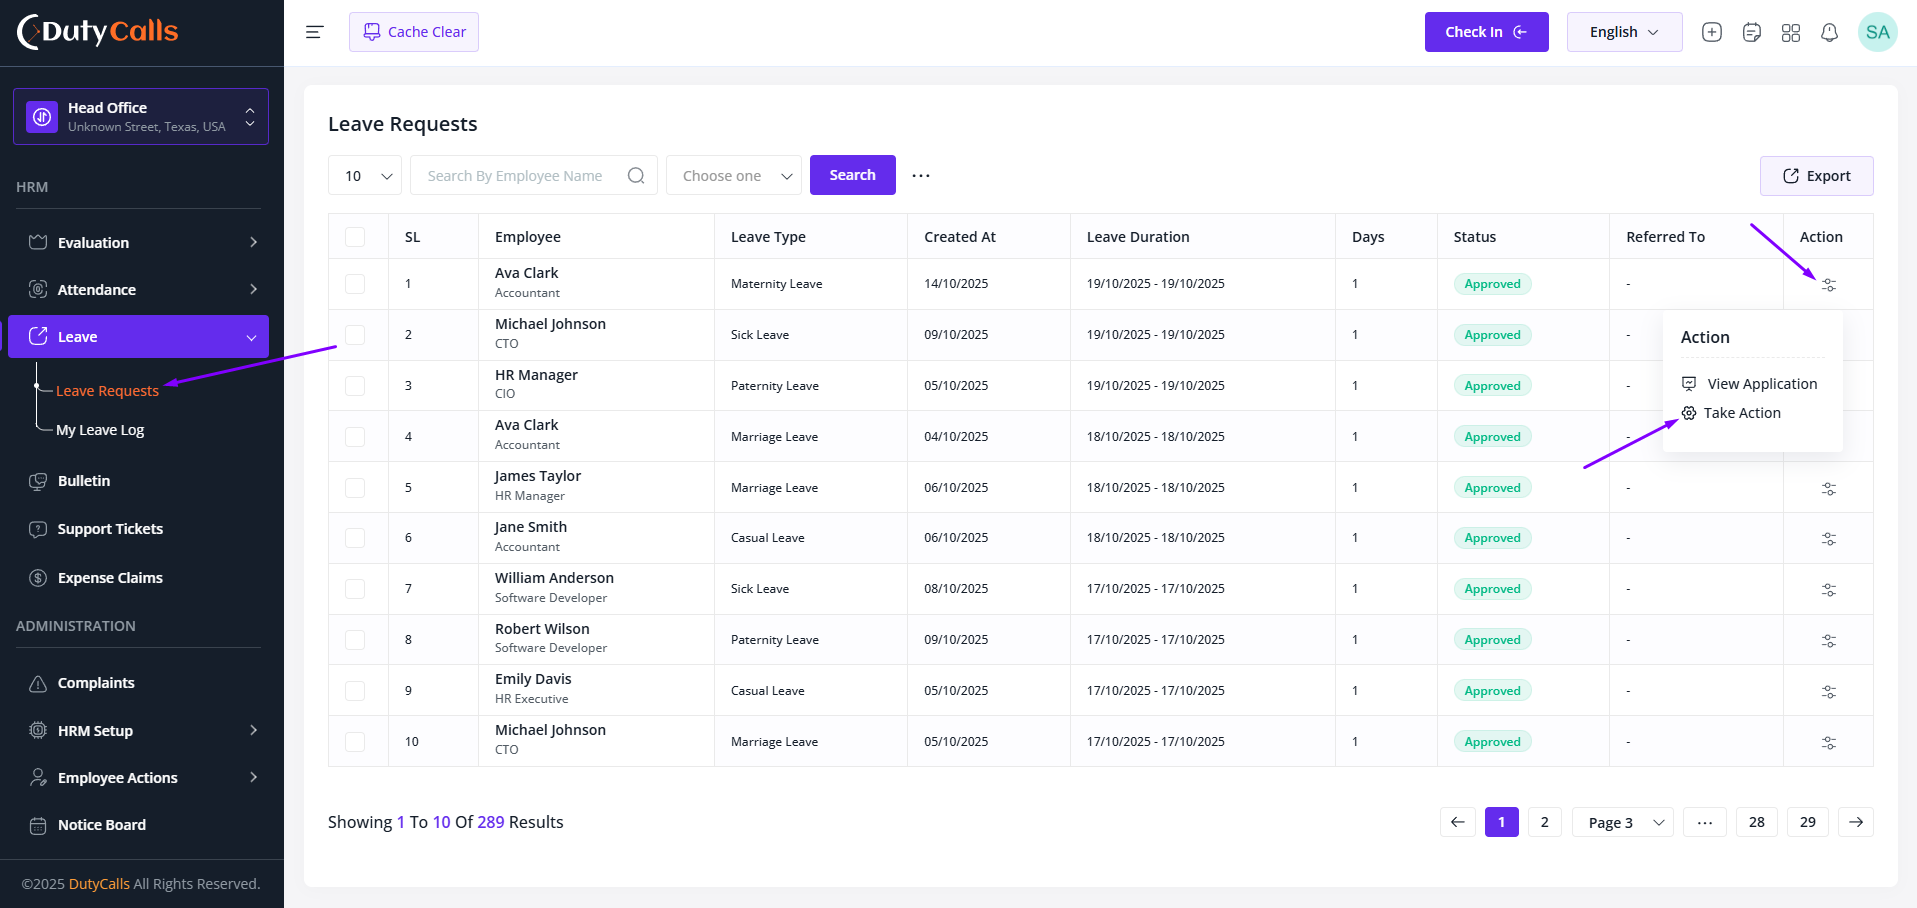
Employees Manager will get the notification and Leave Request on Leave Requests
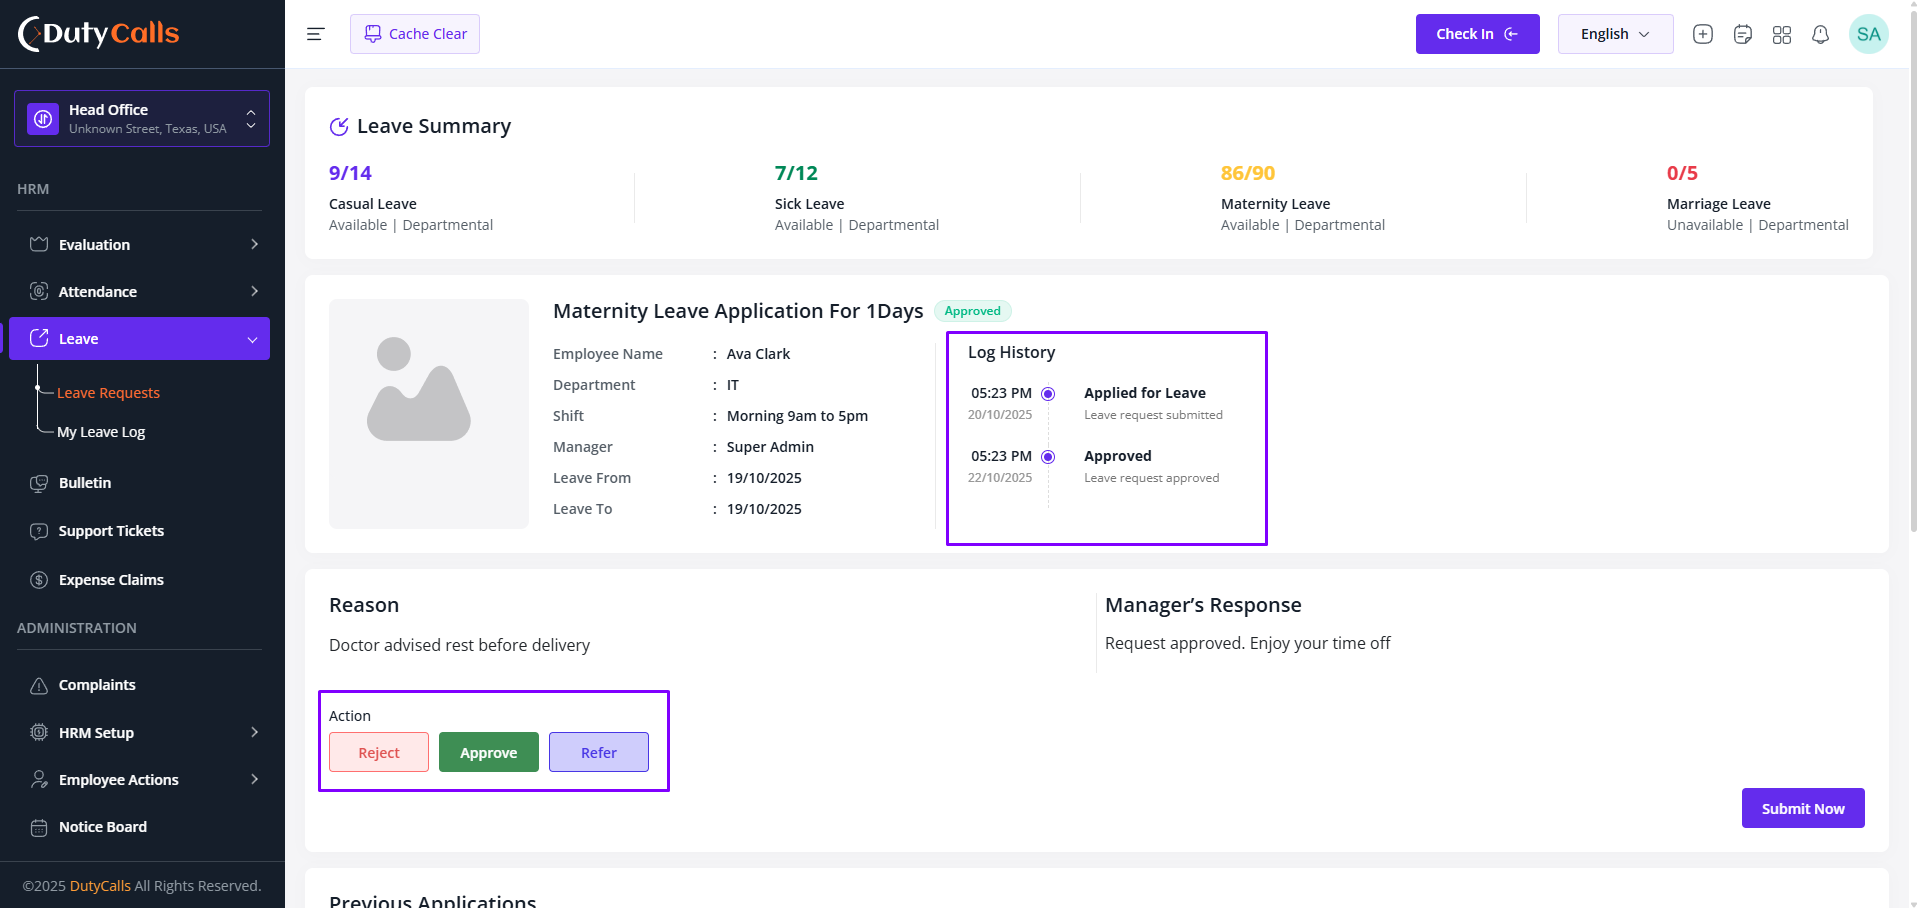
Take action on Leave Request, Manager can Accept, Reject or Refer to another person. Referred user will see the request on the Leave Requests by that he also can take action on it. Every Action will be visible to the Log History
Leave Application Workflow
The leave application process in TrustedHRM is designed for simplicity and transparency:
- Application Submission: Select leave type, dates, and provide reason for leave
- Manager Review: Automatic routing to his manager. Manager can be updated from Employee > Click on "Action" and then click on "Edit" of the User > Office Setup > Manager
- Approval Process: Multi-level approval workflows with email
notifications
- Accept: Leave will be approved
- Reject: Leave will be rejected
- Refer: Leave will be referred to another person
- Balance Tracking: Real-time leave balance updates and accrual calculations
Leave Types & Policies
- Annual Leave / Vacation Days
- Sick Leave with medical certificate requirements
- Maternity/Paternity Leave
- Emergency Leave
- Compensatory Off (Comp Off)
- Work From Home requests
- Half-day and partial day leave options
- Custom leave types based on company policy
Smart Features
- Holiday calendar integration to avoid conflicts
- Team availability checker before applying
- Automatic calculation of working days vs. calendar days
- Mobile app support for on-the-go applications
- Recurring leave pattern setup (weekly offs, etc.)
Configuration Tips
Set up leave policies that align with your company's HR guidelines. Configure approval hierarchies, carry-forward rules, and encashment policies to match your organizational structure and compliance requirements.
Bulletin & Notice
Keep your organization informed and engaged with TrustedHRM' powerful communication tools. Create, manage, and distribute company-wide announcements, notices, and important updates effectively.
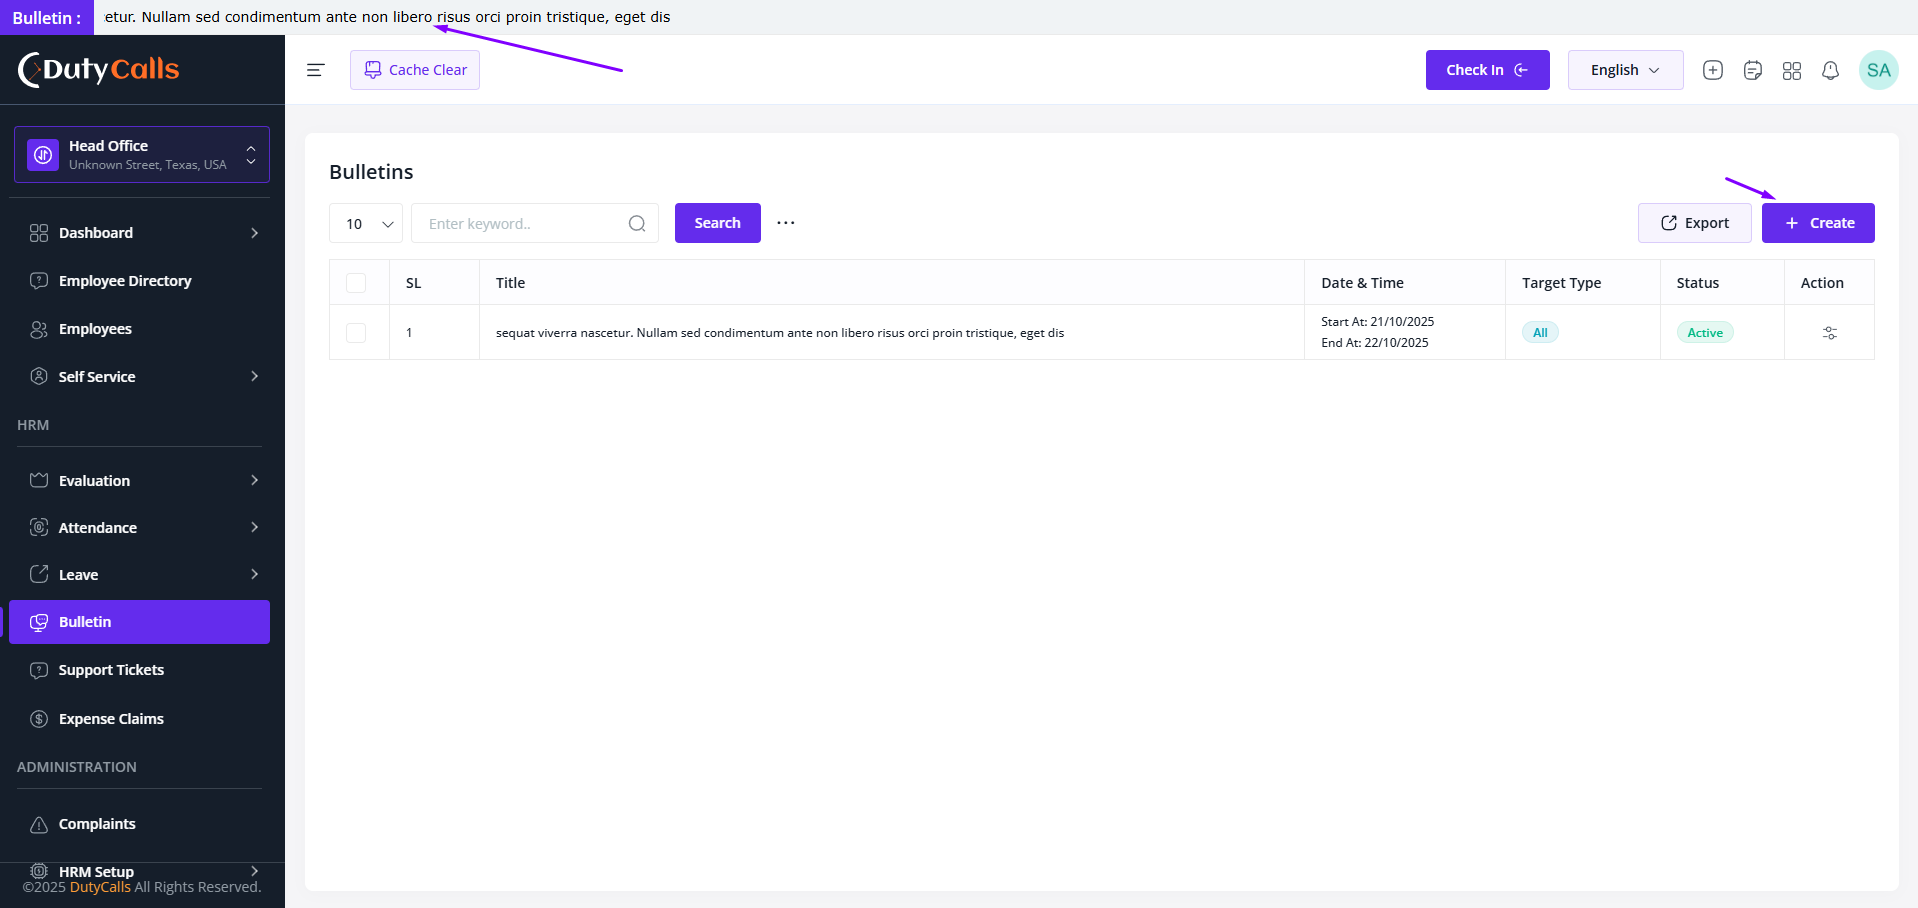
Create bulletin notice for your organization
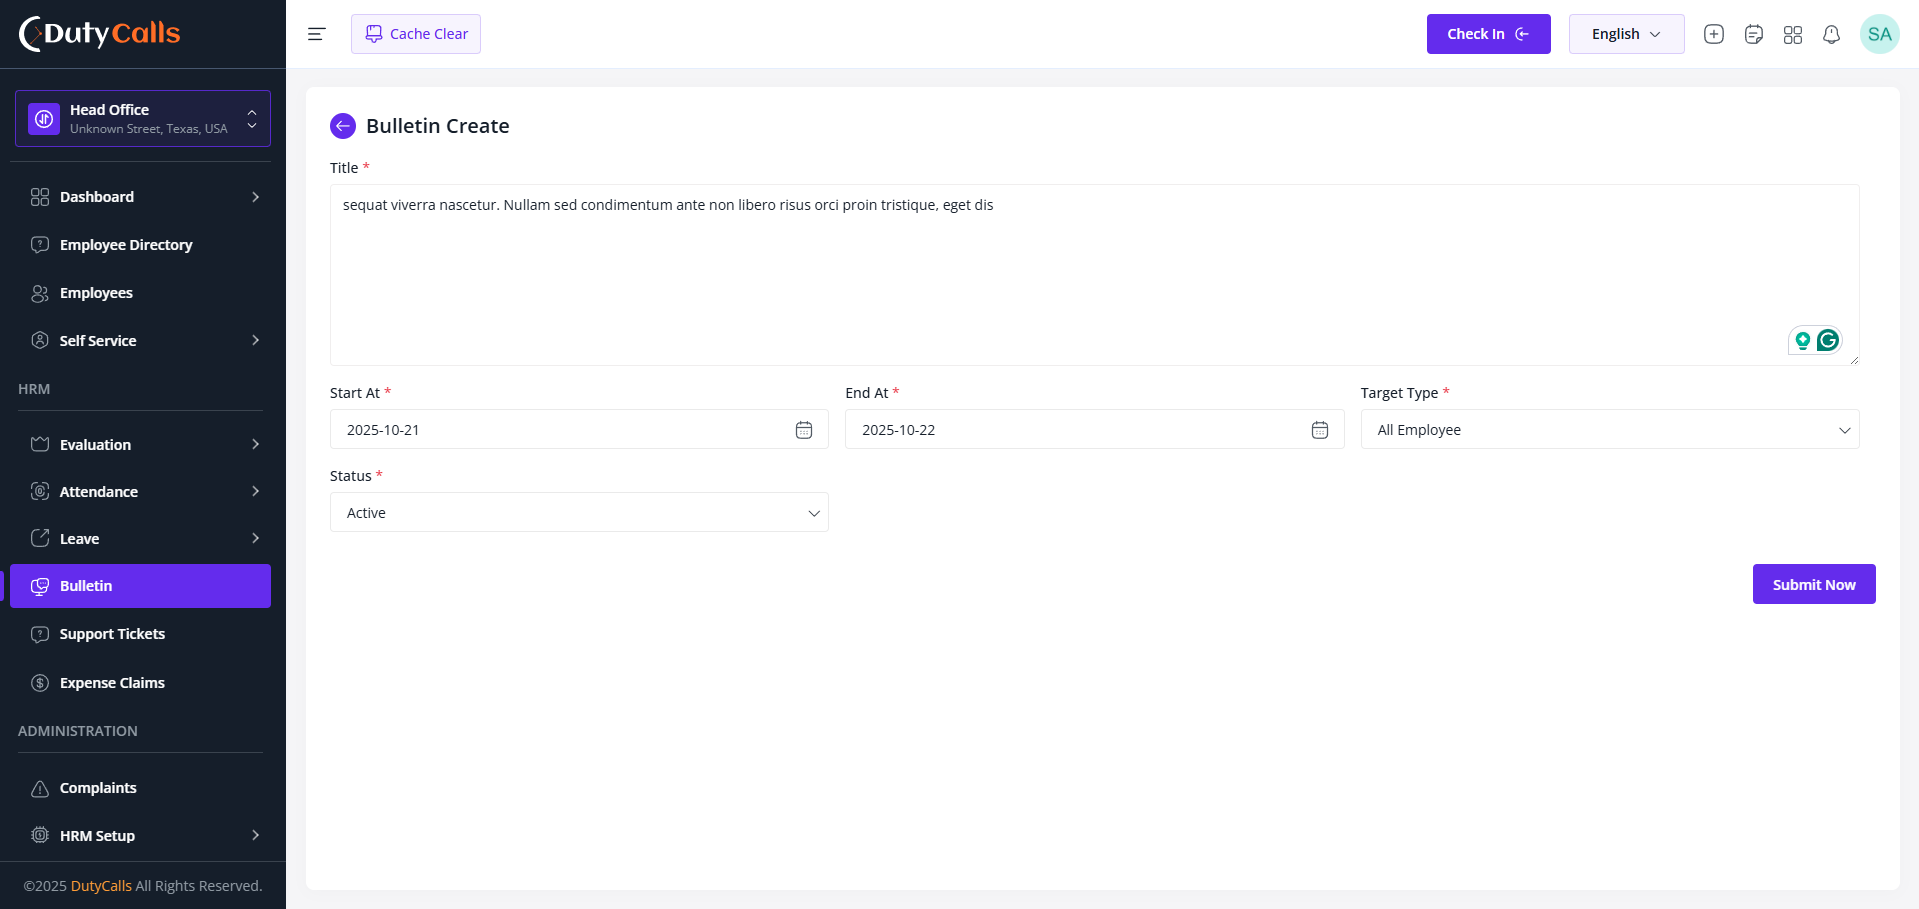
Create with required information
Communication Features
TrustedHRM provides comprehensive tools for organizational communication:
- Company Announcements: Broadcast important news and updates to all employees
- Department Notices: Target specific teams or departments with relevant information
- Policy Updates: Distribute HR policies, procedures, and guidelines
- Event Notifications: Announce company events, training sessions, and meetings
- Emergency Alerts: Send urgent communications with priority flags
Engagement Features
- Employee polls and surveys integration
- Like, comment, and share functionalities
- Push notifications for mobile users
- Email digest options for important updates
- Social wall for casual team interactions
Content Guidelines
Maintain professional communication standards and ensure all content aligns with company values and policies. Consider cultural sensitivity and accessibility when creating notices for diverse teams.
Support Ticket
Empower employees with comprehensive self-service capabilities in TrustedHRM. Reduce administrative overhead while giving staff the tools they need to manage their own HR-related tasks independently.
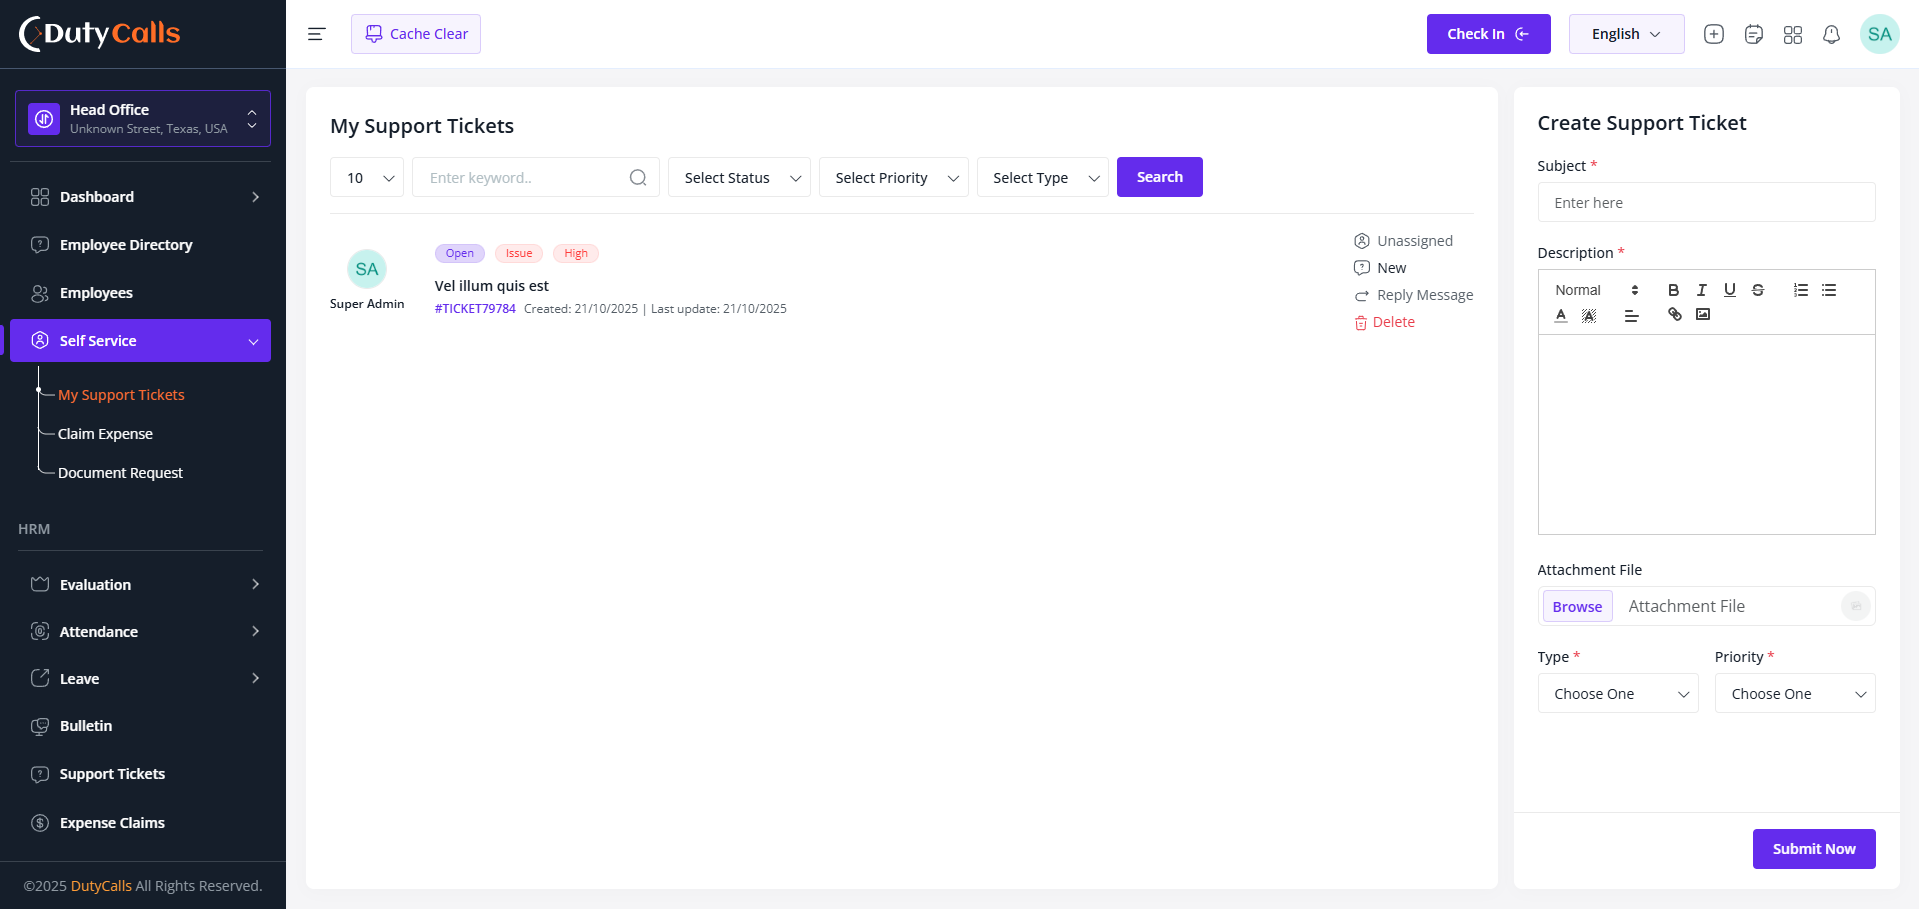
Employee can make support ticket from here
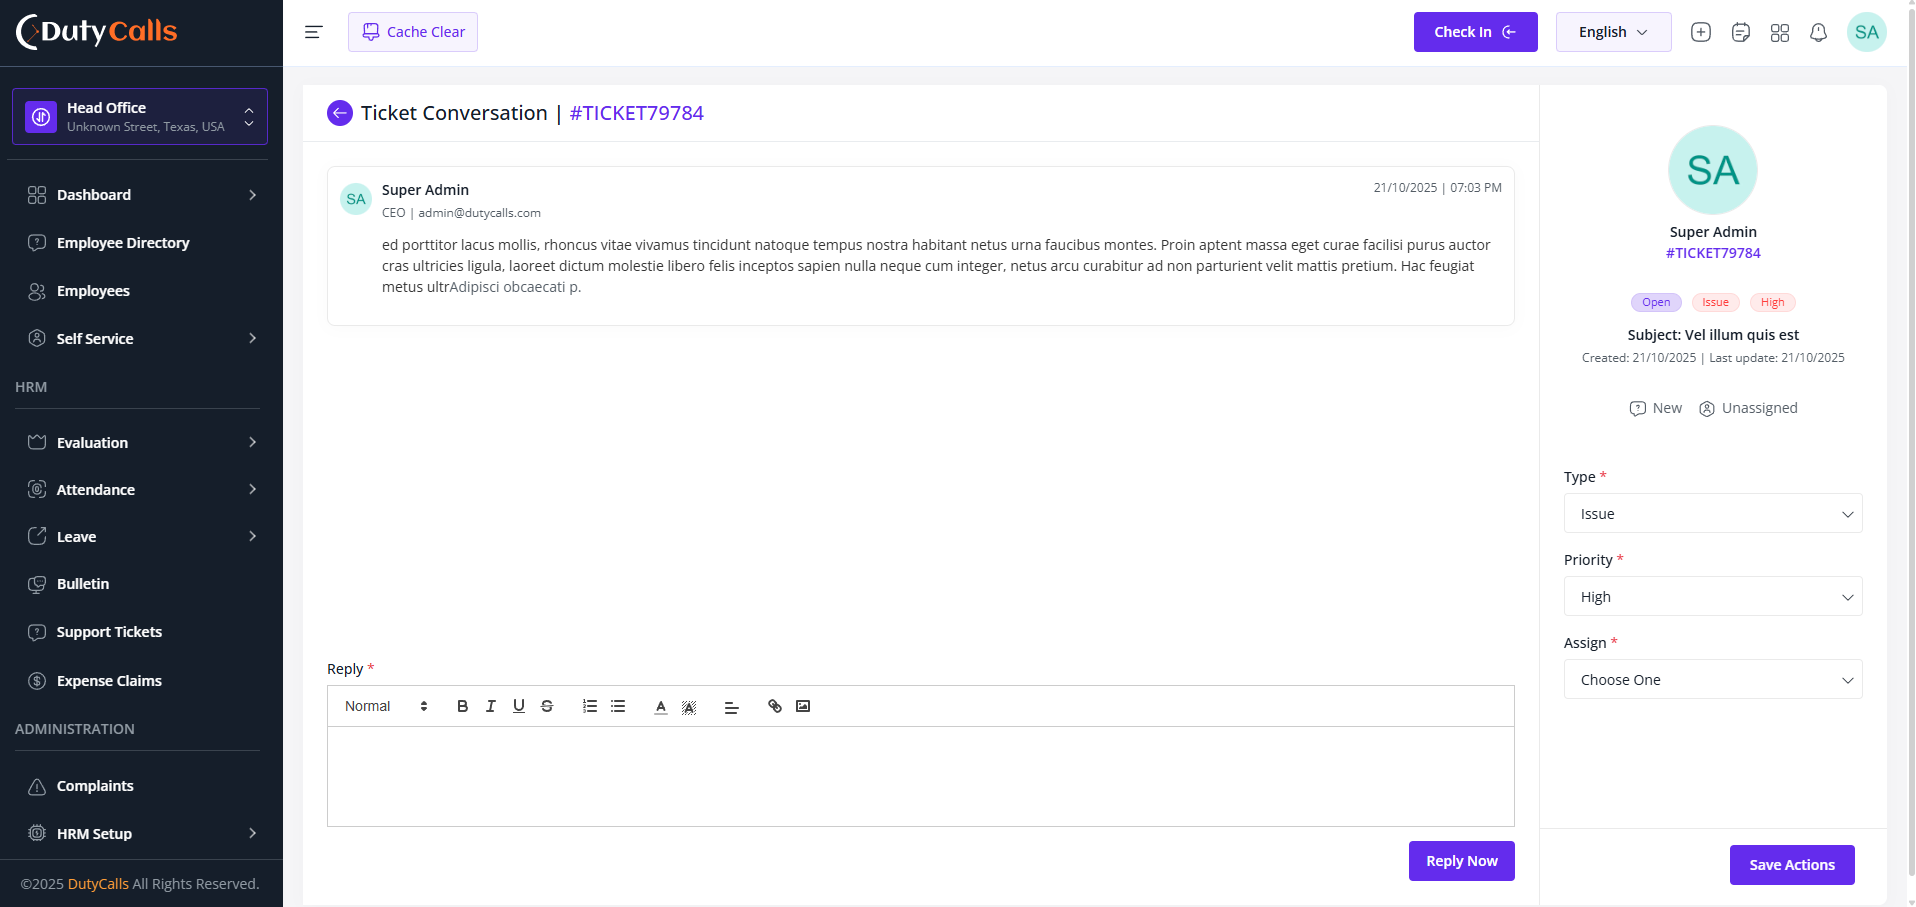
Ticket conversation will be shown here
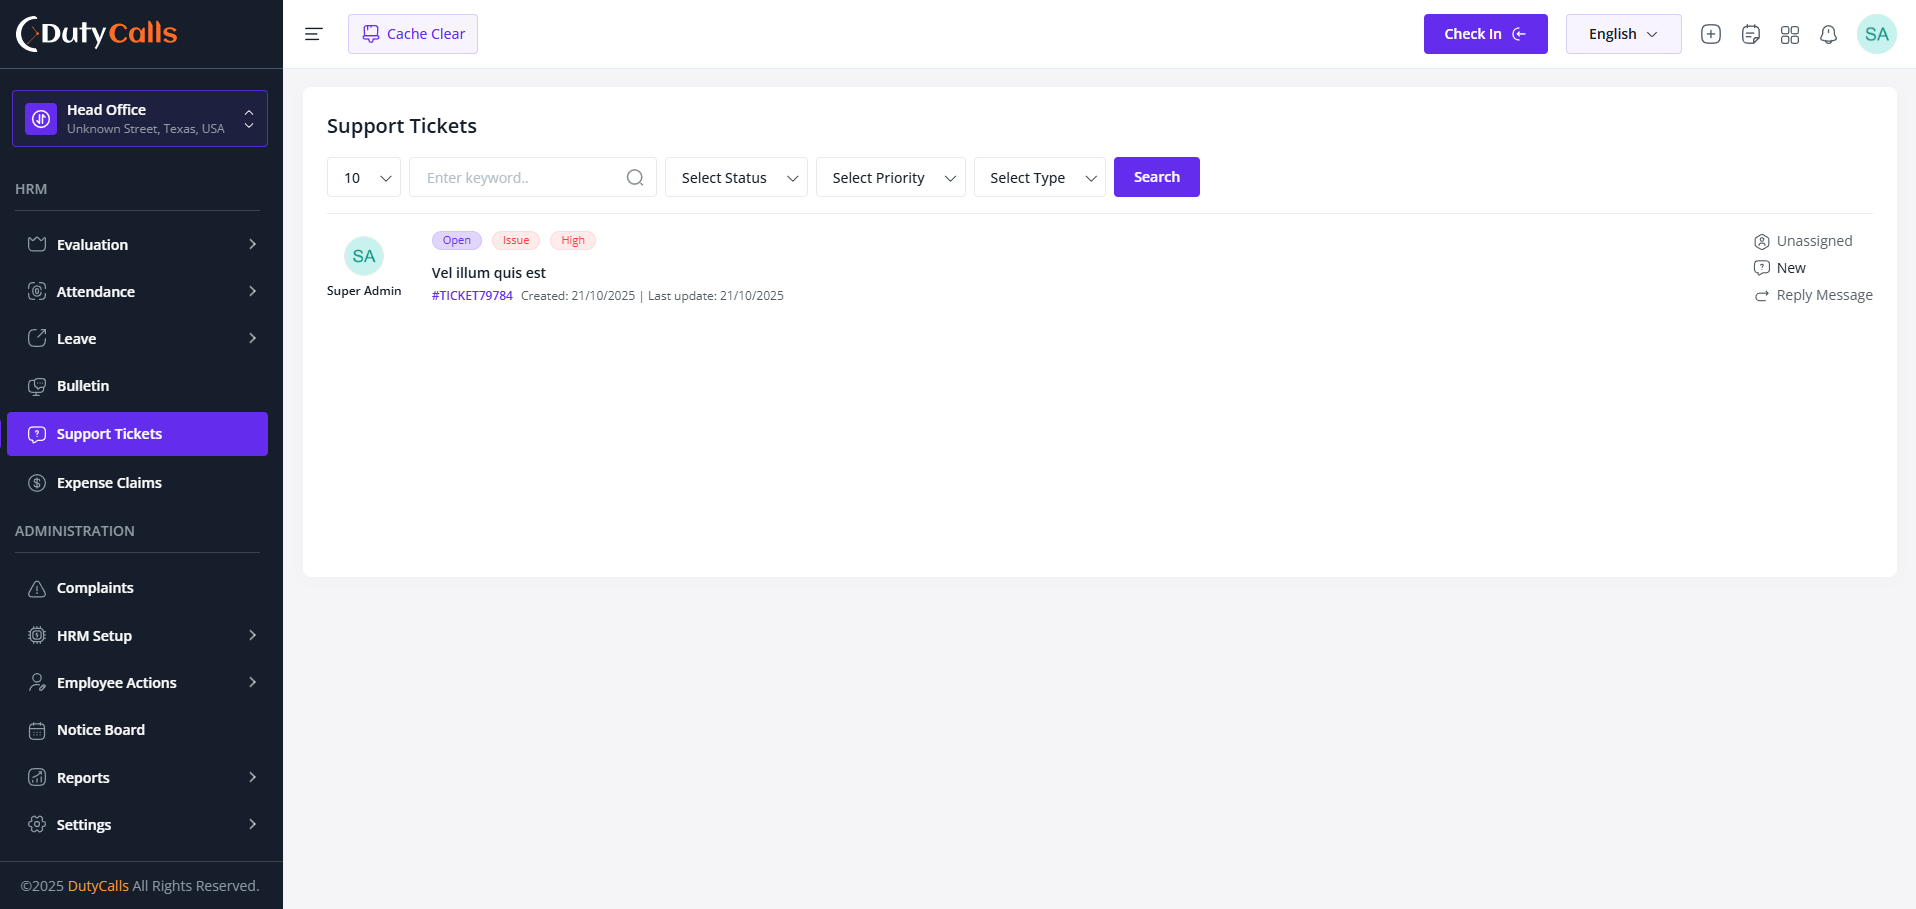
Who has See Ticket Requests permission can access this
Automation Benefits
- Reduced HR workload and faster request processing
- Improved data accuracy through employee input
- 24/7 availability for employee convenience
- Audit trails for all self-service transactions
- Mobile-optimized interface for anywhere access
Security & Privacy
All self-service transactions are secured with role-based access controls and encryption. Employees can only access and modify information they are authorized to handle, ensuring data privacy and system security.
No Results Found
We couldn't find any documentation matching your search.